A Guide to Creating Modular Environments in Unreal Engine
Student at Breda University of Applied Sciences, Máté Válent, shares details about his Highly Commended Rookie Awards entry, with tips for creating a modular environment using Unreal Engine for your own portfolio.
Máté Válent is a current student at Breda University of Applied Sciences, with a goal to become an environment artist in the game industry, with a focus on lighting and material creation.
In this article, Máté shares details about his Highly Commended Rookie Awards entry, with tips for creating your own modular environment using Unreal Engine.
When I was around 15 I downloaded Blender from Steam because I had no computer games to play. Since then, I have been going in deeper and deeper into 3D graphics. When I turned 16 I decided to pursue a career in the game industry, and found myself studying at Breda University of Applied Sciences.
I entered the Rookie Awards 2022, because it's very easy to get lost in assignments when you are studying. And when a contest like this asks students to present their best pieces, it can be shocking to realise 90% of your school work is either unfinished or irrelevant. This happened to me last year and decided that I was going to focus on my portfolio more.
I sincerely think that people shouldn't view The Rookies as a contest but as a free tool to assess their skill level. This is why every student or self-learning individual should enter their newest work. There is literally nothing to lose, just benefits.
It was also the reason I decided to enter this year. I set out a goal at the beginning of the year to get an Excellence Award. However, I ended up being super lucky to be featured amongst the finalists and then receive a Highly Commended award.
In this article I will share more details about my entry, and hopefully inspire you to create your own winning Rookie Awards entry next year!
Getting the right reference
When getting into a new environment, having the right references is key. Especially with distant locations. It’s very easy to wrongfully assume, and fall into a pit full of prejudice and clichés that we have in our minds or saw in the movies. These can cause huge problems later on, so it is worth it to get these right at the beginning.
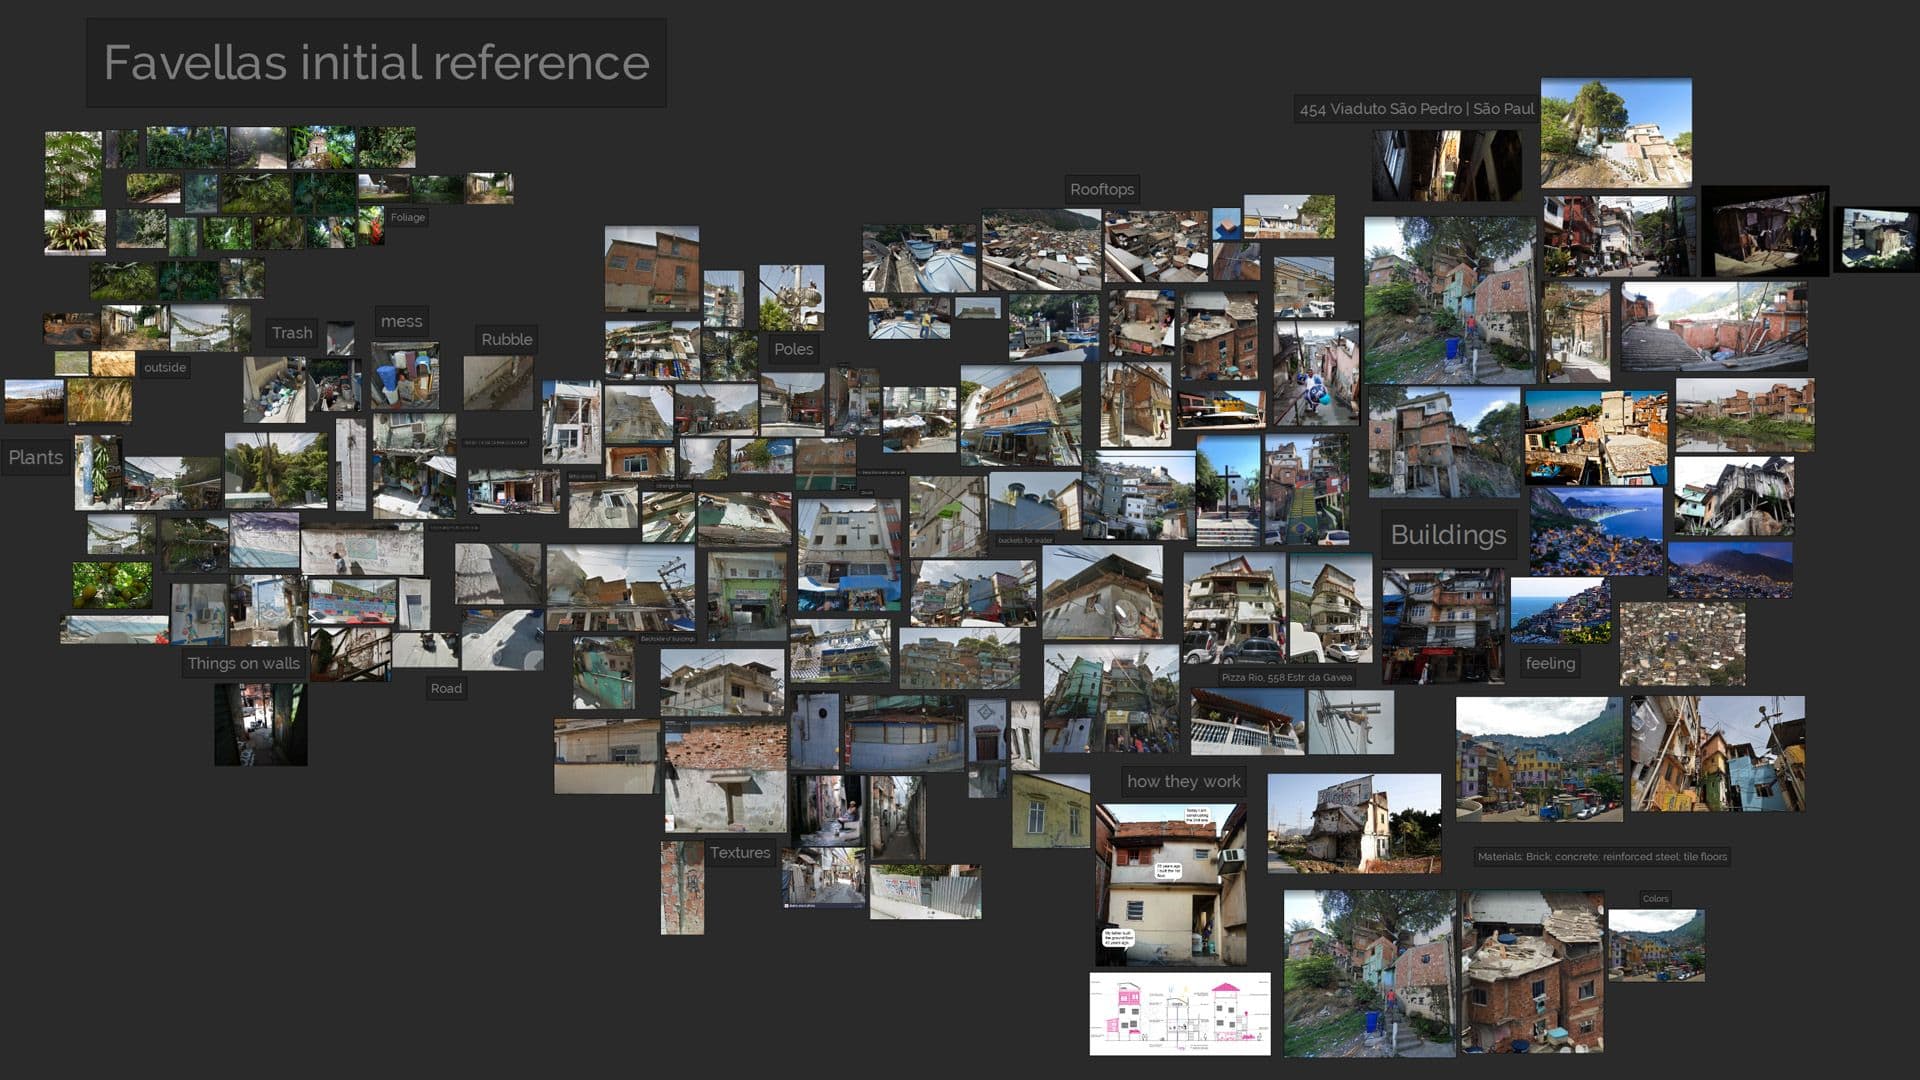
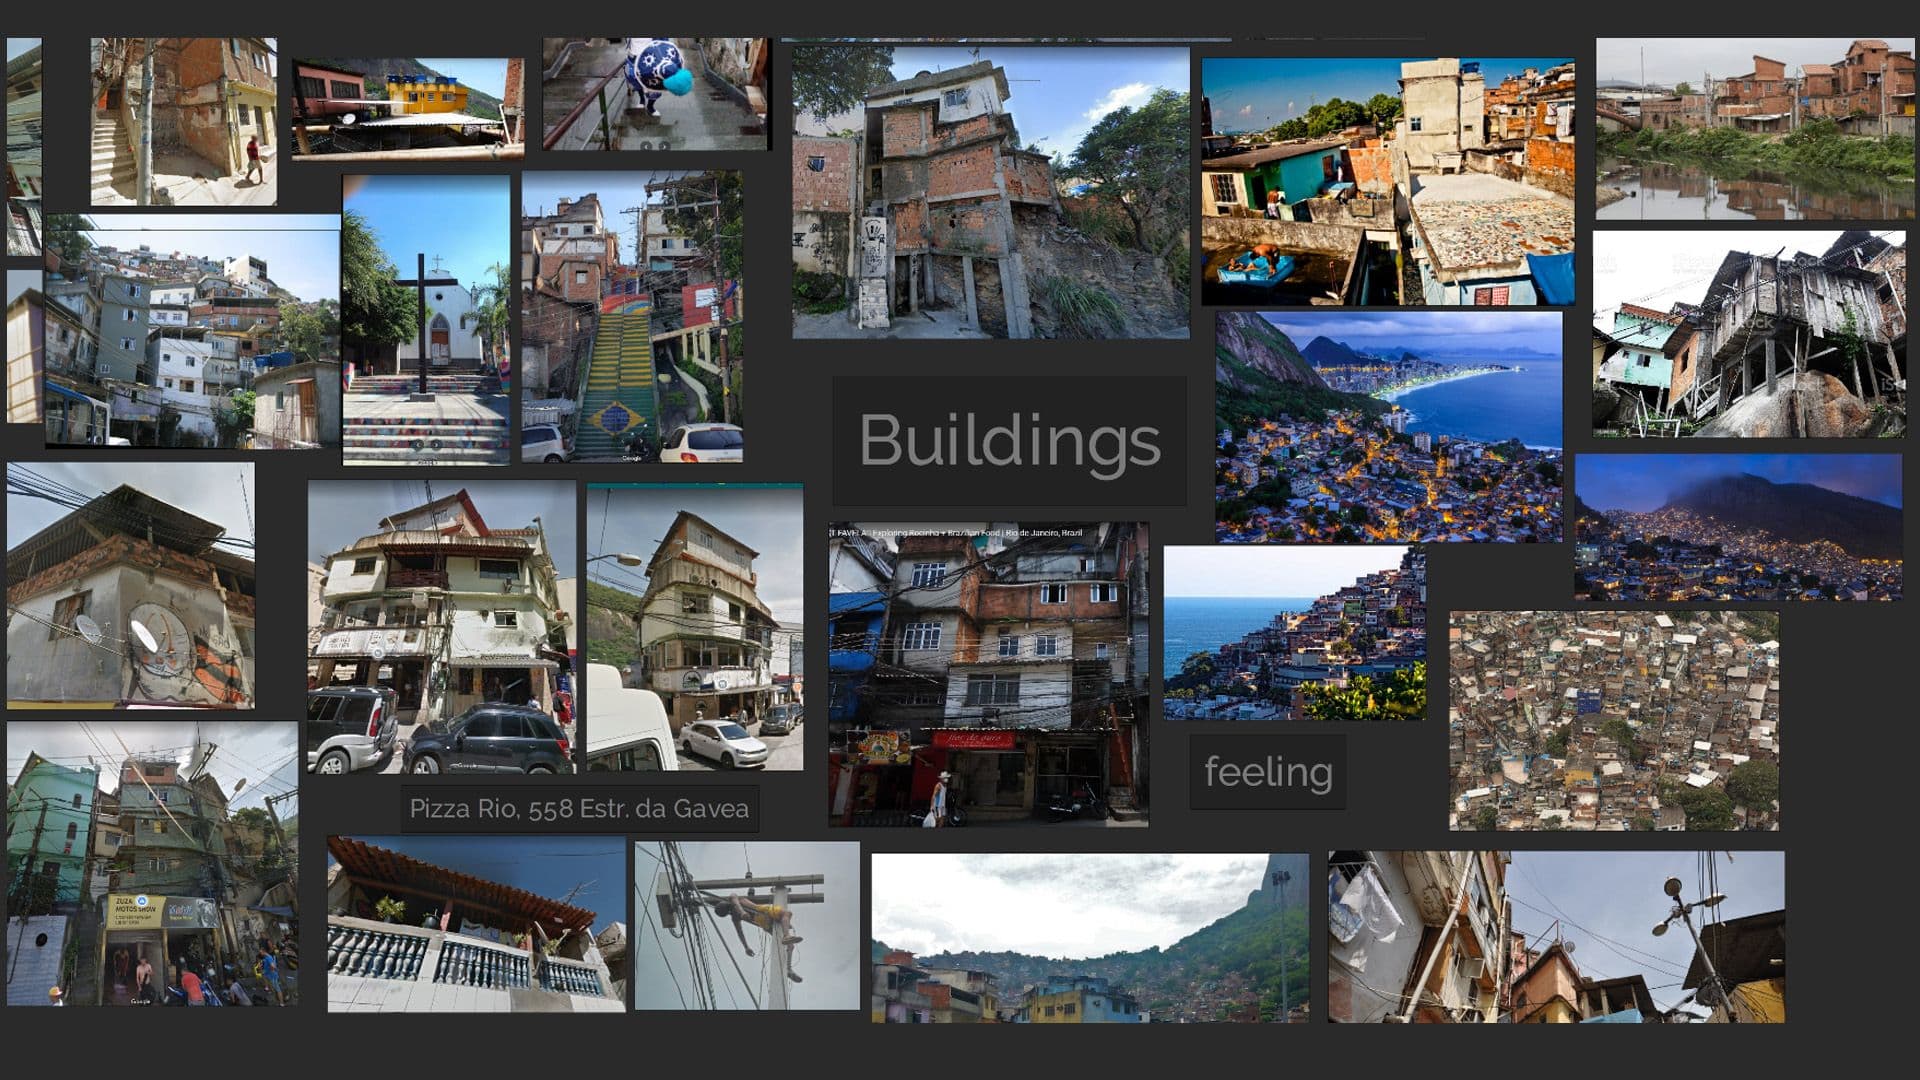
A portion of a PureRef created for the As Favelas project (My PureRef can get a bit messy, but it does work for me)
Tips to get a good grip on the location:
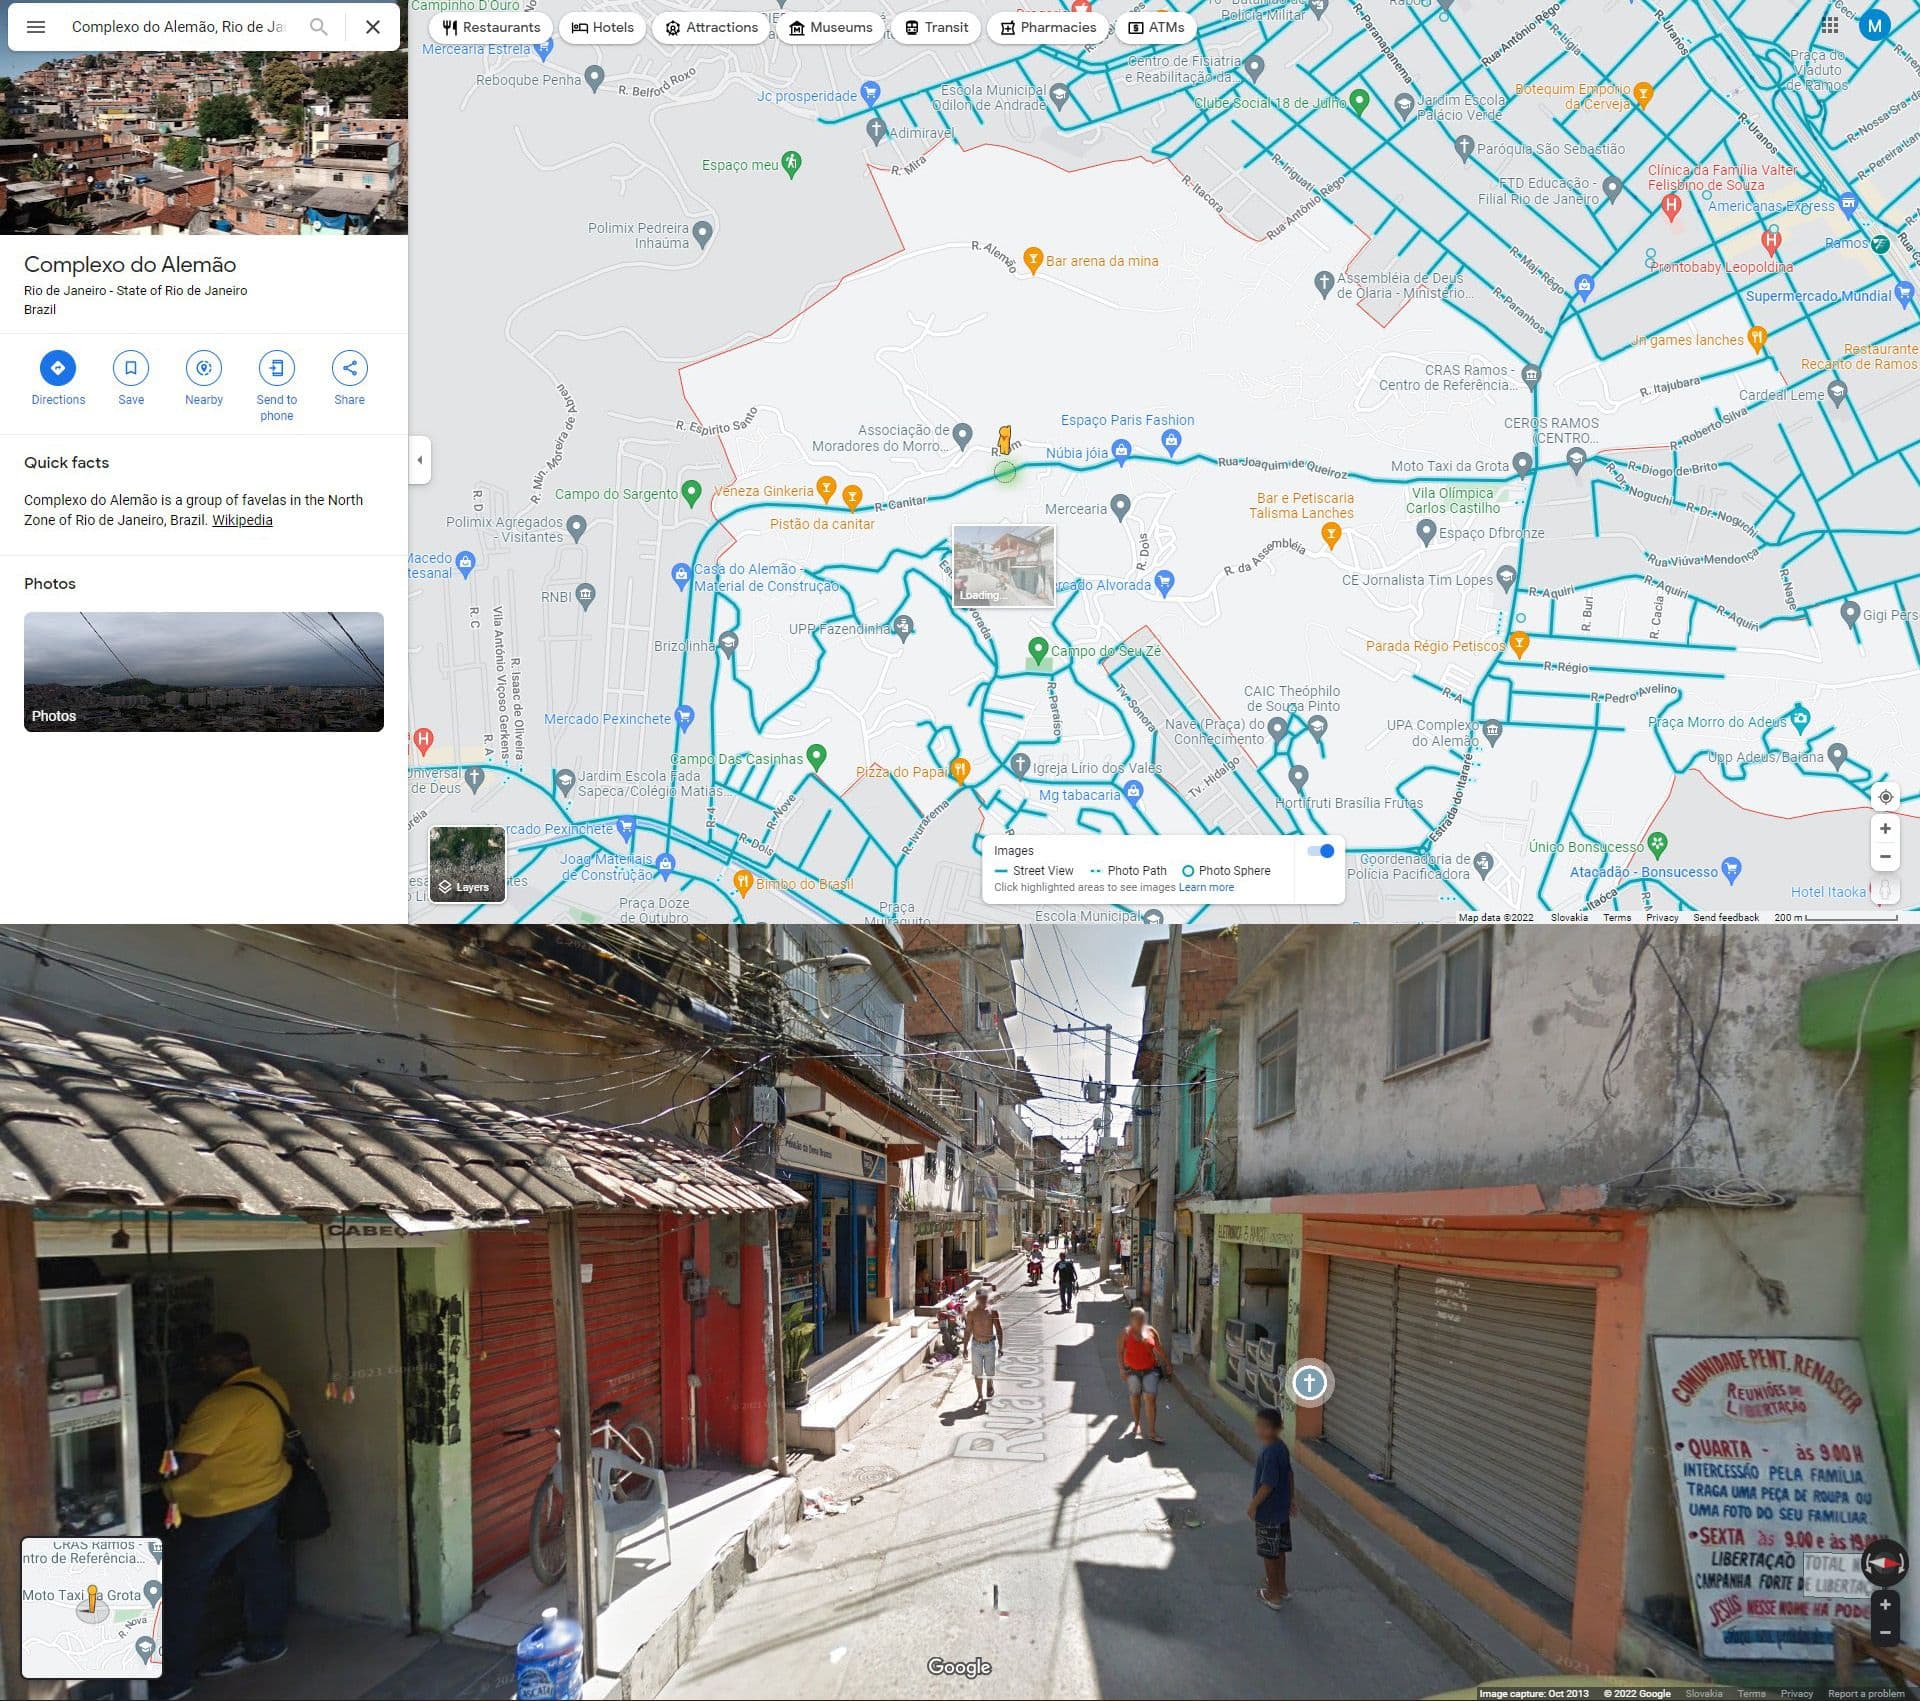
Walk around on the streets (in Google Maps);
If the location isn’t well documented, watch vlogs of locals or tourists;
Get to know the culture and the people (read up on how they live, their everyday problems);
Watch a documentary;
Find local photographers and analyze their content;
(+1) create a playlist of authentic music, that gets you in the mood.
Walking around in Google Maps in the Favelas
I think being able to walk the streets in Google Maps is the most important point I listed above - This helps you avoid gathering random google pictures that are unfaithful to the location. Look for what you see the most, the main characteristics of the buildings and the streets, common patterns, type of lamp poles, type of plants, etc. Take screenshots and make a big PureRef board with categories.
At the reference gathering stage look for the common, not the unique!
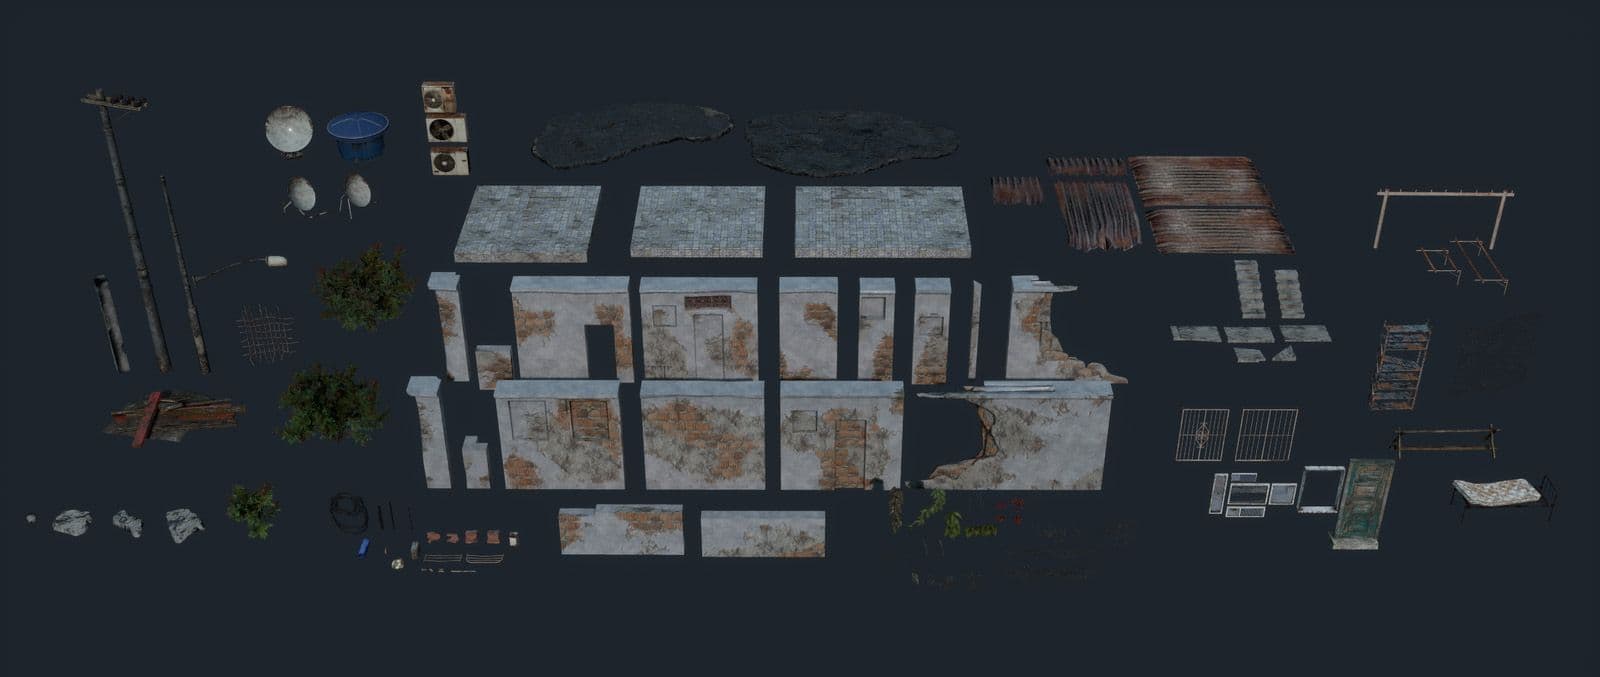
Messy roofs, Water infrastructure, wires & cables, ...and of course the brick walls
Benchmark scene
It’s good practice to create a separate level with a simple neutral lighting set-up where you check out all the assets and see them in a different light (pun intended). It’s really great to use this in combination with your other lighting, so you don’t end up tweaking the lighting instead of the materials or textures.
I later used this scene for my asset breakdown. The lighting is shifted a bit for presentation purposes (As Favelas)
This is a very comprehensive video that will explain how to set up the most neutral scene you can get.
Materials
For my scenes, I created most of my materials in Adobe Substance 3D Designer only, but purely to be able to iterate on them and to challenge myself. Some materials were created by photo sourcing or with a base sculpt and the rest continued in designer.
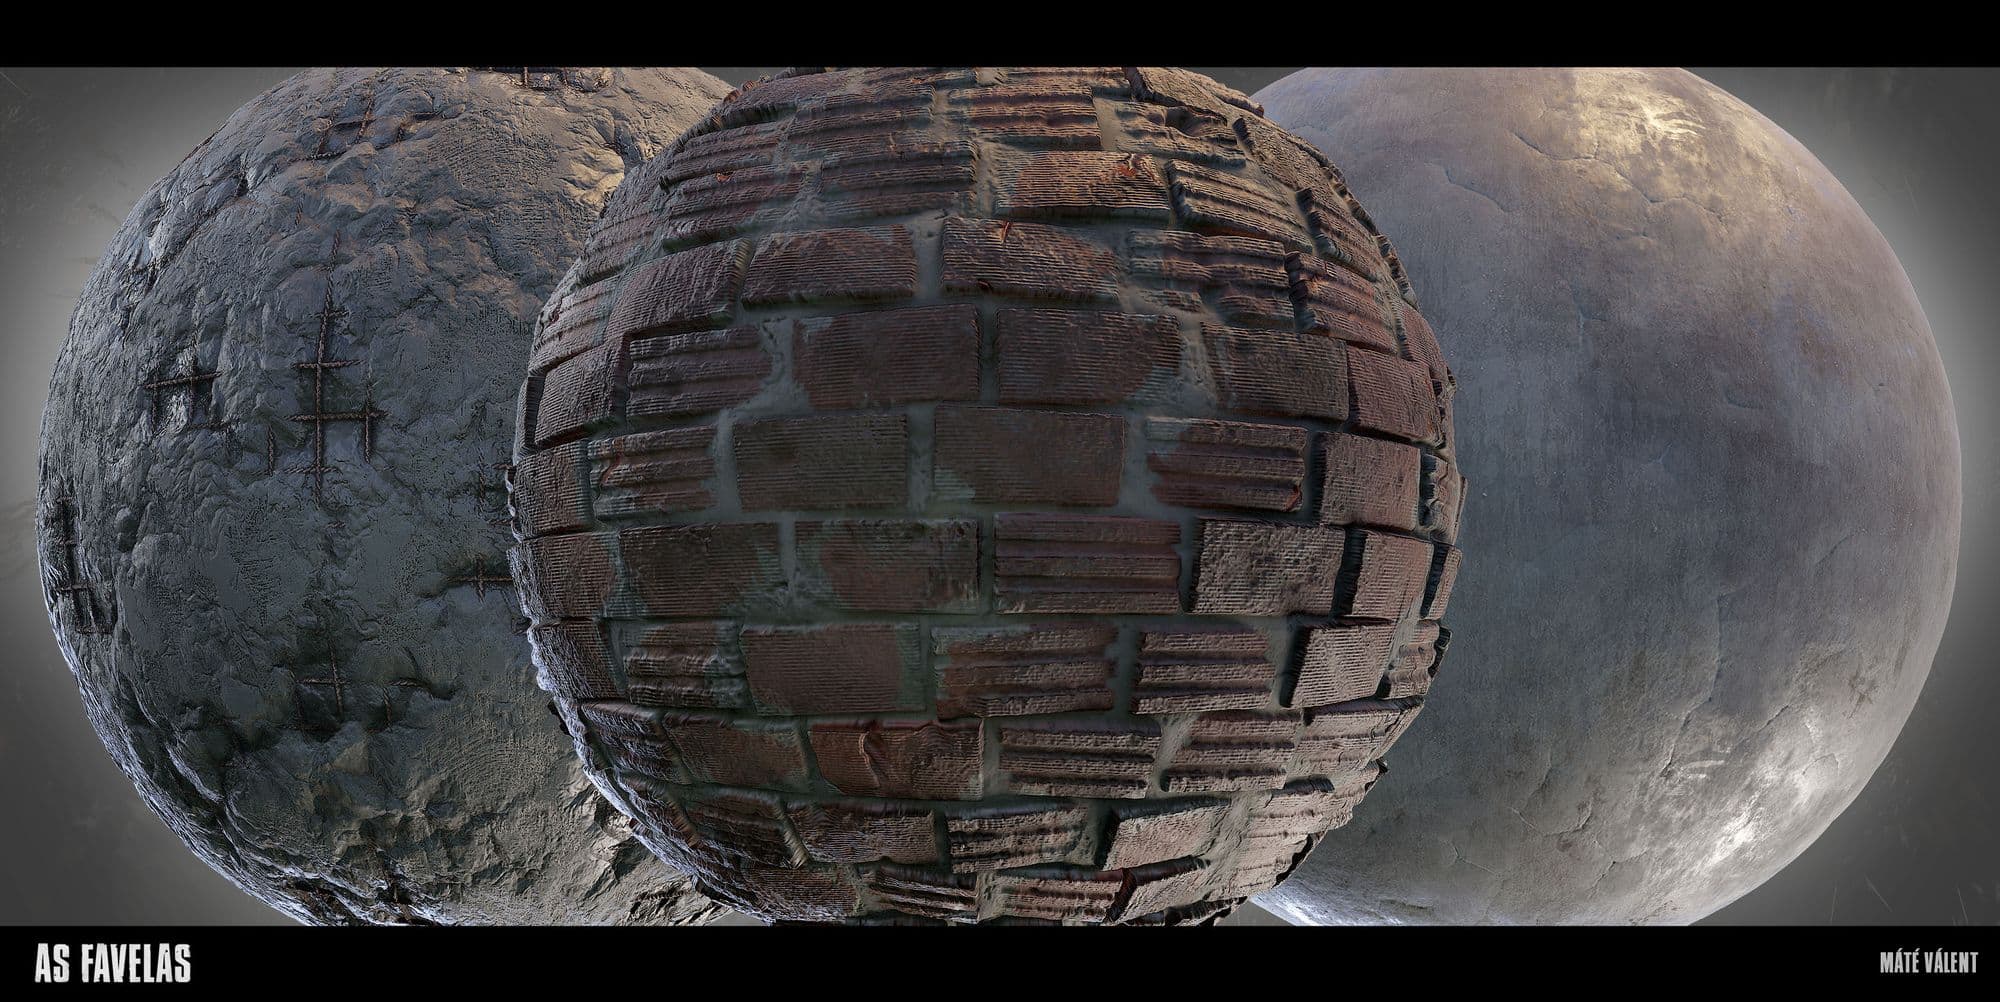
Tile graph breakdown (As Favelas)
It's really beneficial to use softwares for their strengths and not let them limit you. Substance 3D Designer will be very good for bricks and geometrical shapes, but don't be afraid to use other software and go out of Designer to touch up things!
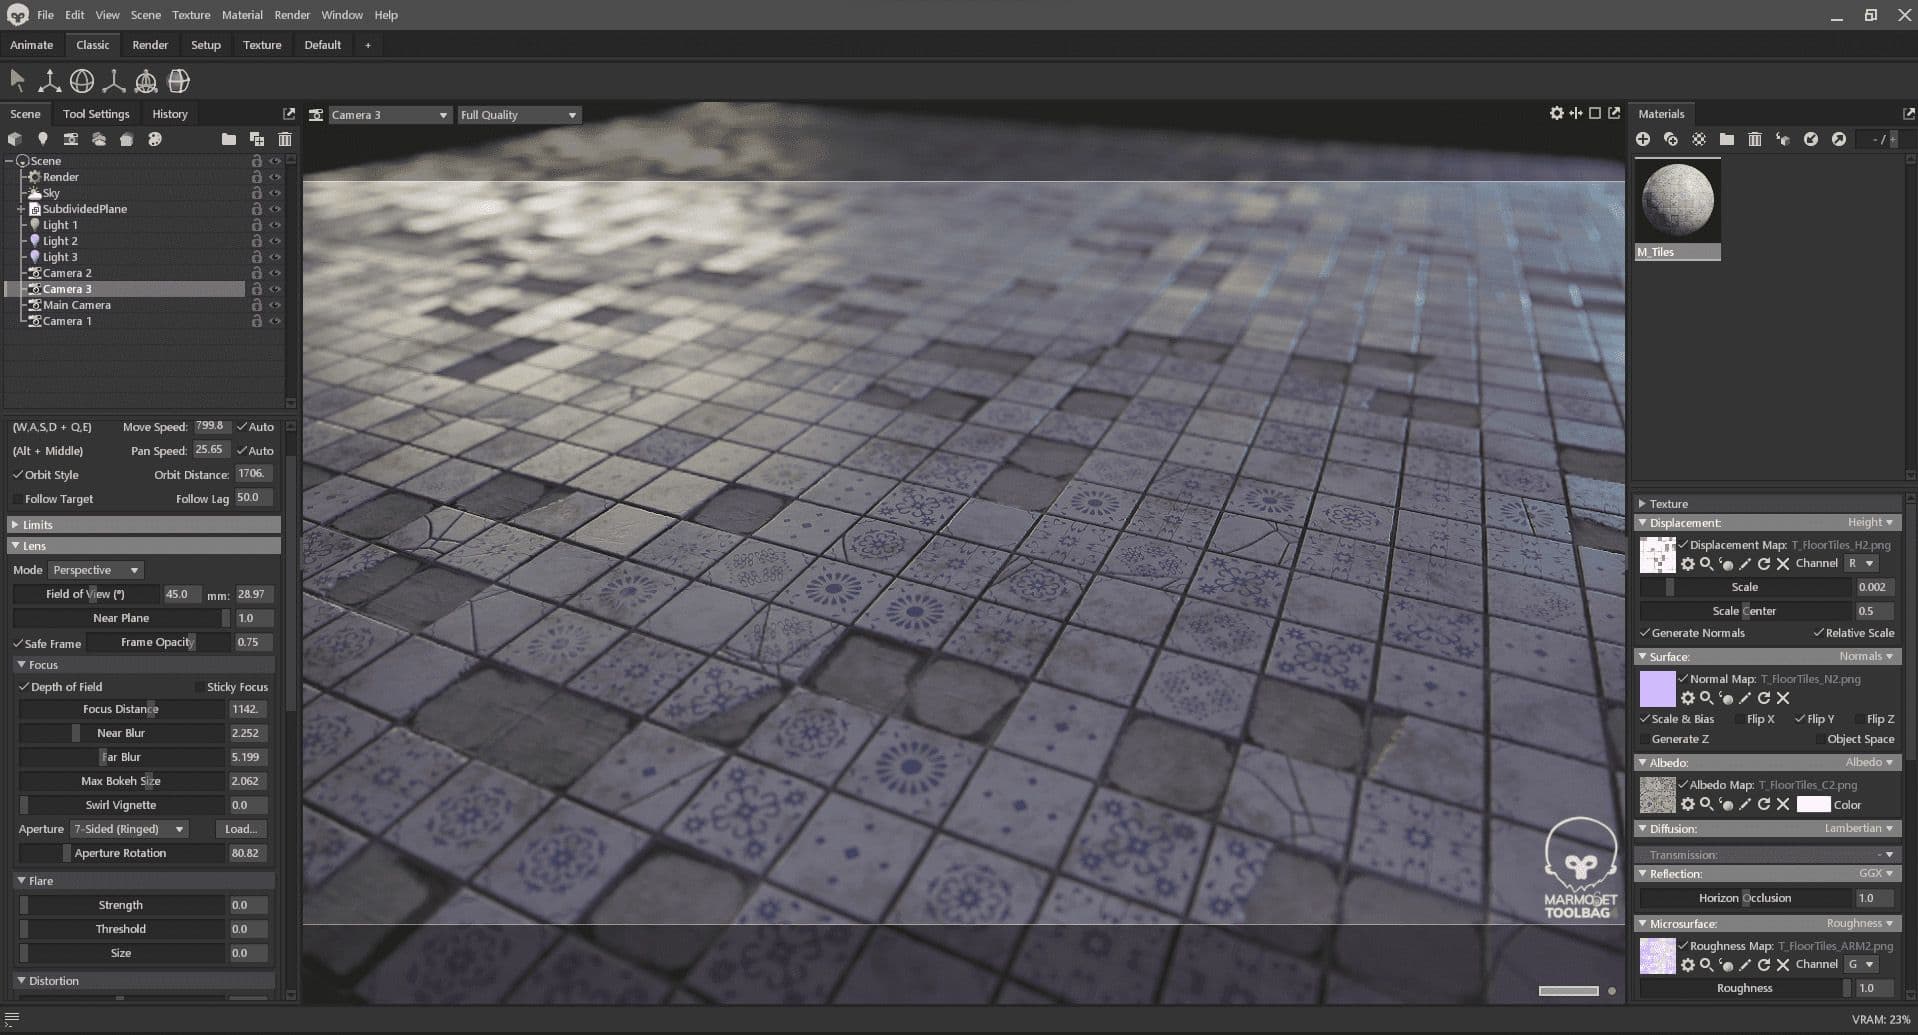
For example, rendering out single assets or materials, Marmoset is an incredibly useful tool! (All my materials above were rendered in Marmoset.)
Presenting my Tile material in Marmoset Toolbag 4 - As Favelas
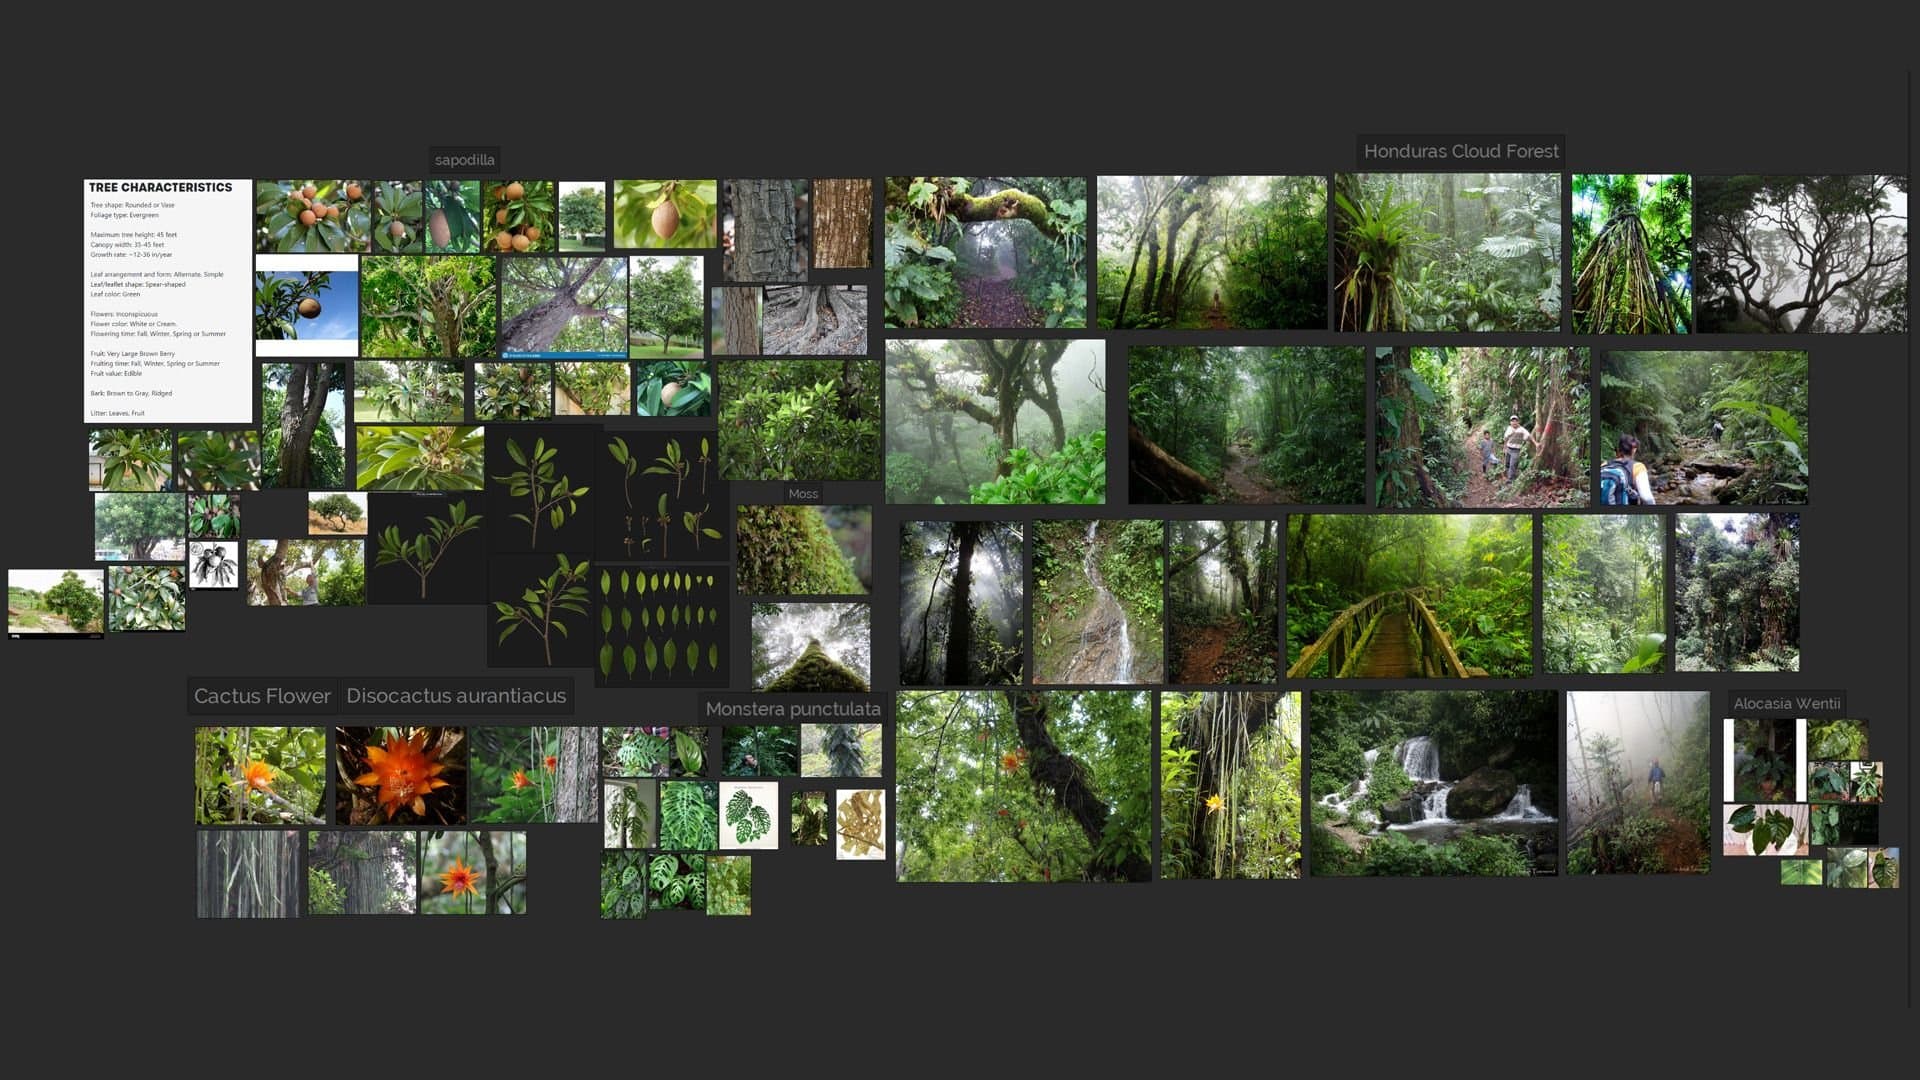
A portion of a PureRef board created for the Honduras project
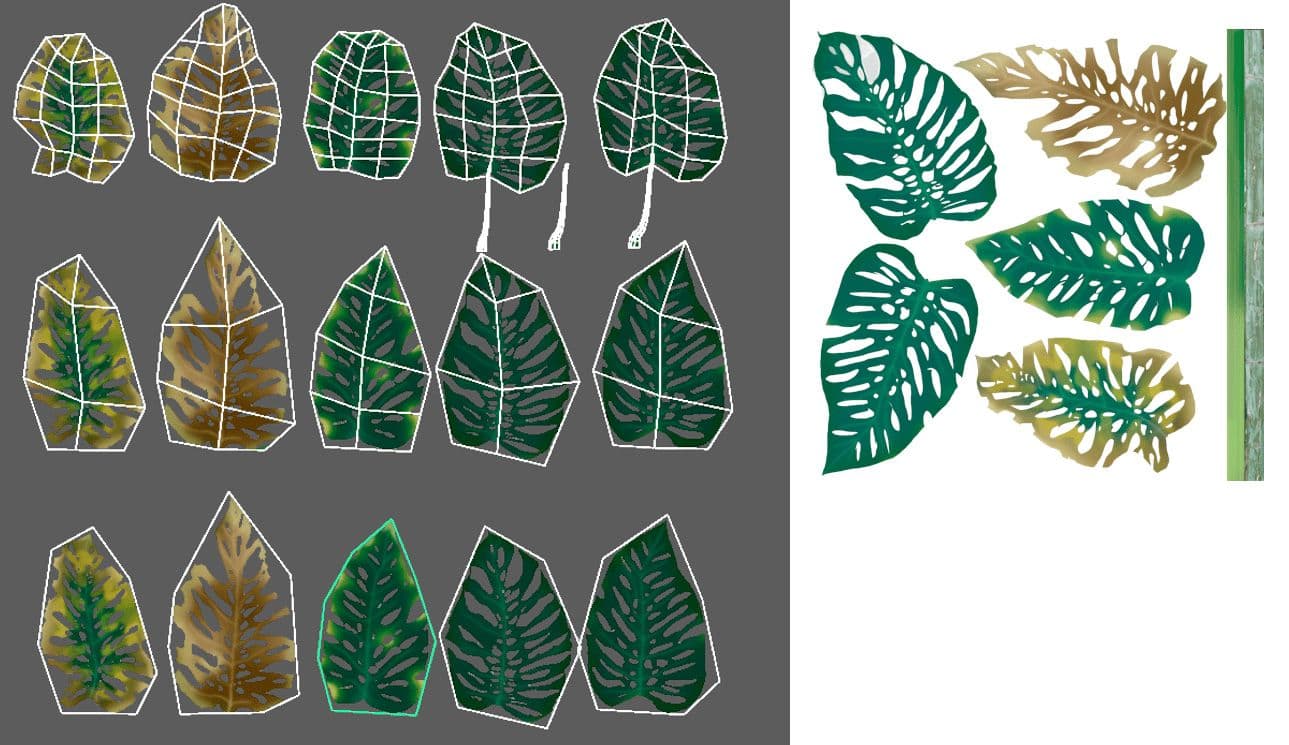
Start in photoshop, start breaking down the plant to its core, and work alongside your reference.
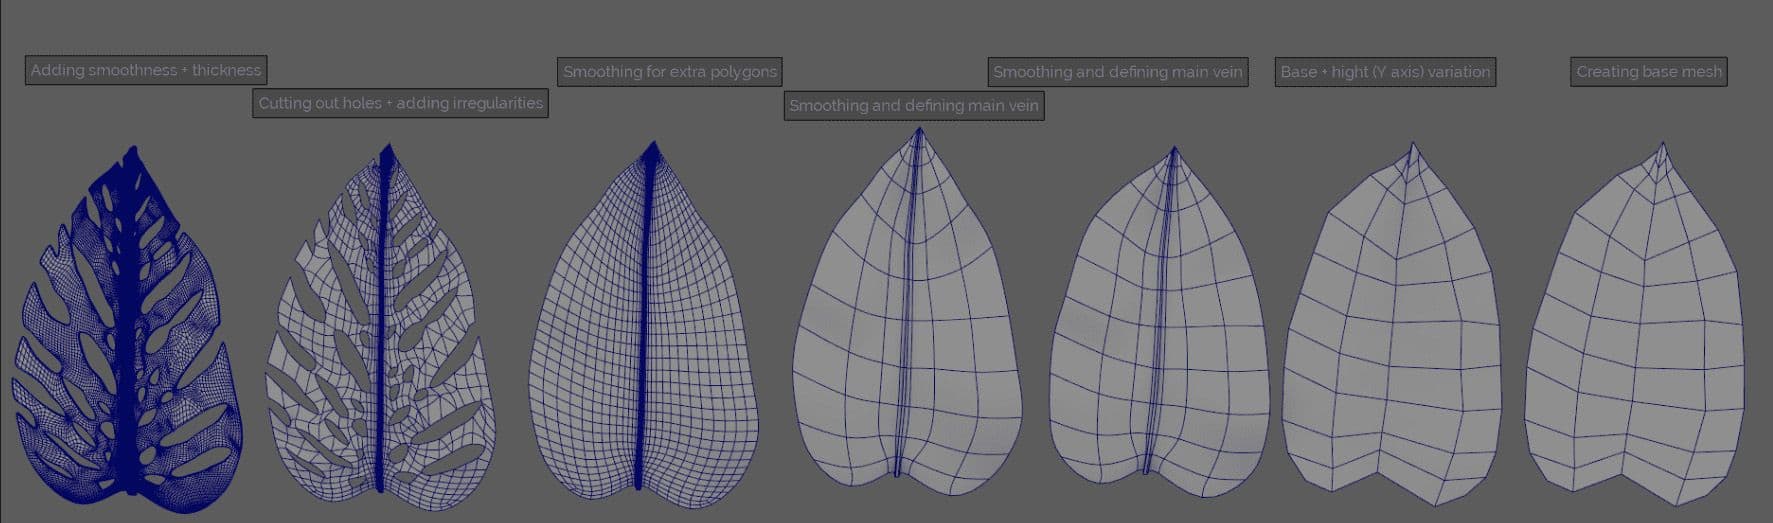
Blockout texture and models made according to it (Monstera Punctulata) - Honduras
At the start, look at the base shape, and try to get the overall silhouette right. Go slow, and keep backups (These backups can be used later to create the LODs).
It's okay to move to Zbrushearlier, I am just much faster with Maya and SubD modeling. Make sure you get the base shapes right before diving in further.
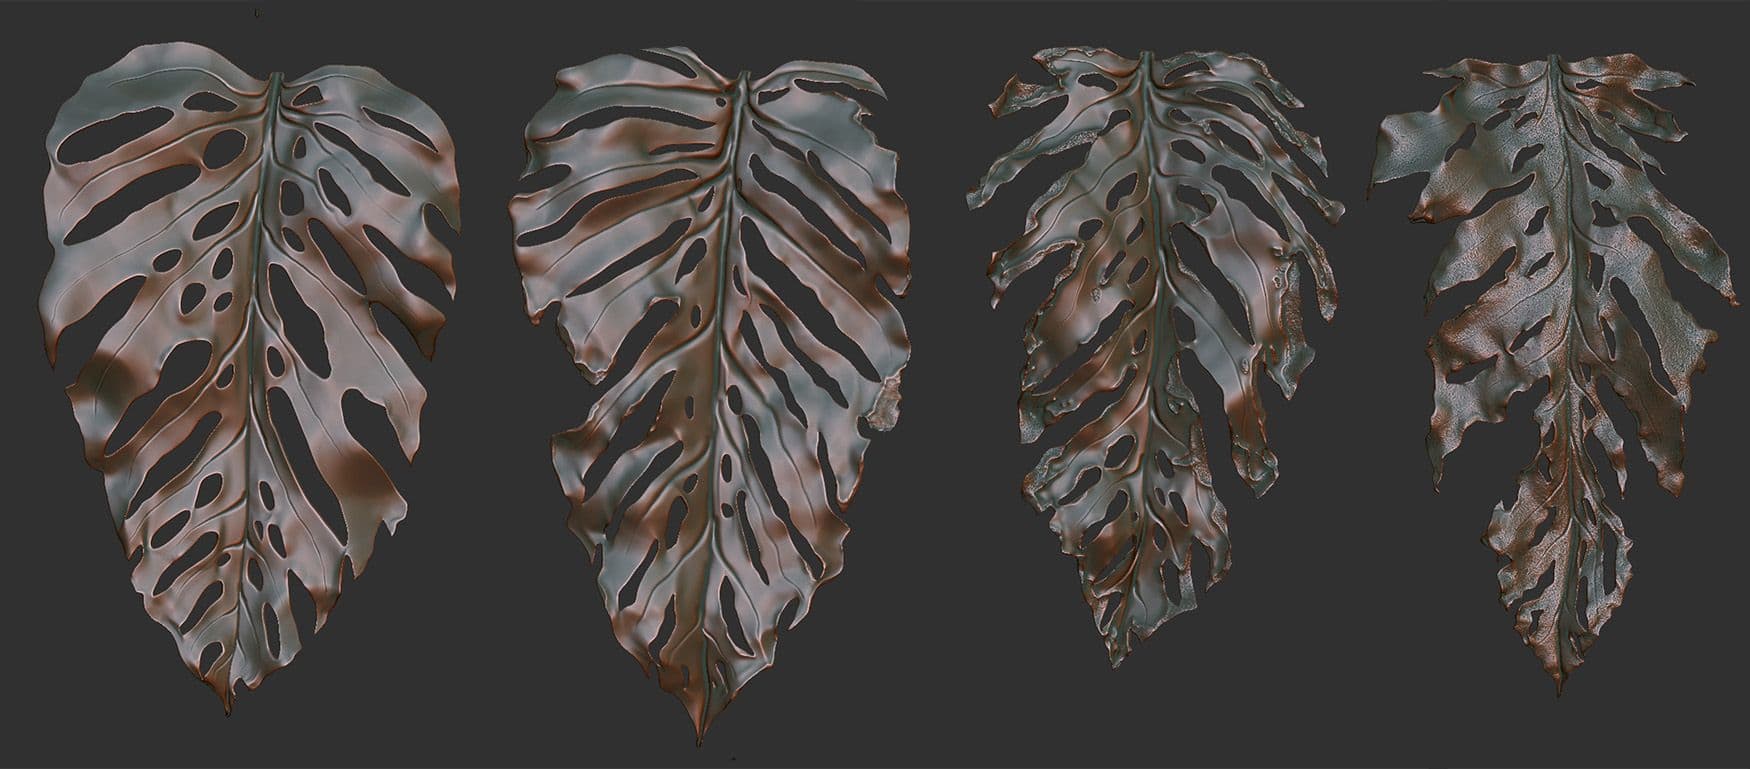
Sculpts of leaves: Healthy ← Drying (Monstera Punctulata) - Honduras
Brush selection tips:
Use the move brush a lot and tweak the edges and the folds of the leaf. Try to add small silhouette changes to it;
You can create a damaging with the clay buildup brush;
For the veins that go out of the leaf, use dam standard;
Limiting the brushes to 3 or 4 for the base sculpt will give you more consistent results;
You don't need a lot of brushes and alphas, a lot of the micro details can be added later on with the Substance packages;
(+1) not a brush selection tip, but use MatCap White Cavity.
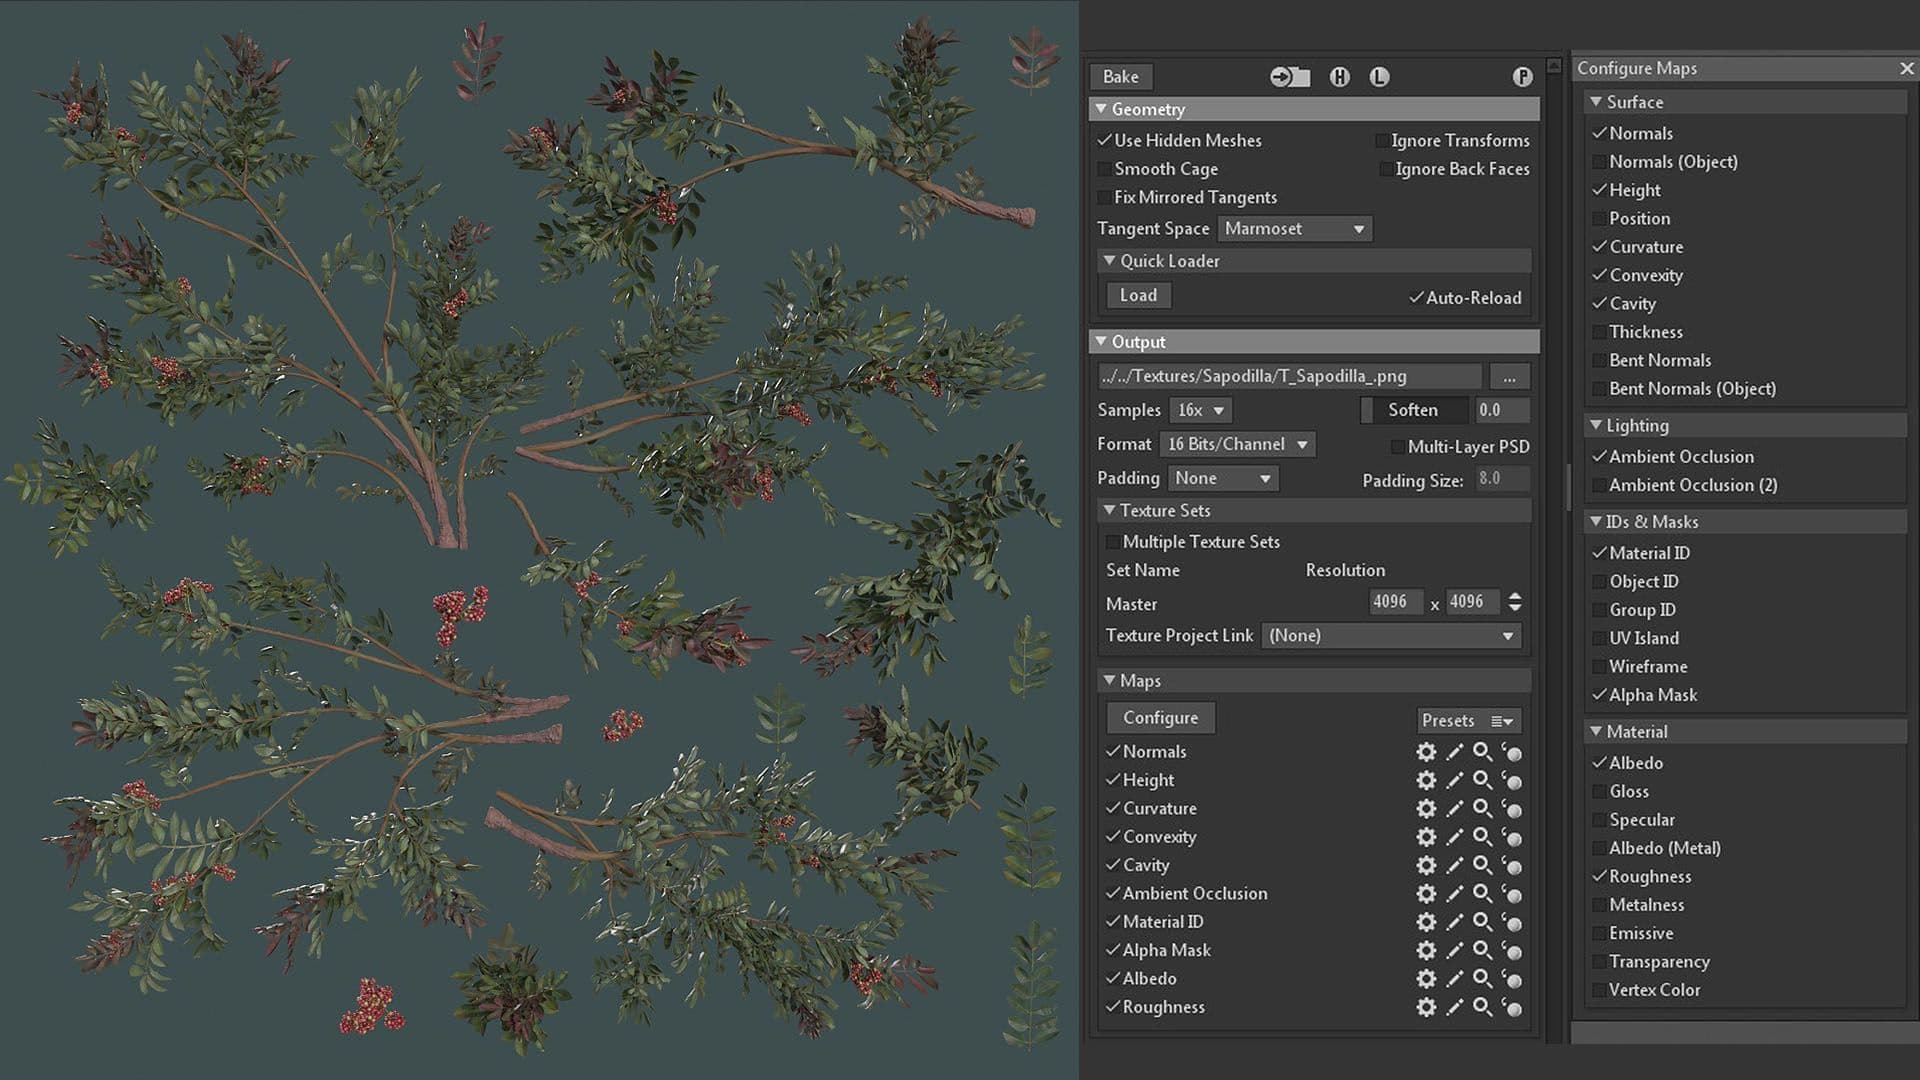
Baking settings in Marmoset (Schinus Terebinthifolia) - As Favelas
I would recommend baking in Marmoset Toolbag if you can. Very clean results super fast and great UX. And has Alpha baking!
I'm baking my extracted maps at 4k or 8k, even if the intended final texture map resolution is 1024 x 1024. The reason is: If you have an RTX card, Marmoset will be able to use the ray-tracing cores and give you very fast bakes. Later in Substance 3D Designer, I can use this extra level of information to have more accurate texturing.
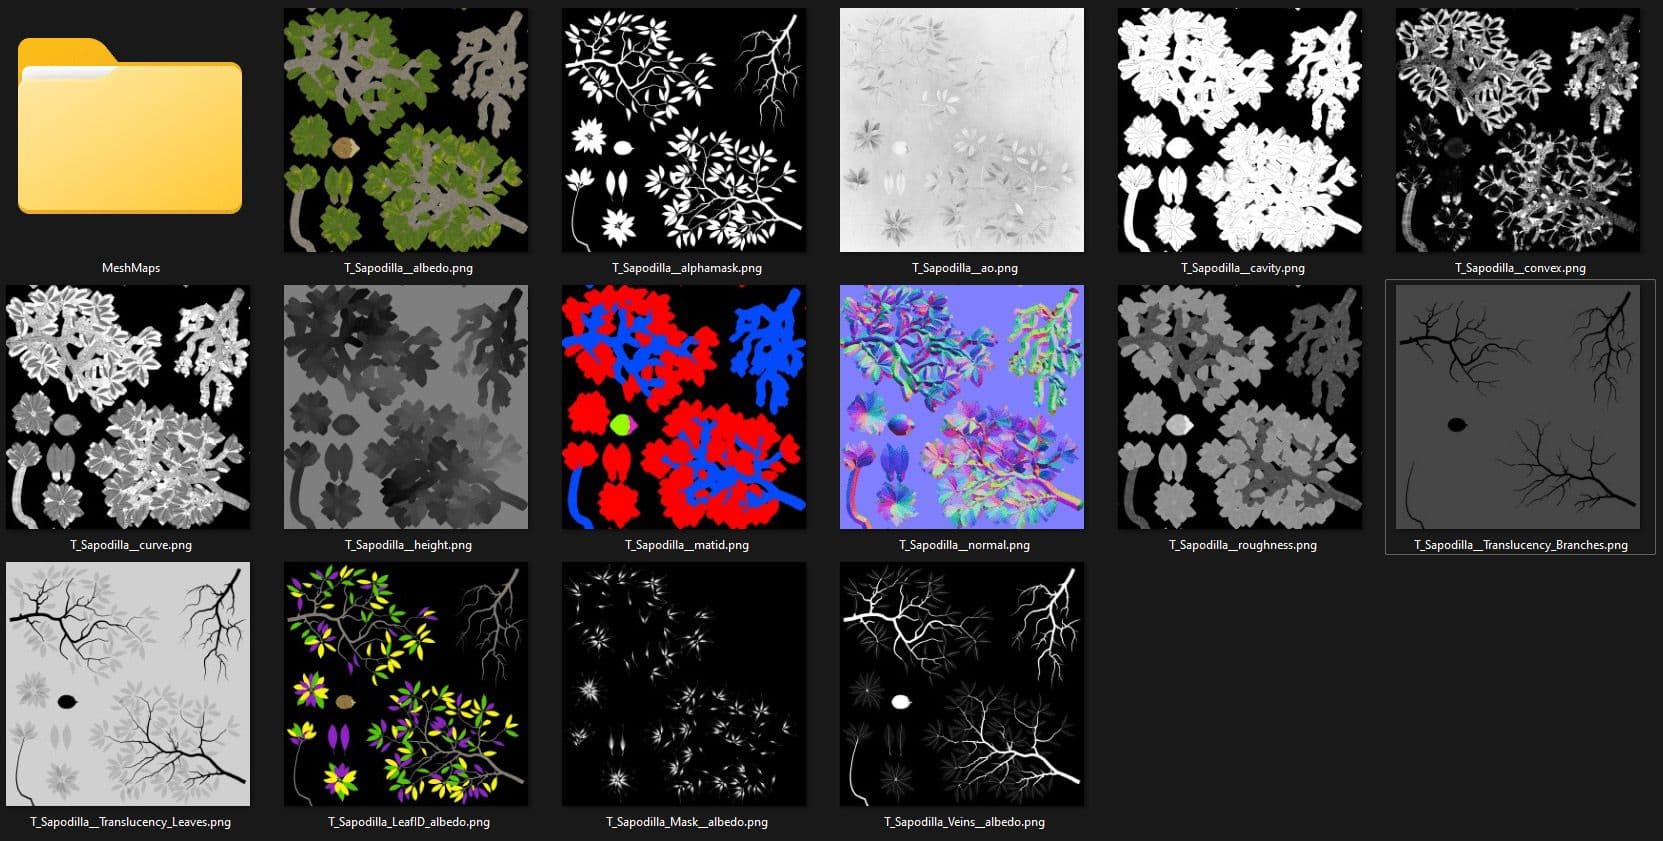
Baked maps from Marmoset Toolbag 4 (Sapodilla) - Honduras
A good alternative to Marmoset's baking is Substance 3D Designer. Yes, there is a difference between Designer and Painter regarding their baking tools. Designer's baking is much more customisable than Painter's.
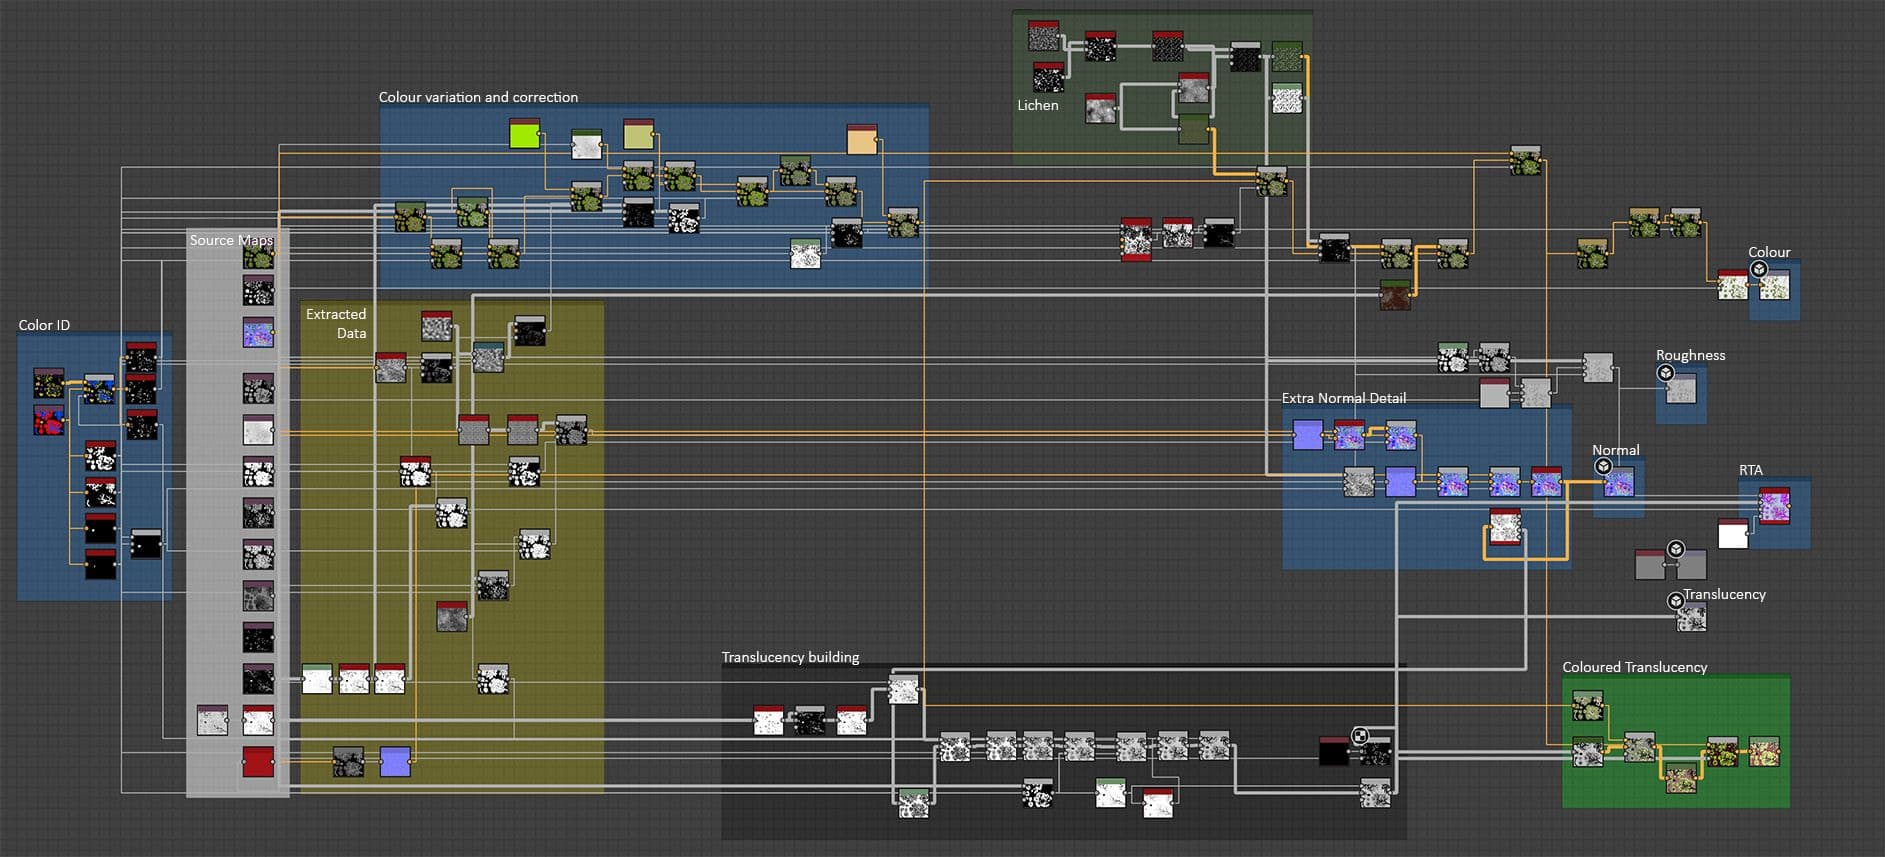
Graph showing procedural tweaks to textures in Substance Designer - Honduras
At this stage, depending on the vegetation, I go into Substance 3D Painter or Designer right away. If the vegetation is an assembly-type (eg. tree branches) with texture information baked down, I use Substance 3D Designer to add extra texture details (like lichen, colour variation and small touch-ups).
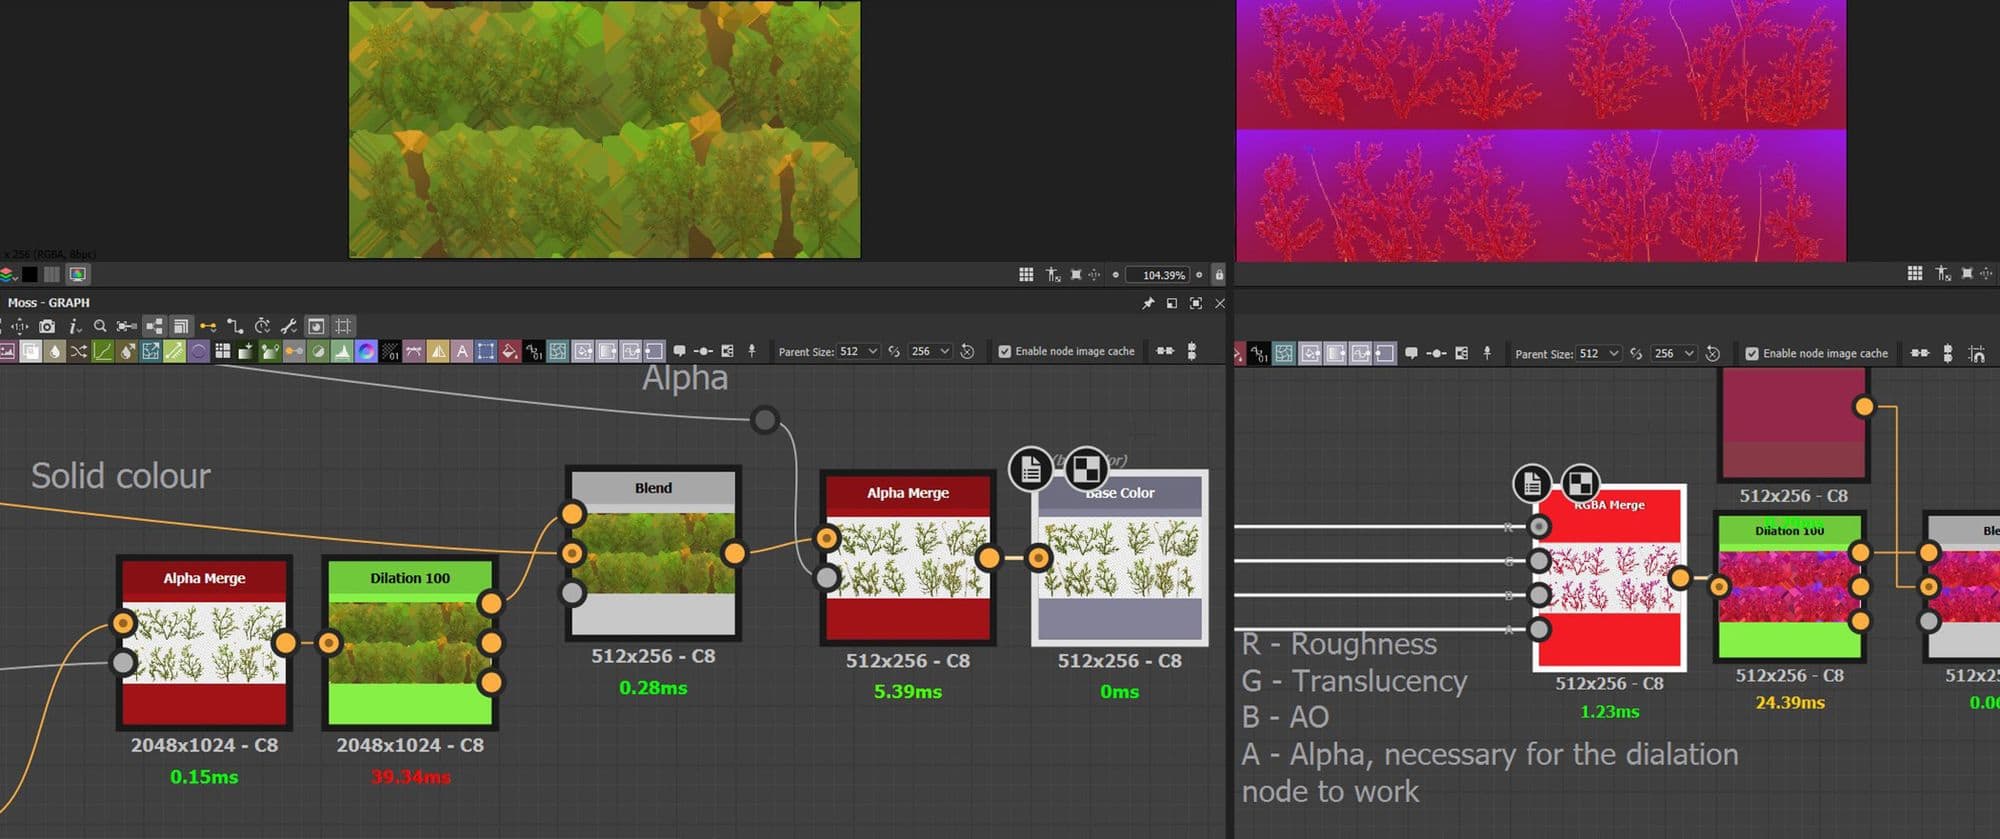
Using the dialation tool and packing the moss - Honduras
After everything is done, I pack every texture in Substance 3D Designer. I use a dilation node made by Markus Pohl that you can get access to here.
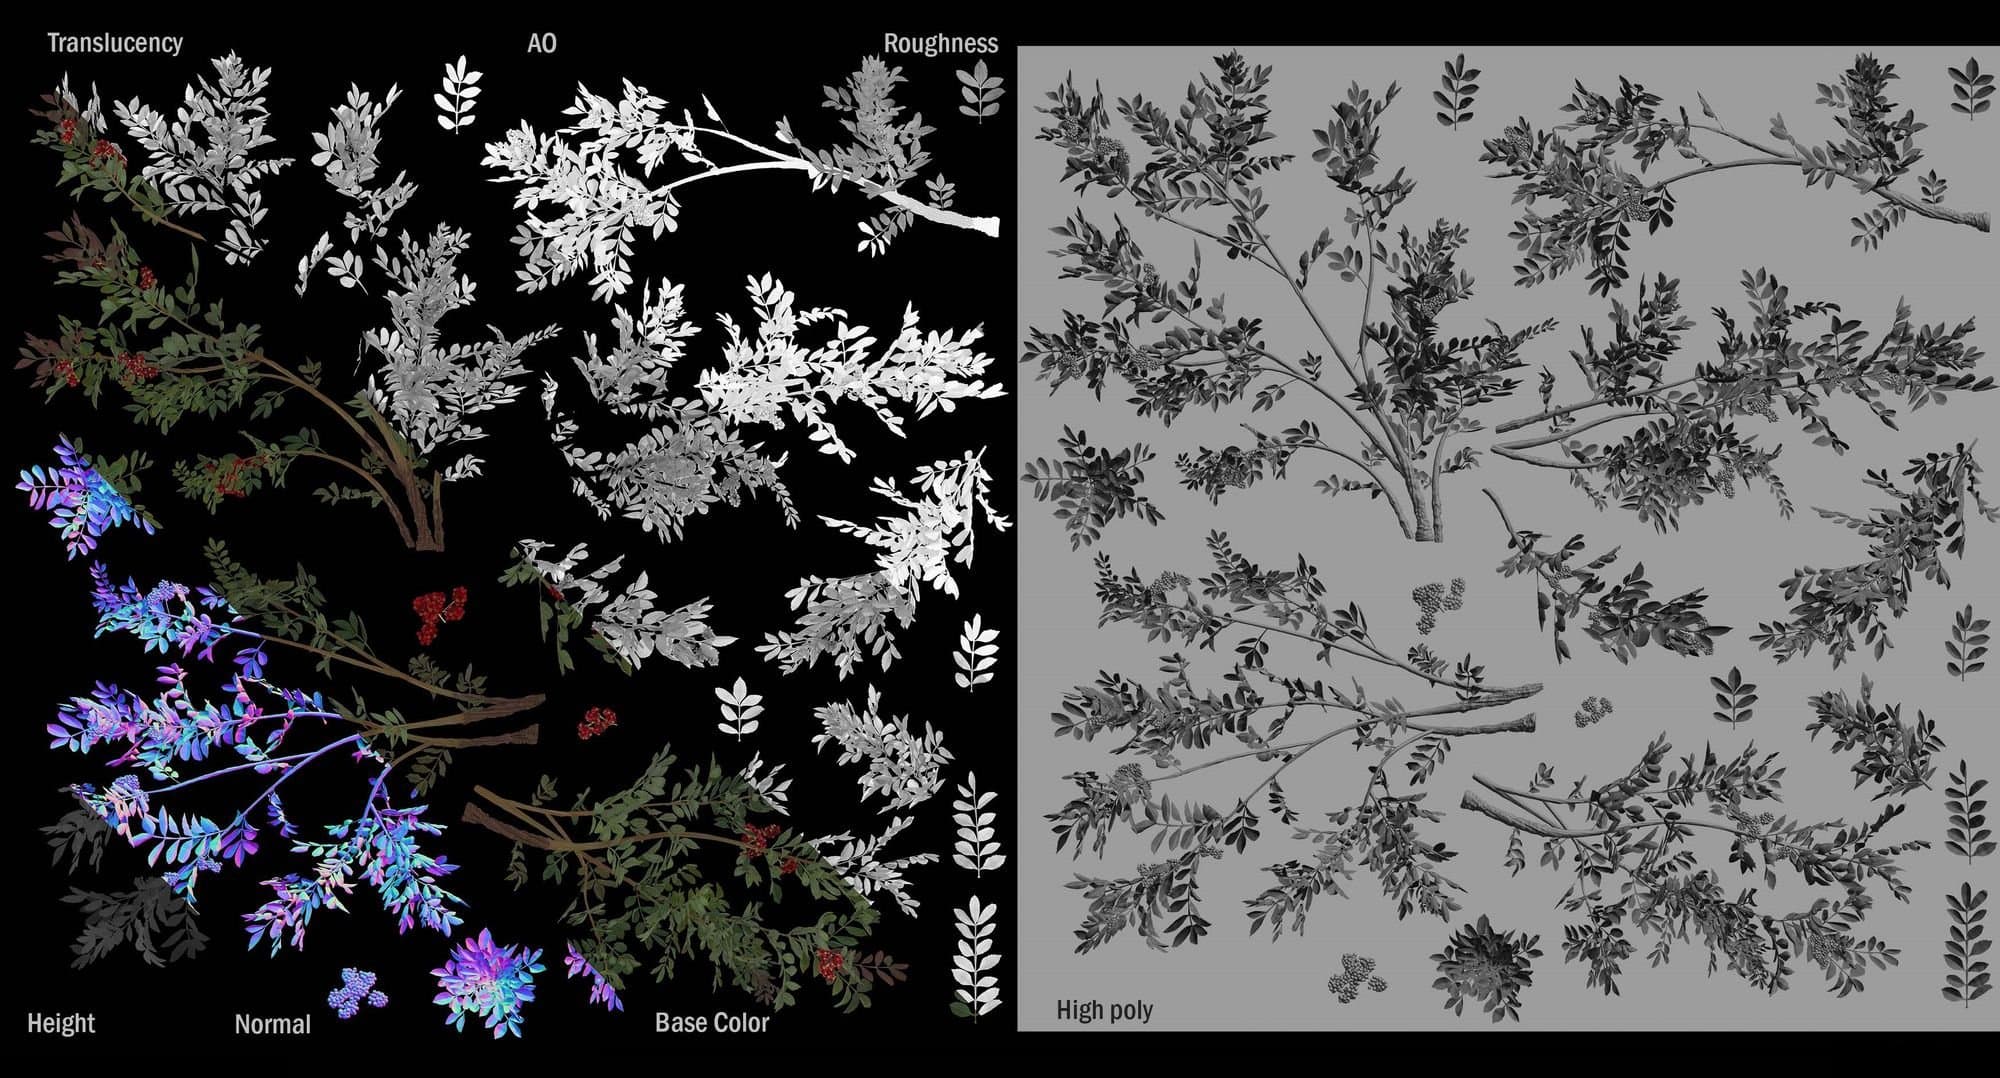
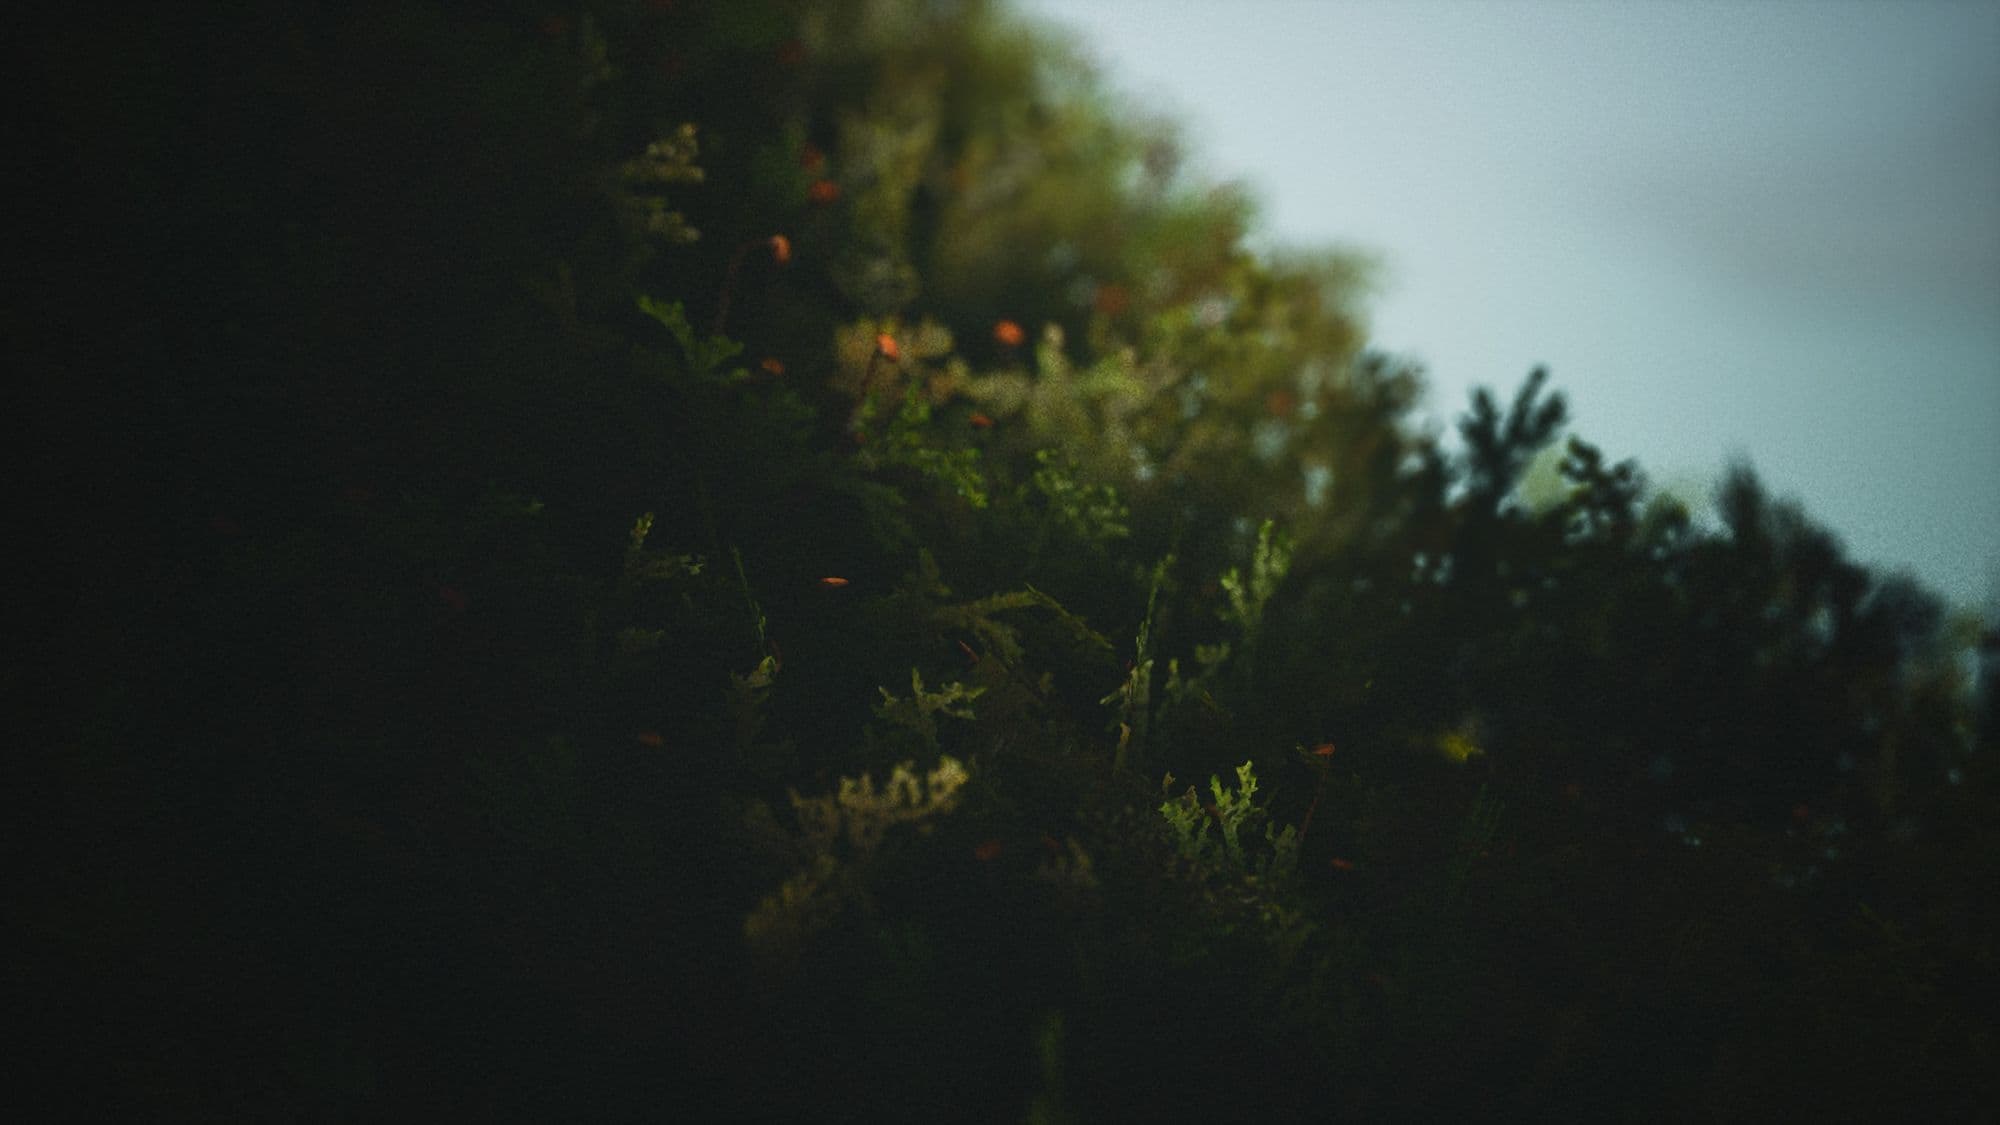
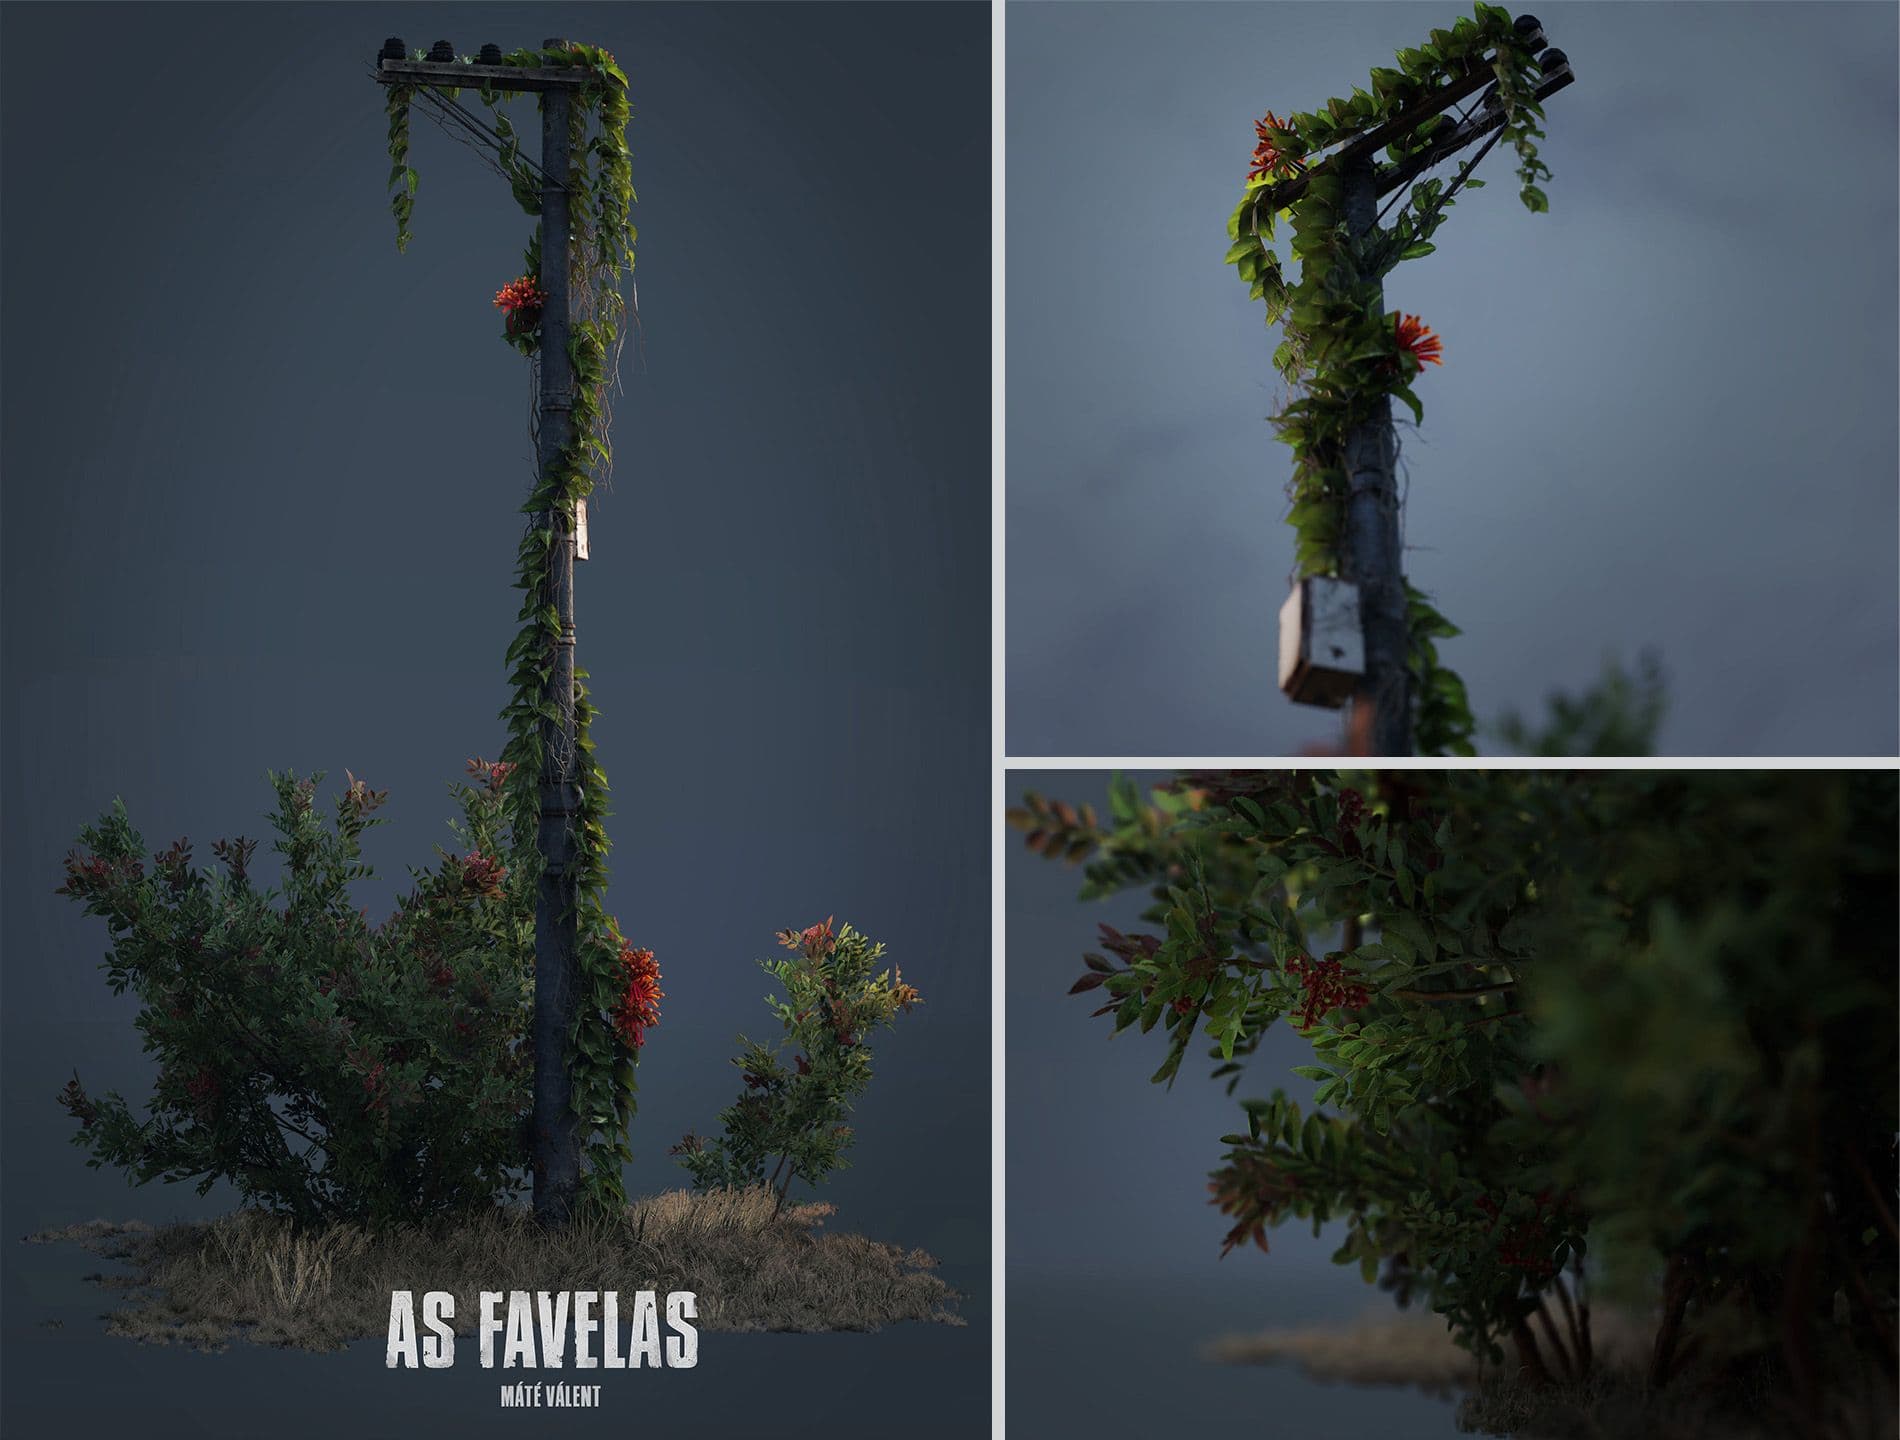
Breakdown of Schinus Terebinthifolia - As Favelas
Packing the vegetation textures for Unreal Engine:
R - Roughness (this channel preserves a decent amount of info)
G - consider putting your Translucency here, if you don't have translucency, put your Roughnesshere (preserves most details)
B - Ambient Occlusion (stores the least amount of information, lot of compression)
A - (optional) Translucency or Alpha (stores most information and preserves a lot of intricate details for the cost of a lot of memory)
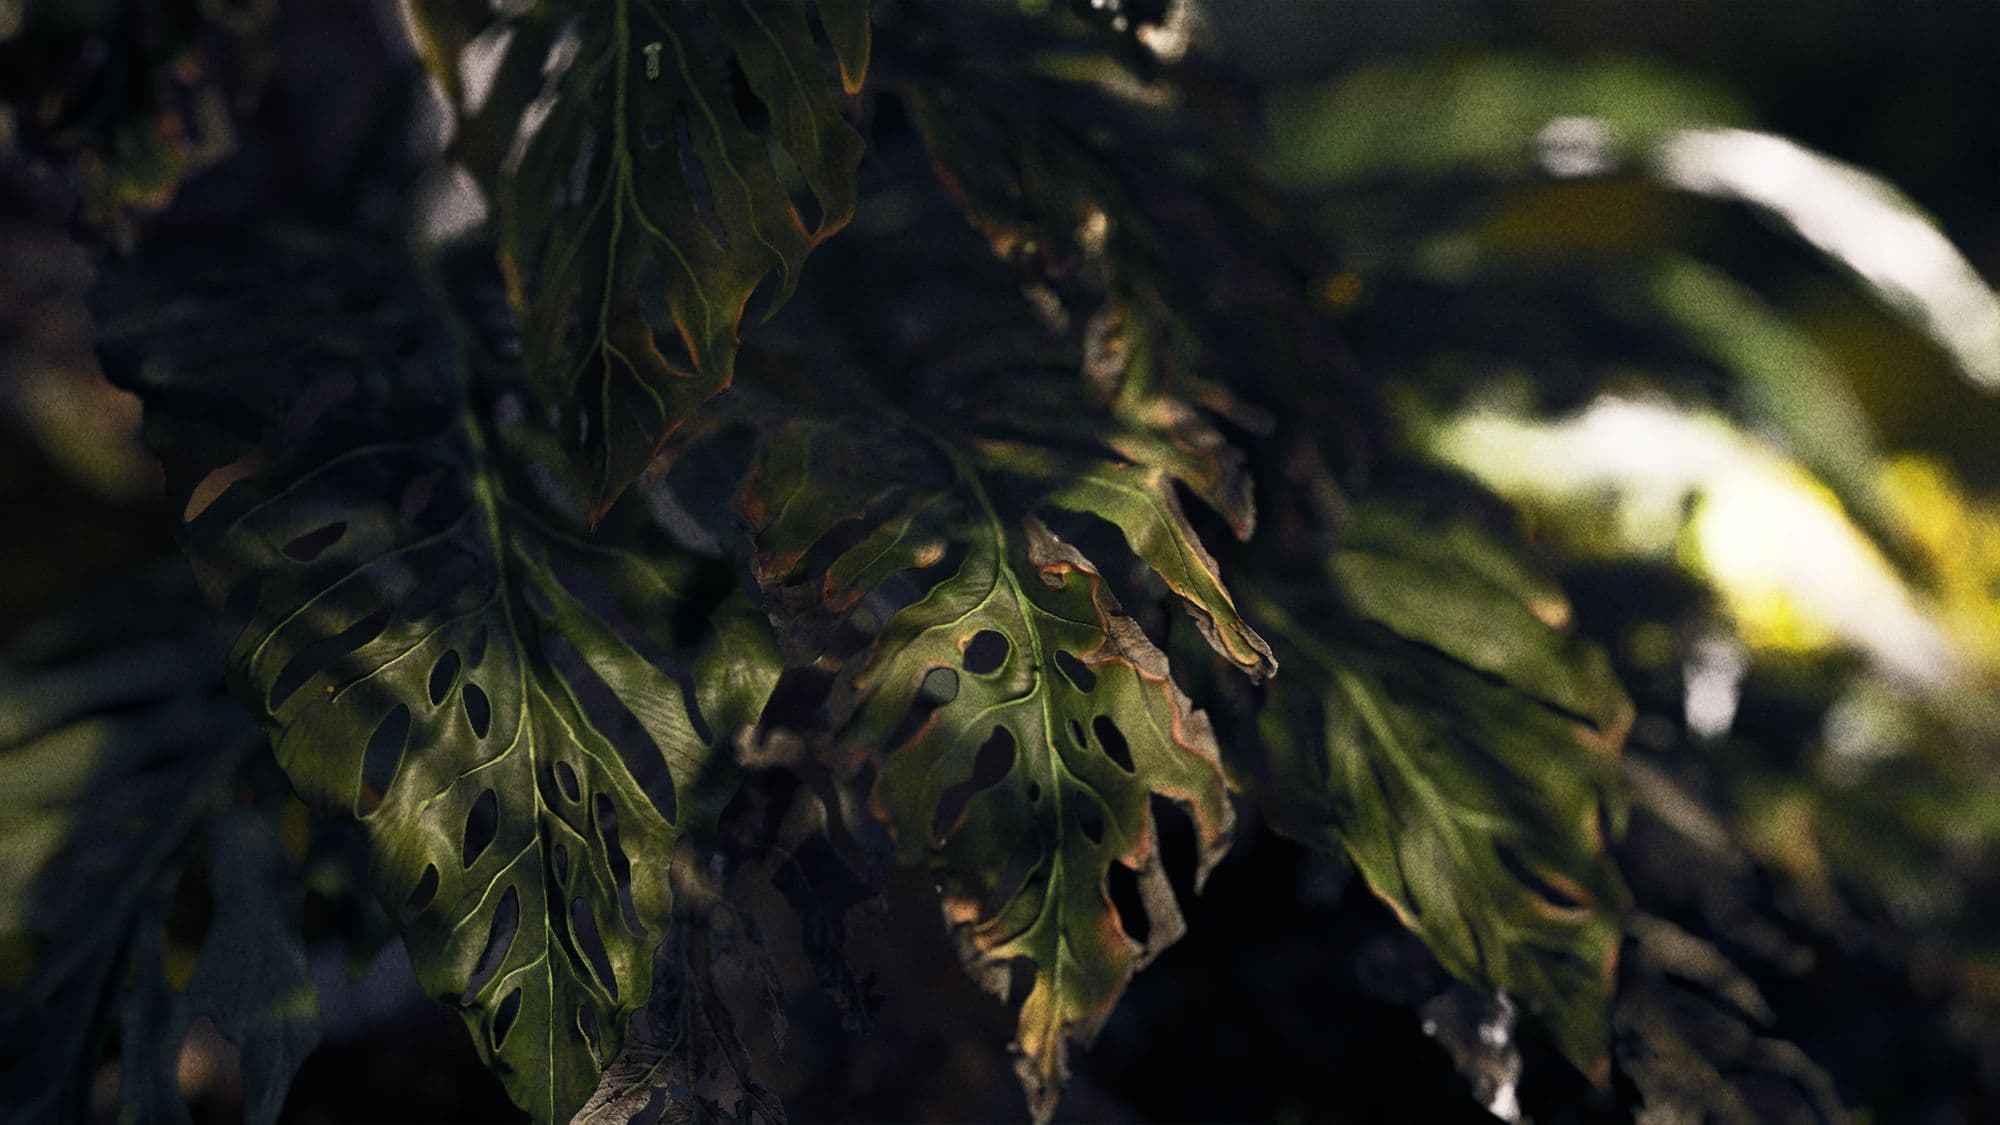
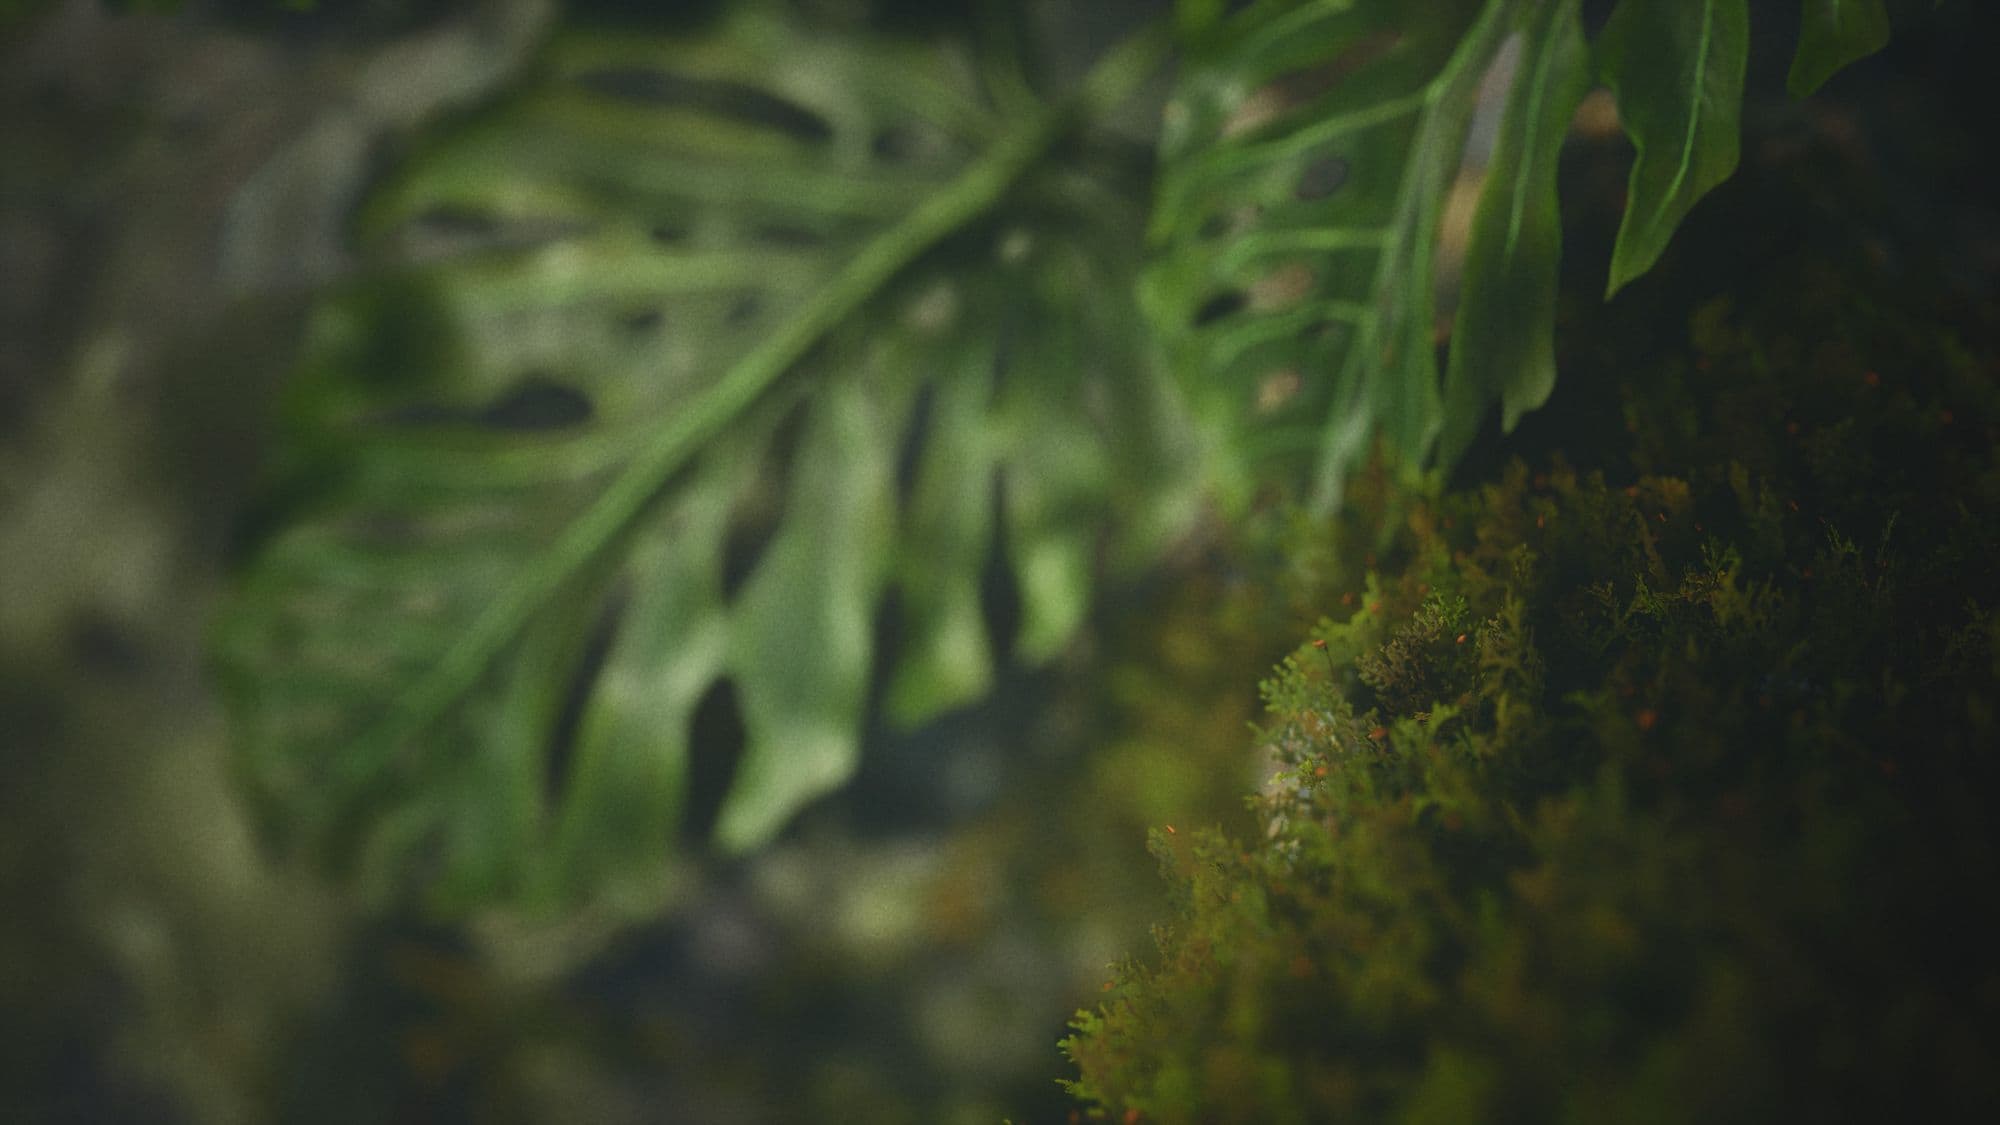
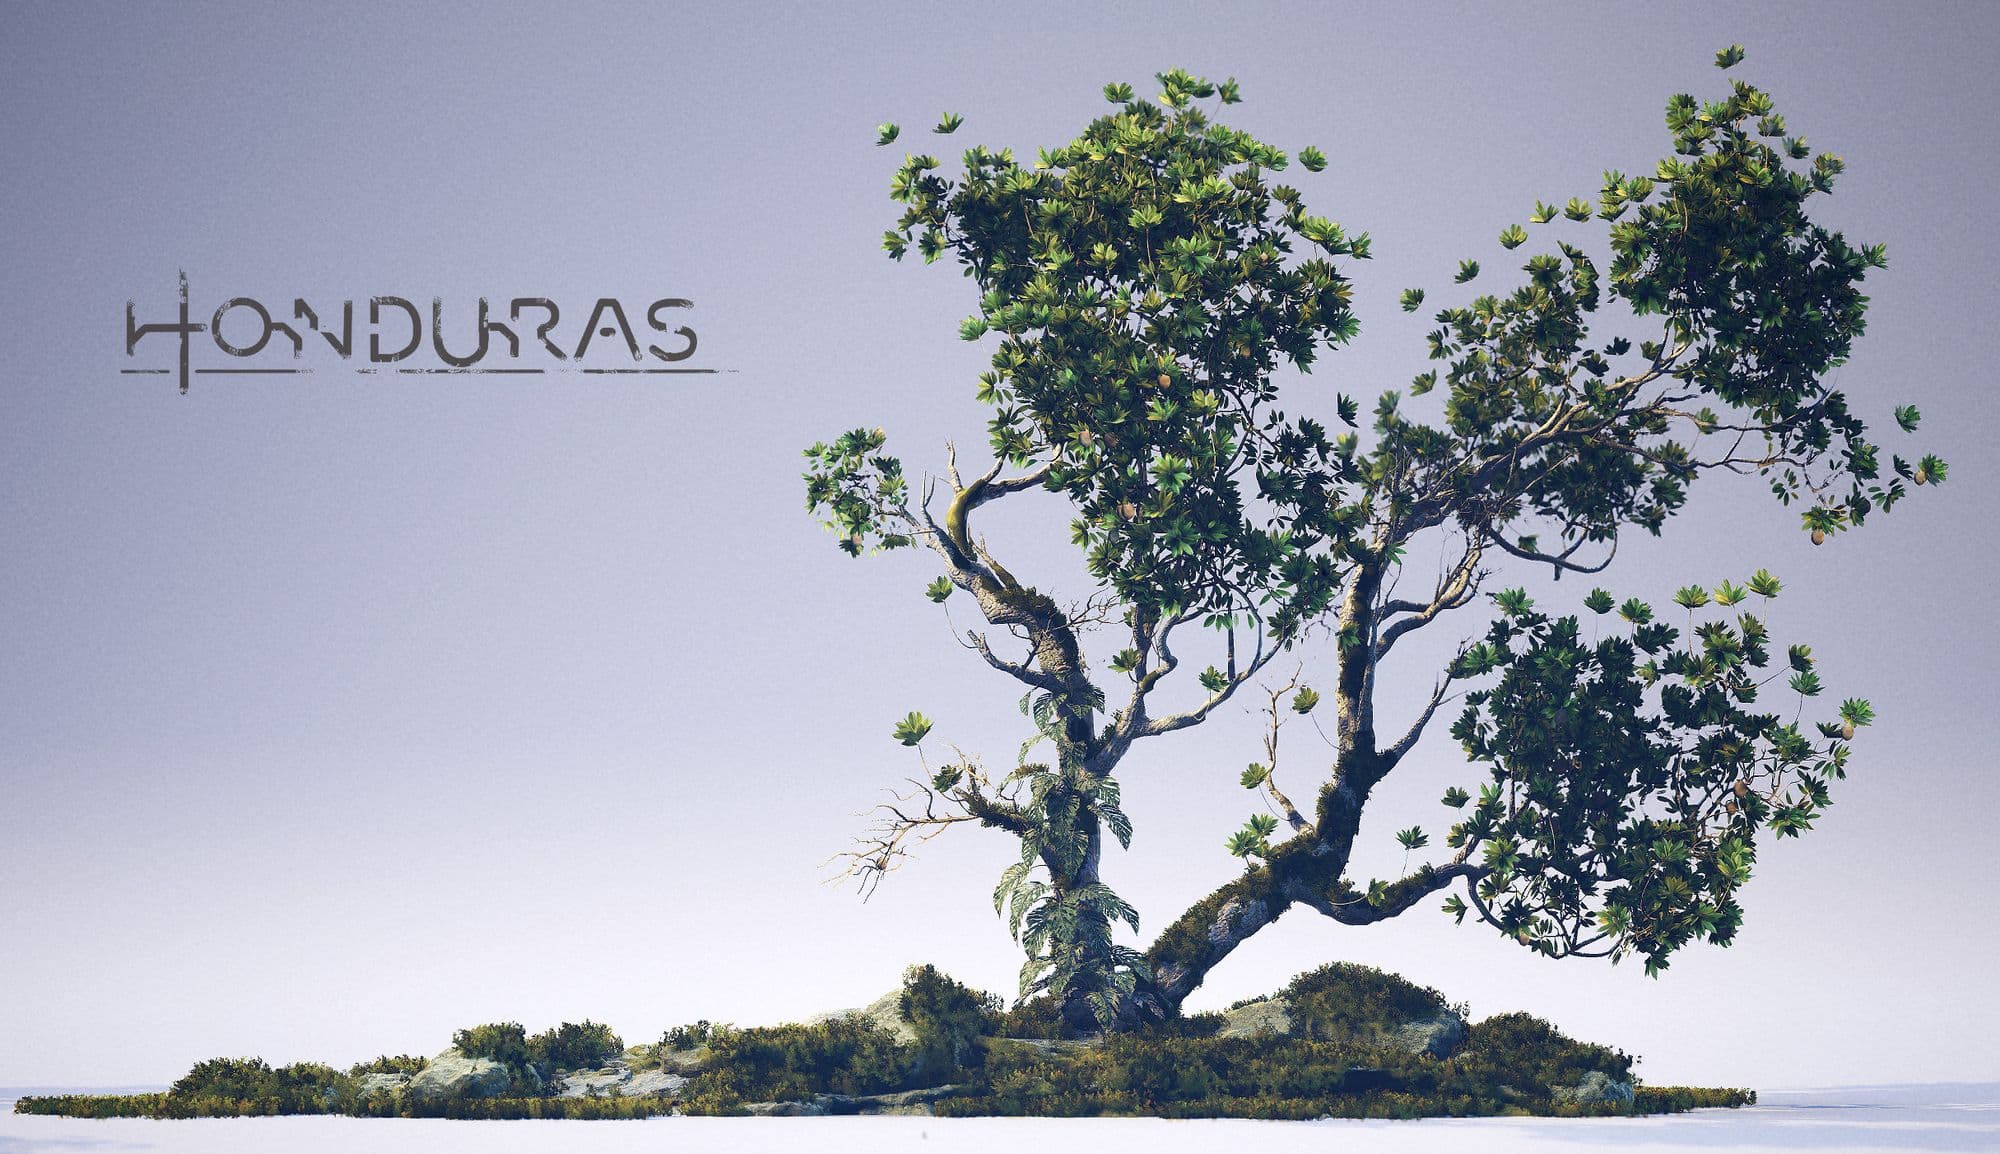
Shots from the Honduras project
If you would like to learn more about vegetation, I'd recommend these tutorials, they are worth every penny:
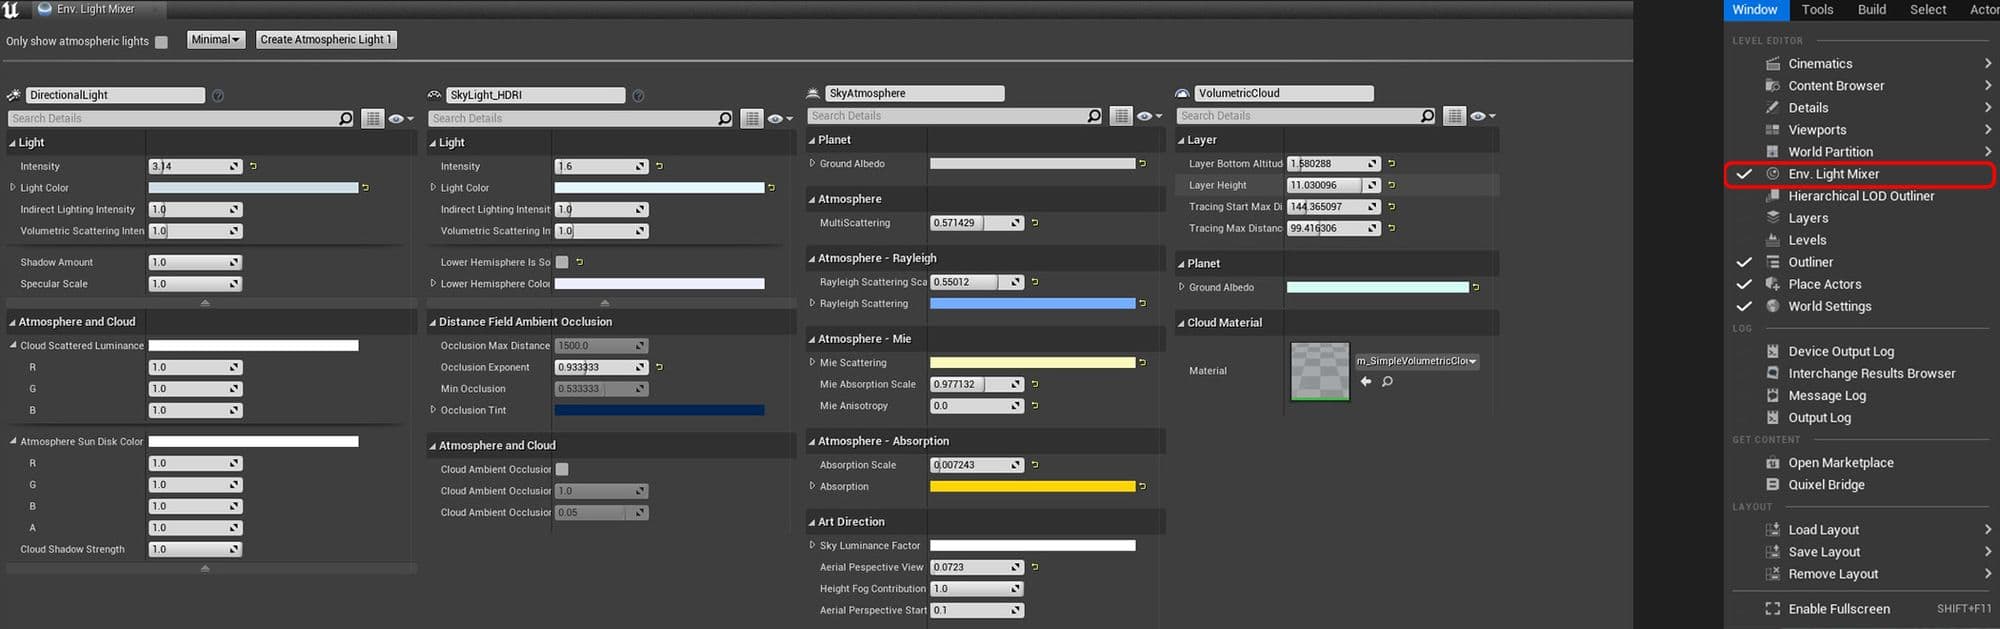
I use the environment light mixer for the base lighting.
You can find it in the Window panel.
Lighting will make or break the final scene, it’s really great to start tweaking it early on in the blockout process and iterate on it as you go.
Don’t be afraid to put some extra lights around to get better bounce light here and there for the final shots!
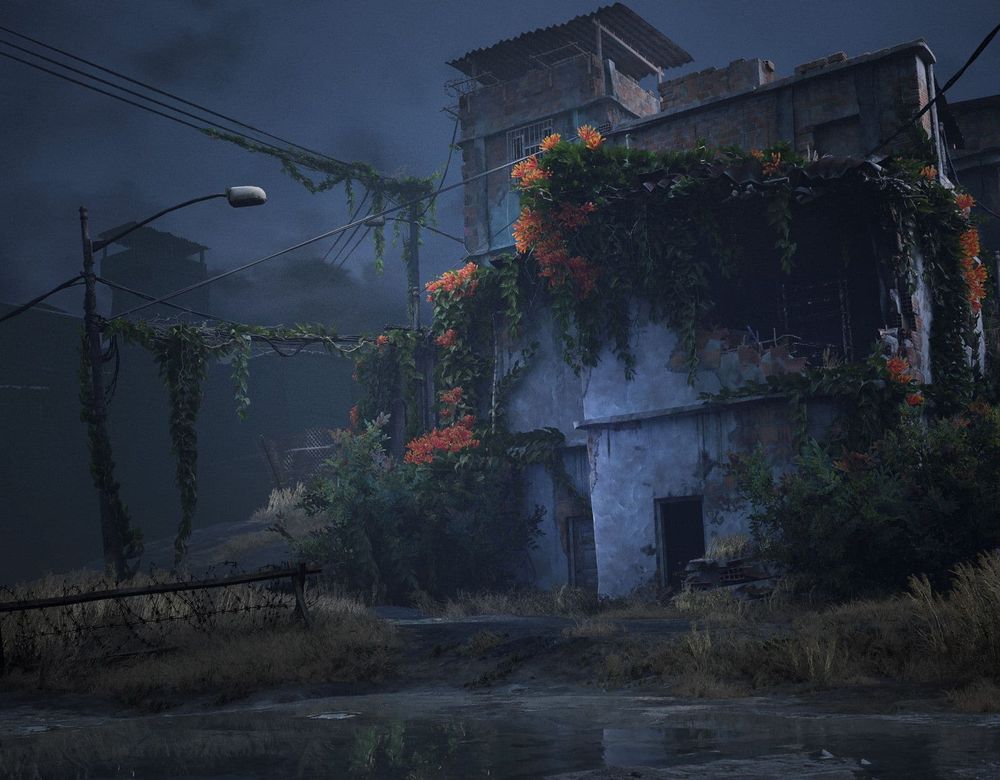
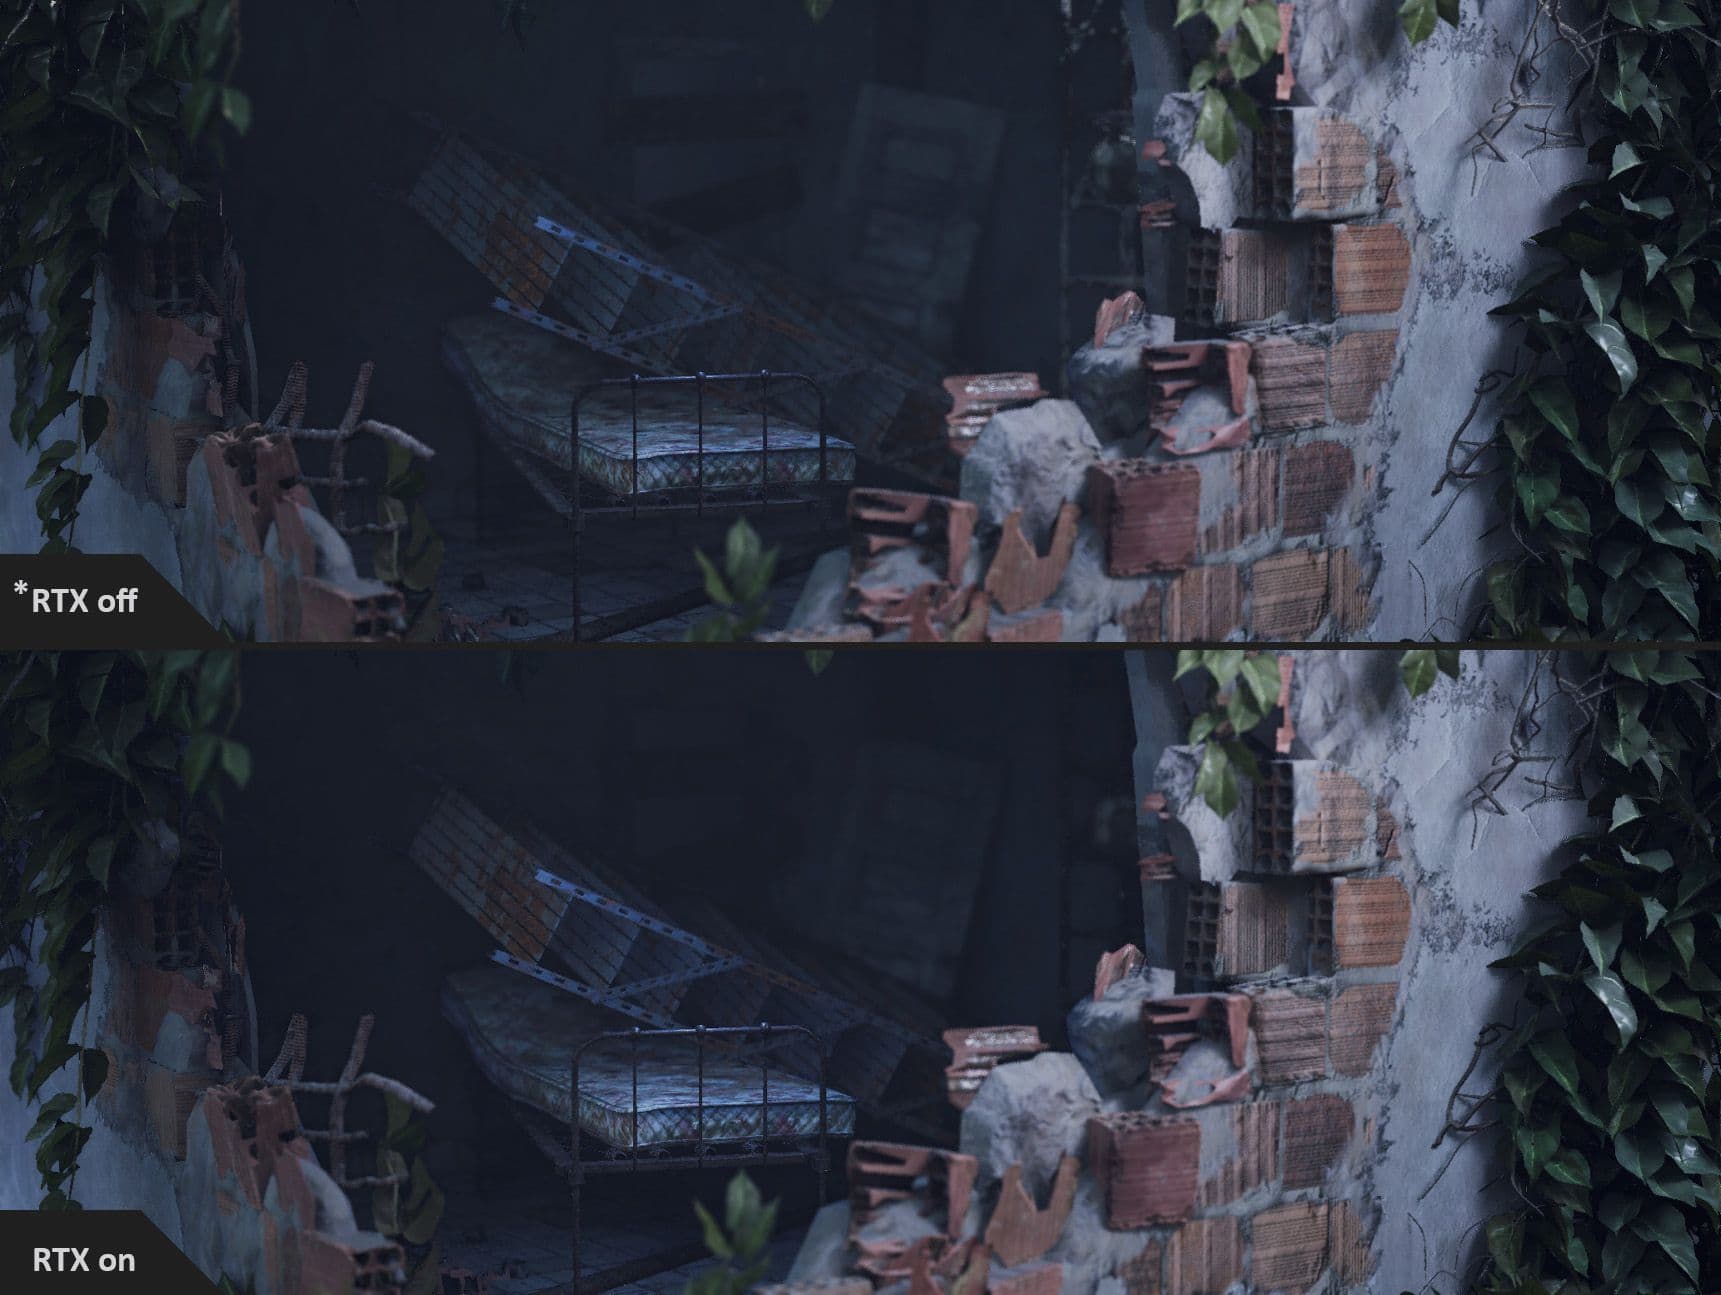
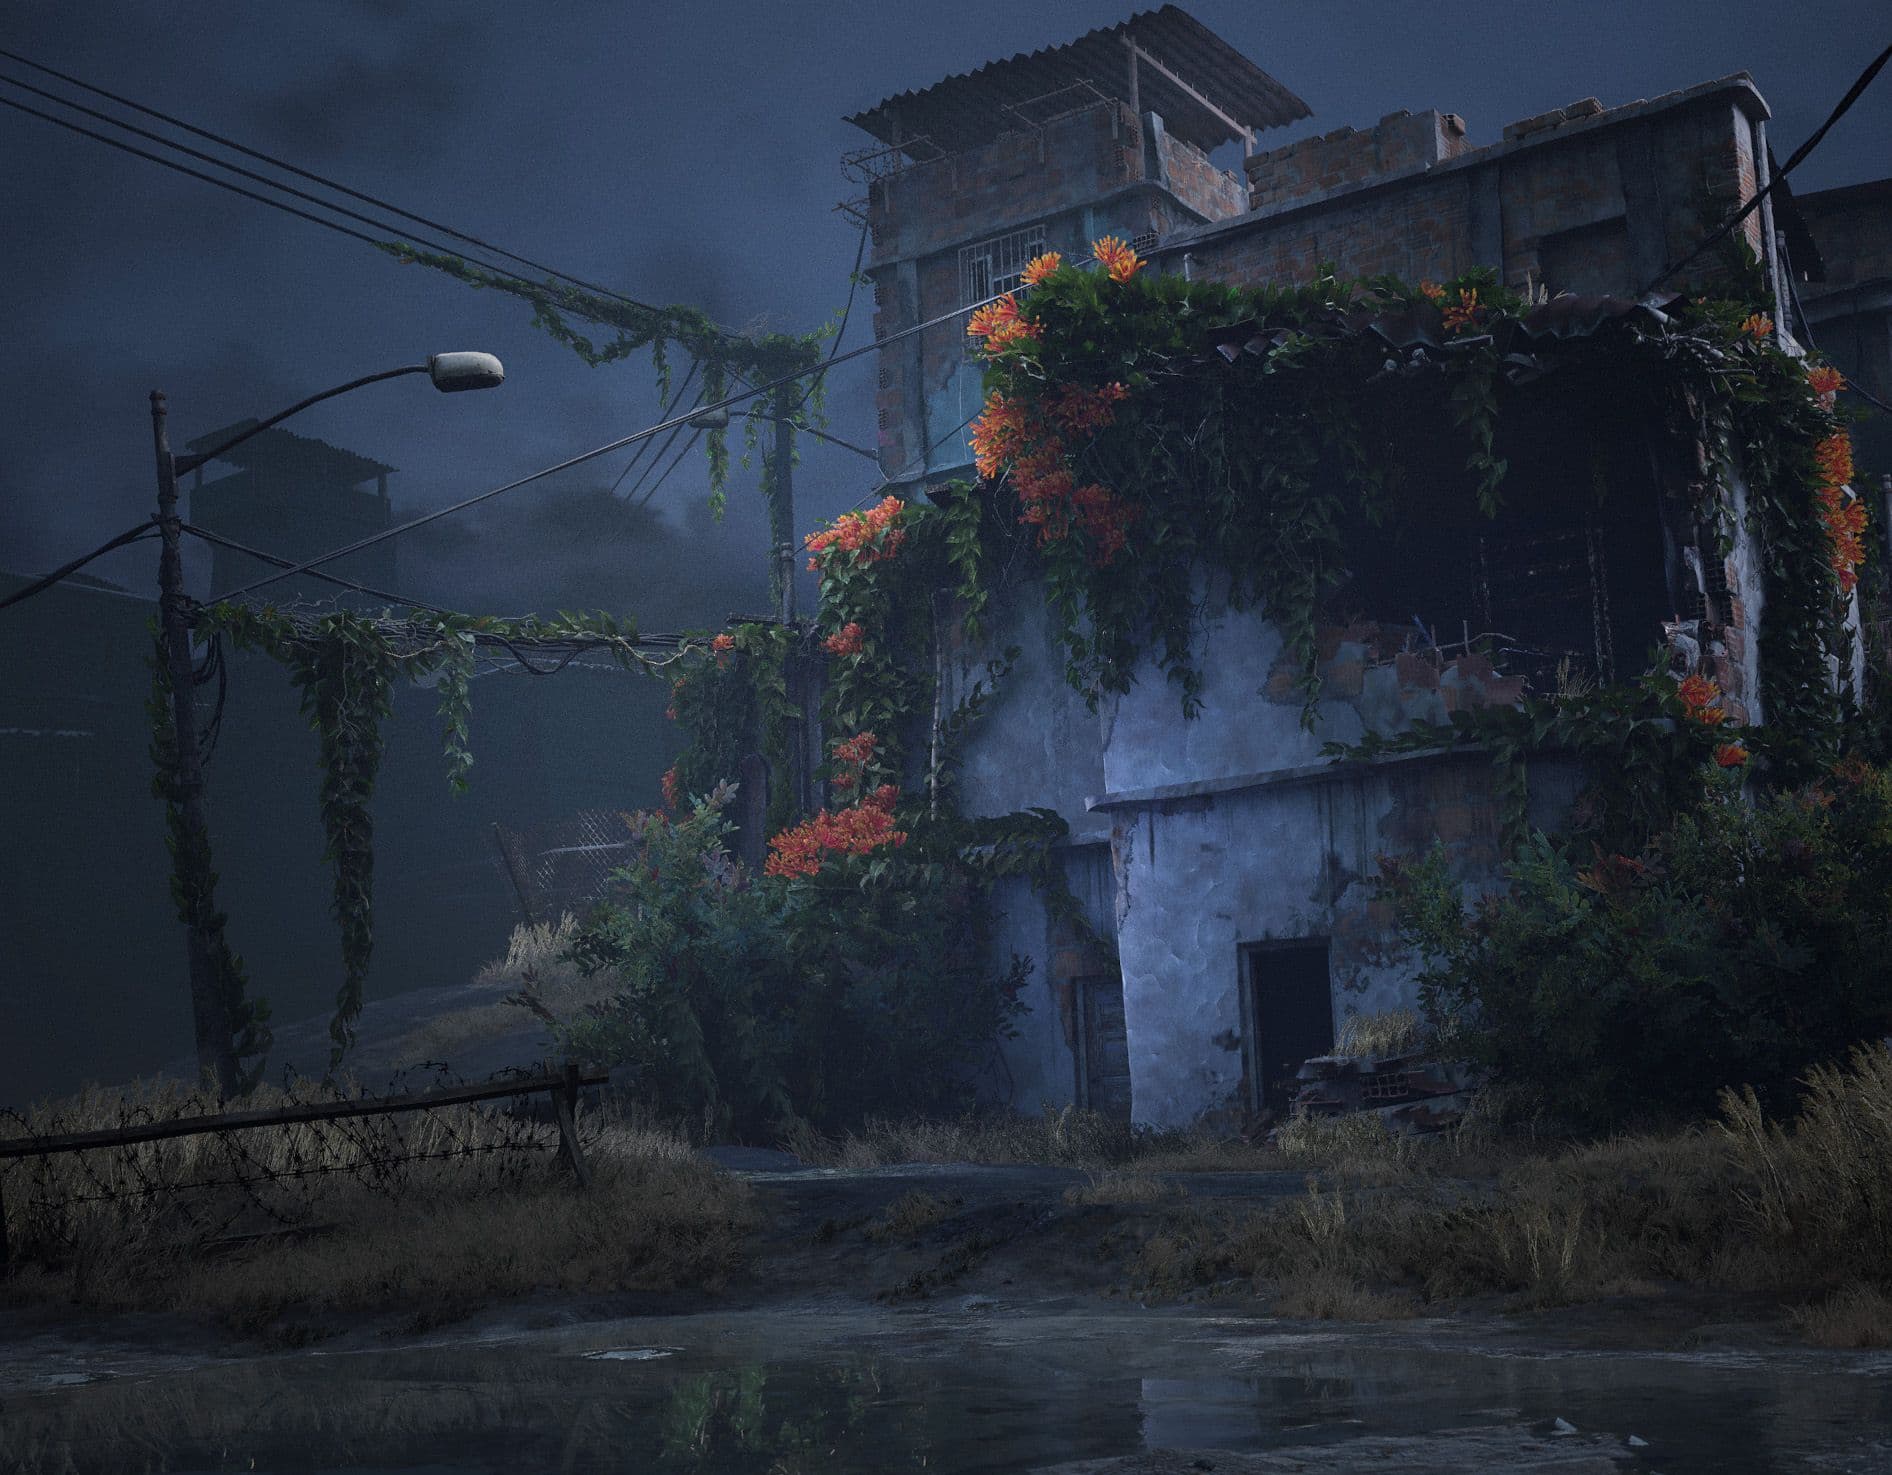
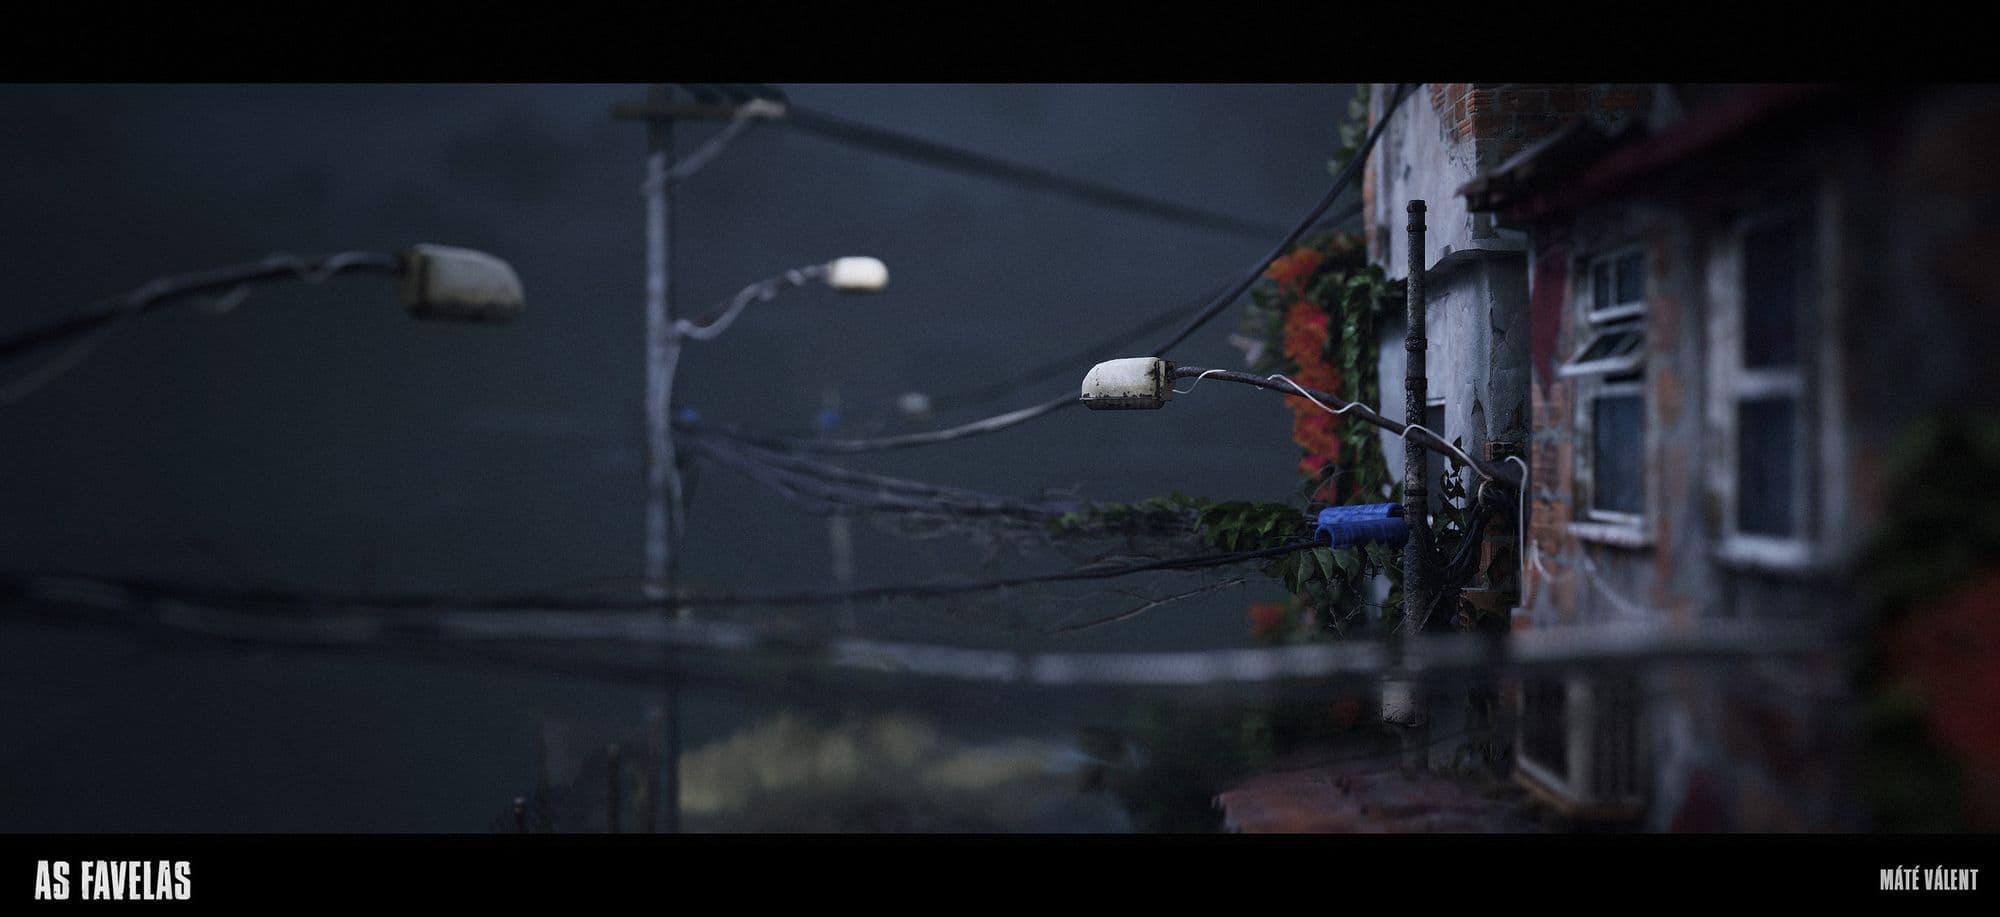
Showcase of lighting of As Favelas
The lighting is heavily dependent on ray-tracing. It gave me the best results for overcast dusk since this light scenario is heavily dependent on Ambient Occlusion and global illumination.
*Ray-traced shadows and GI (Global Illumination) is still on - As Favelas
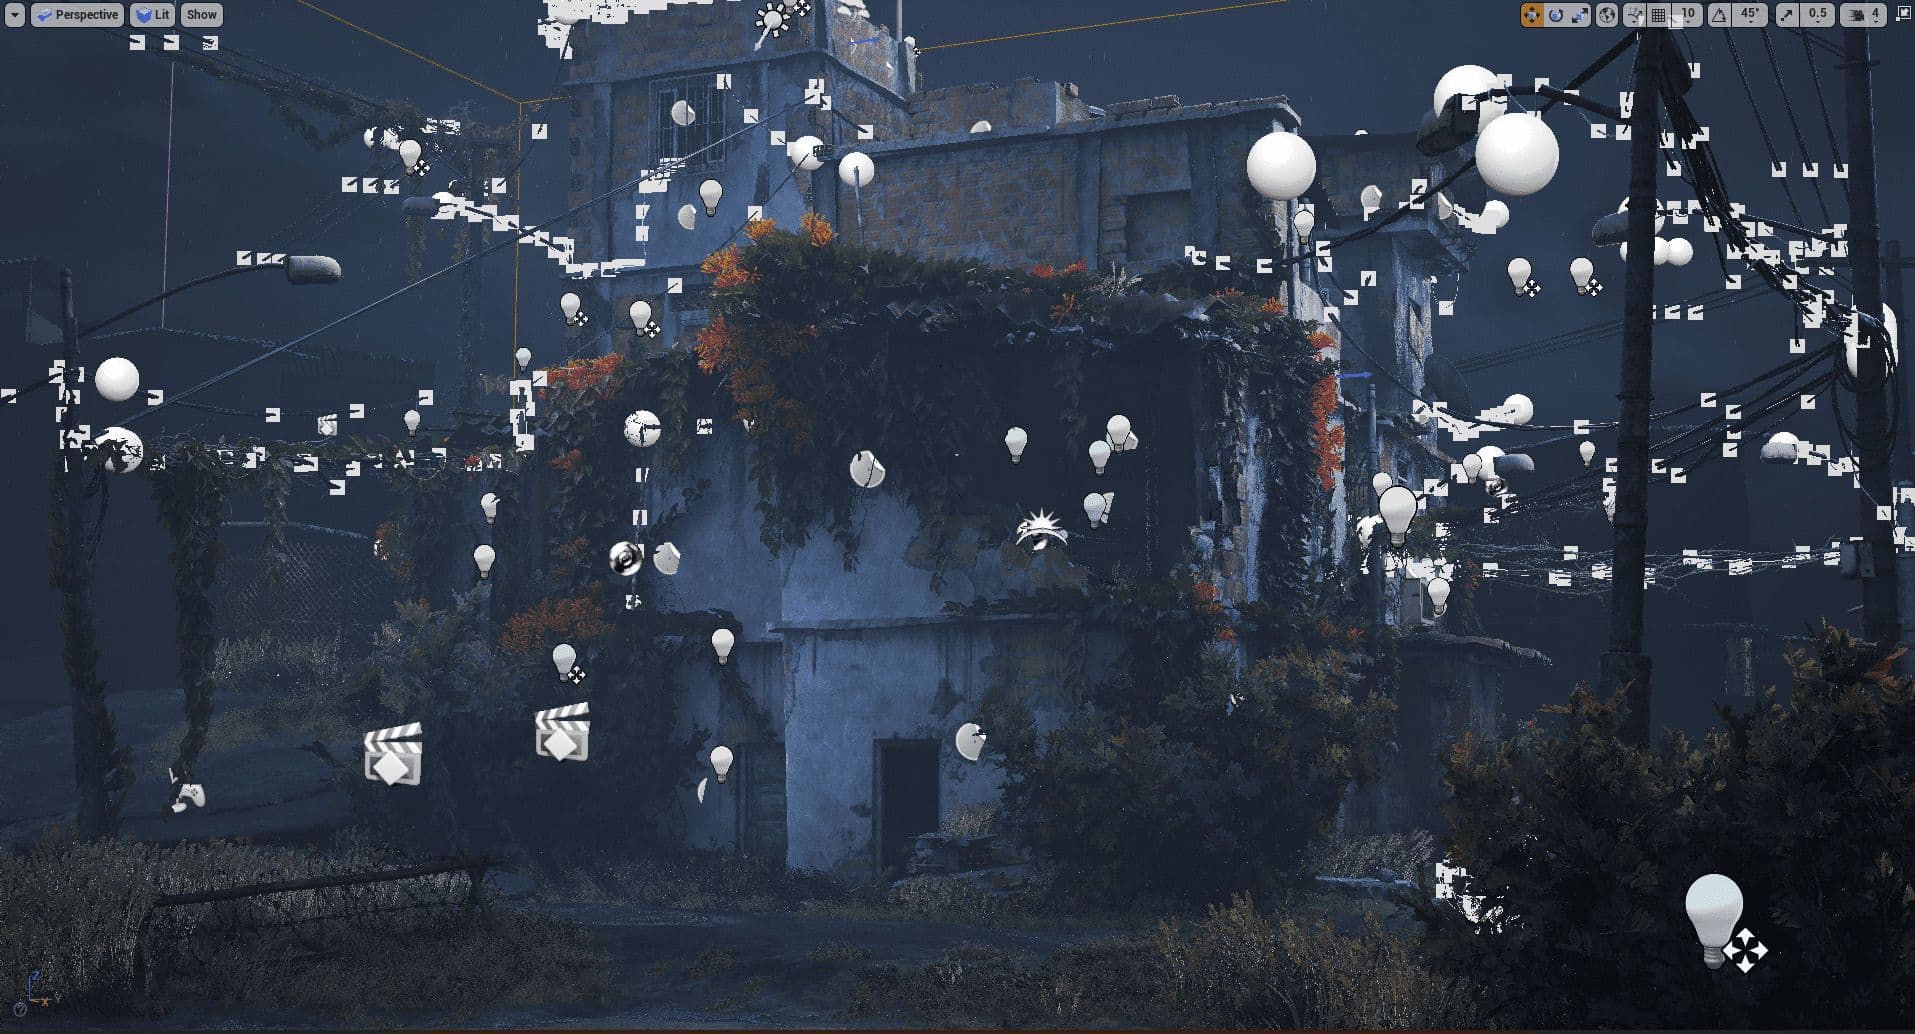
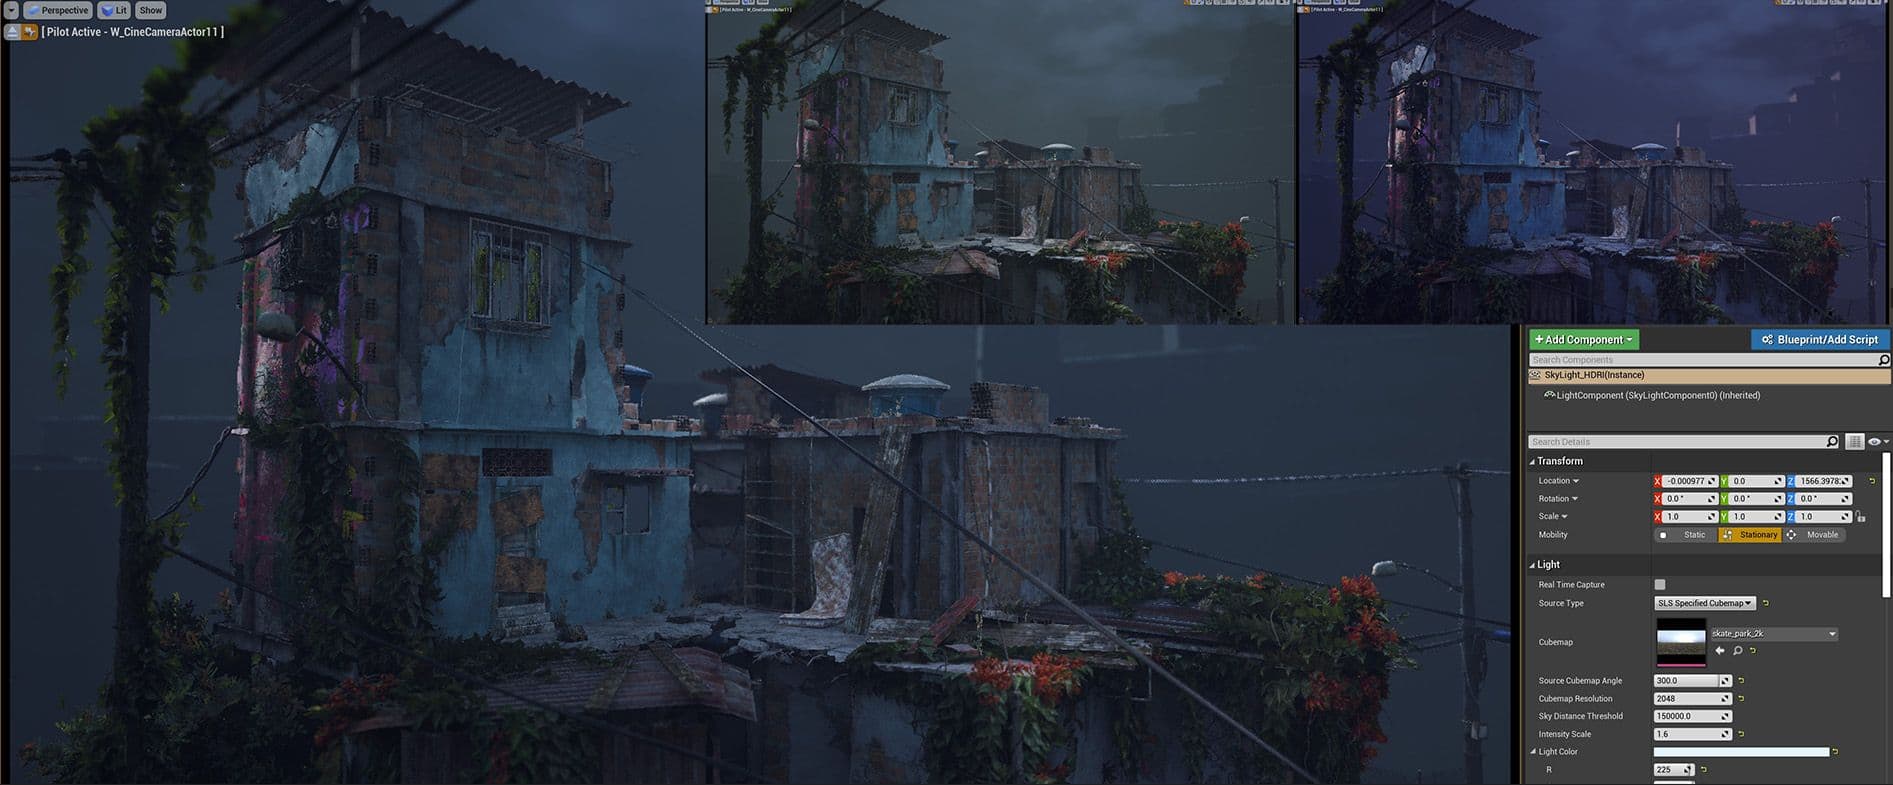
I am also using an HDRI because it's a diorama; it helps the scene a lot by adding a lot of colouring and environmental bounce light. Here is a Link to a free high-quality HDRI library!
Unreal viewport with skylight settings and different HDRIs comparison (top right) - As Favelas
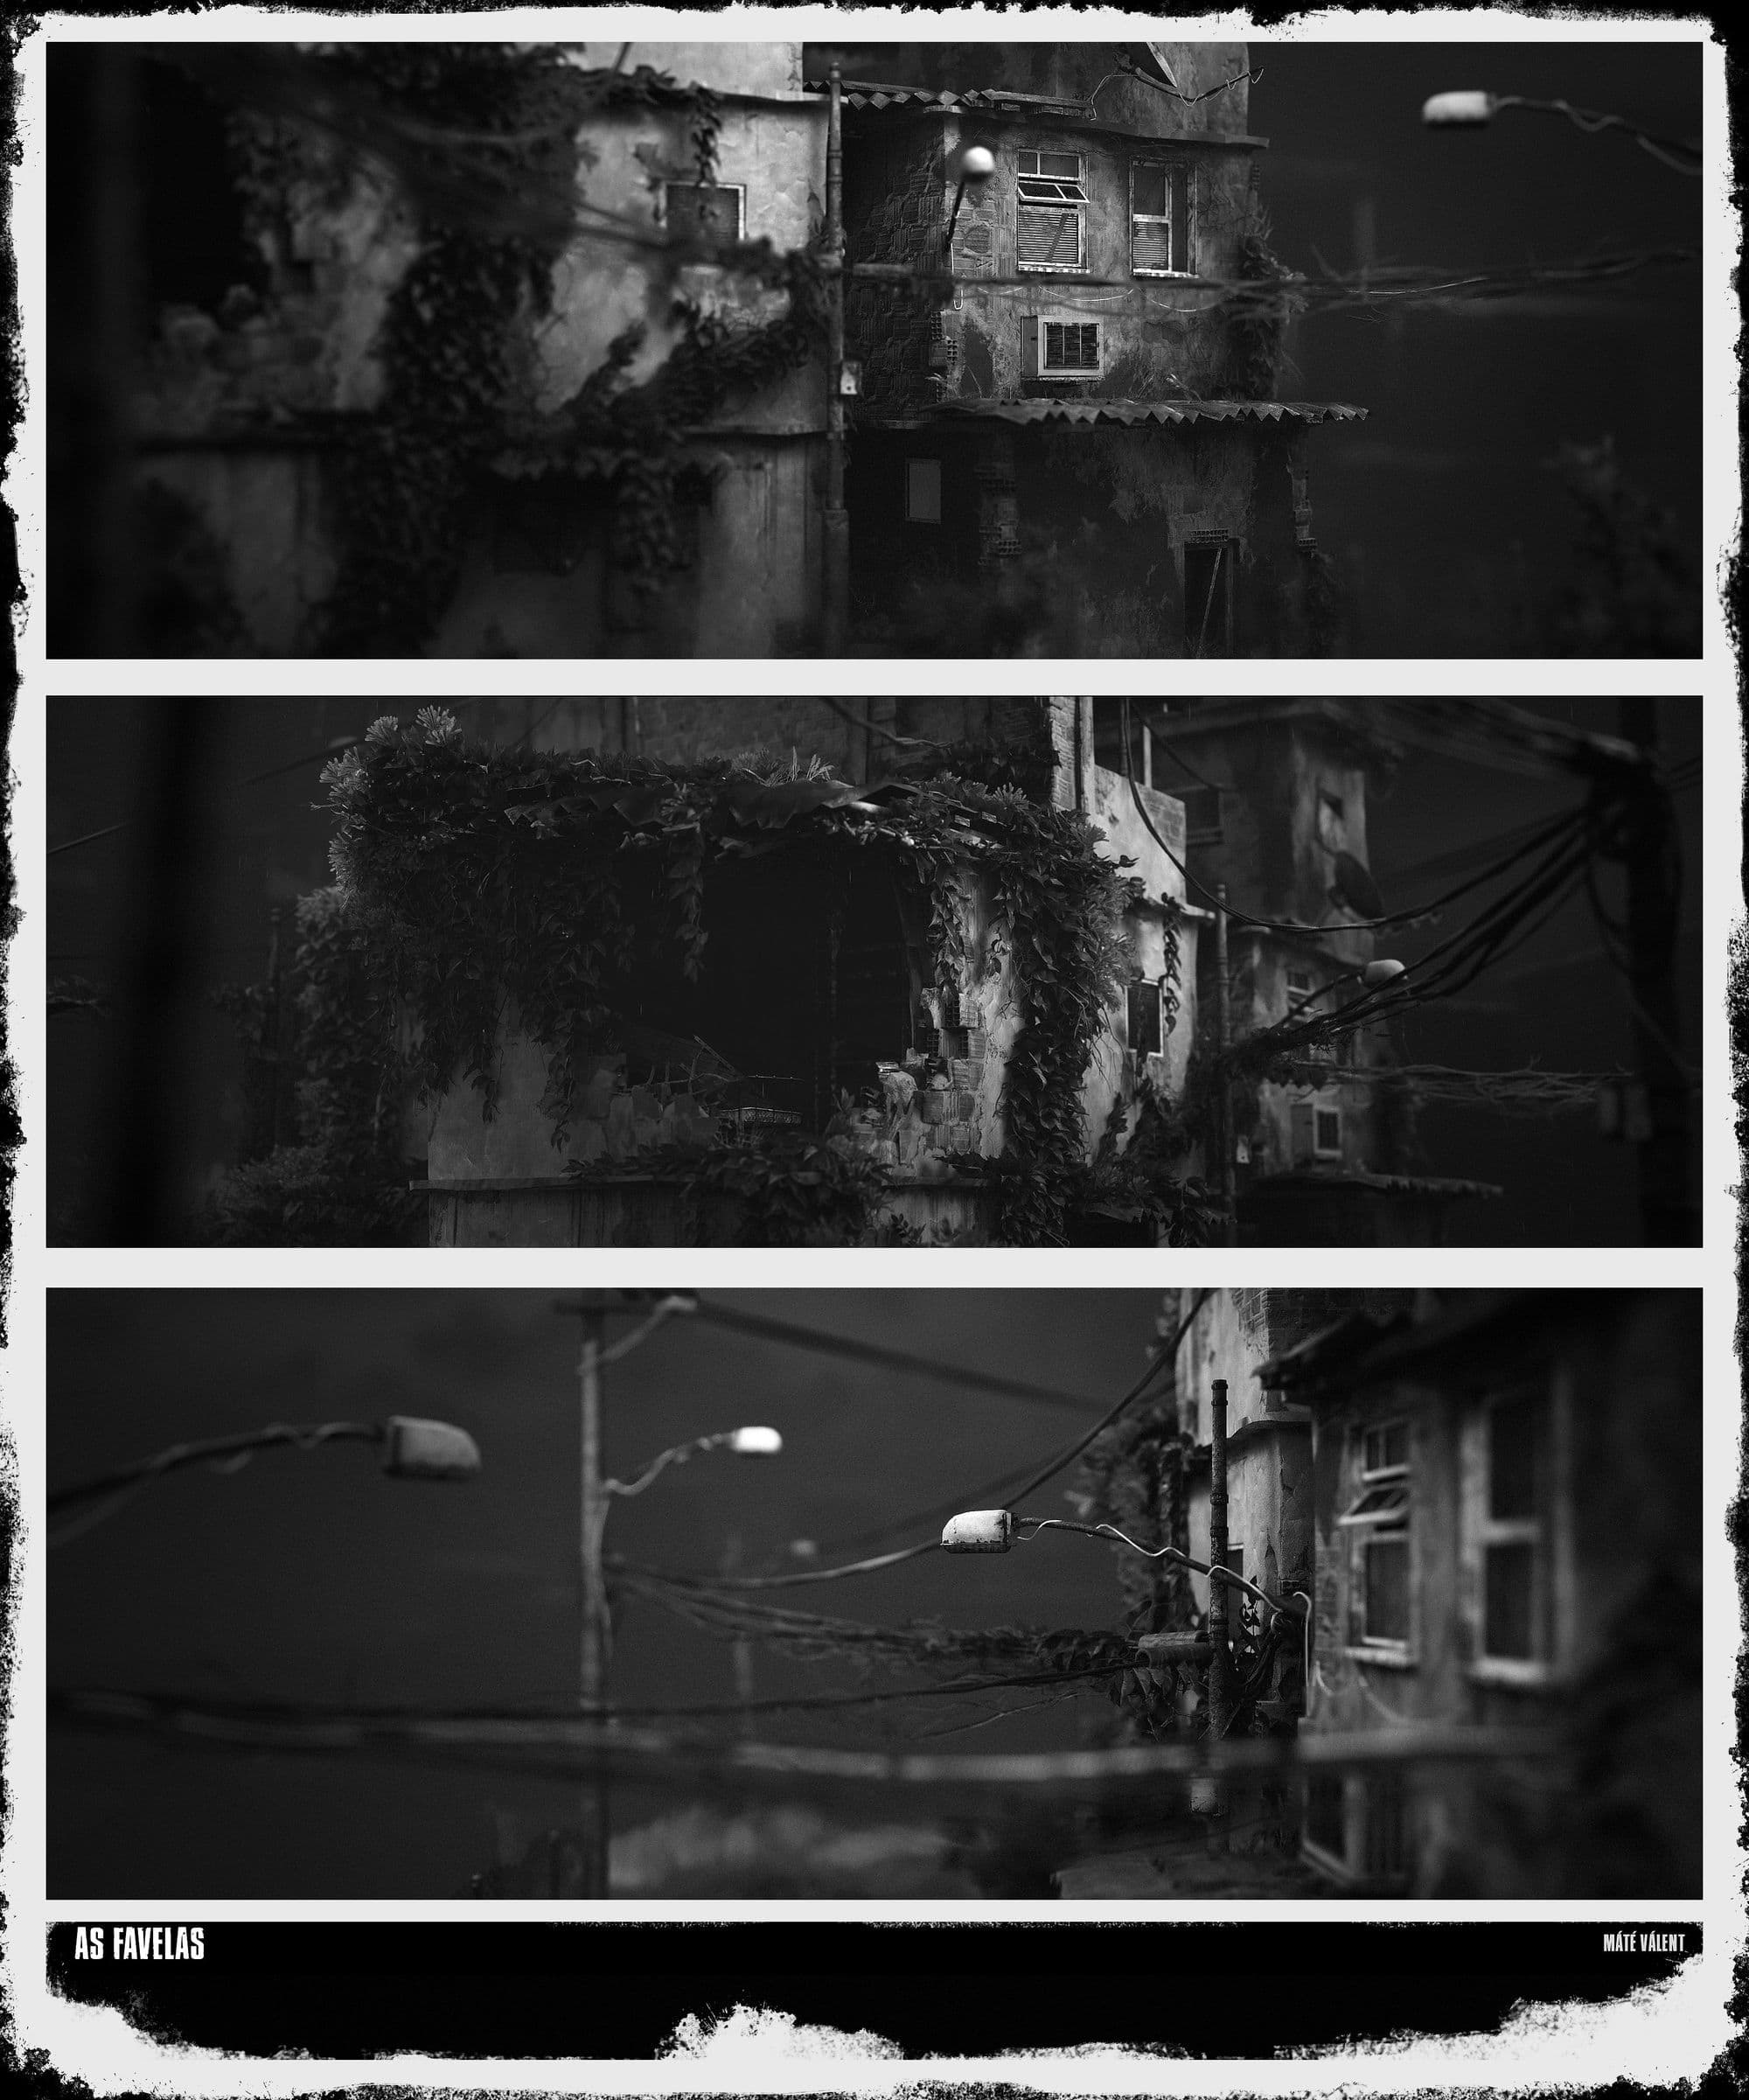
Final presentation
After everything is done, I go around the scene, place a bunch of extra cine cameras (close-ups and interesting shots), go crazy and play around with the aspect ratios, aperture, framing, and composition.
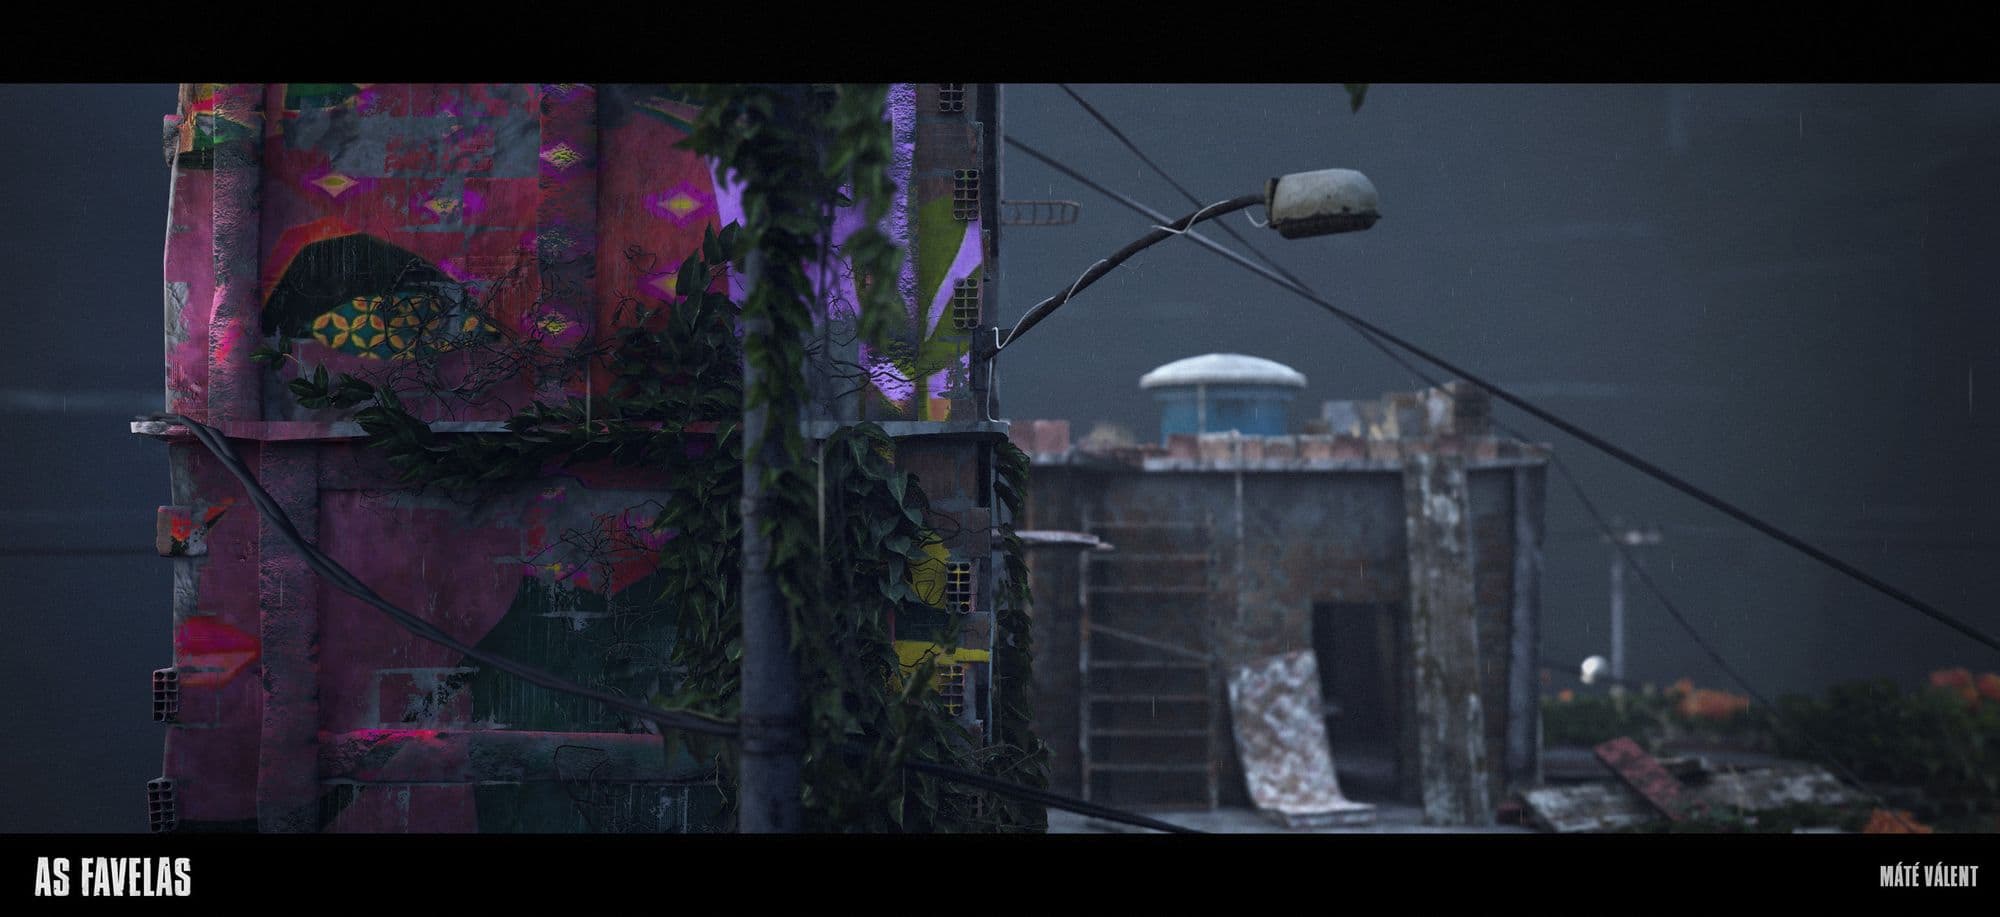
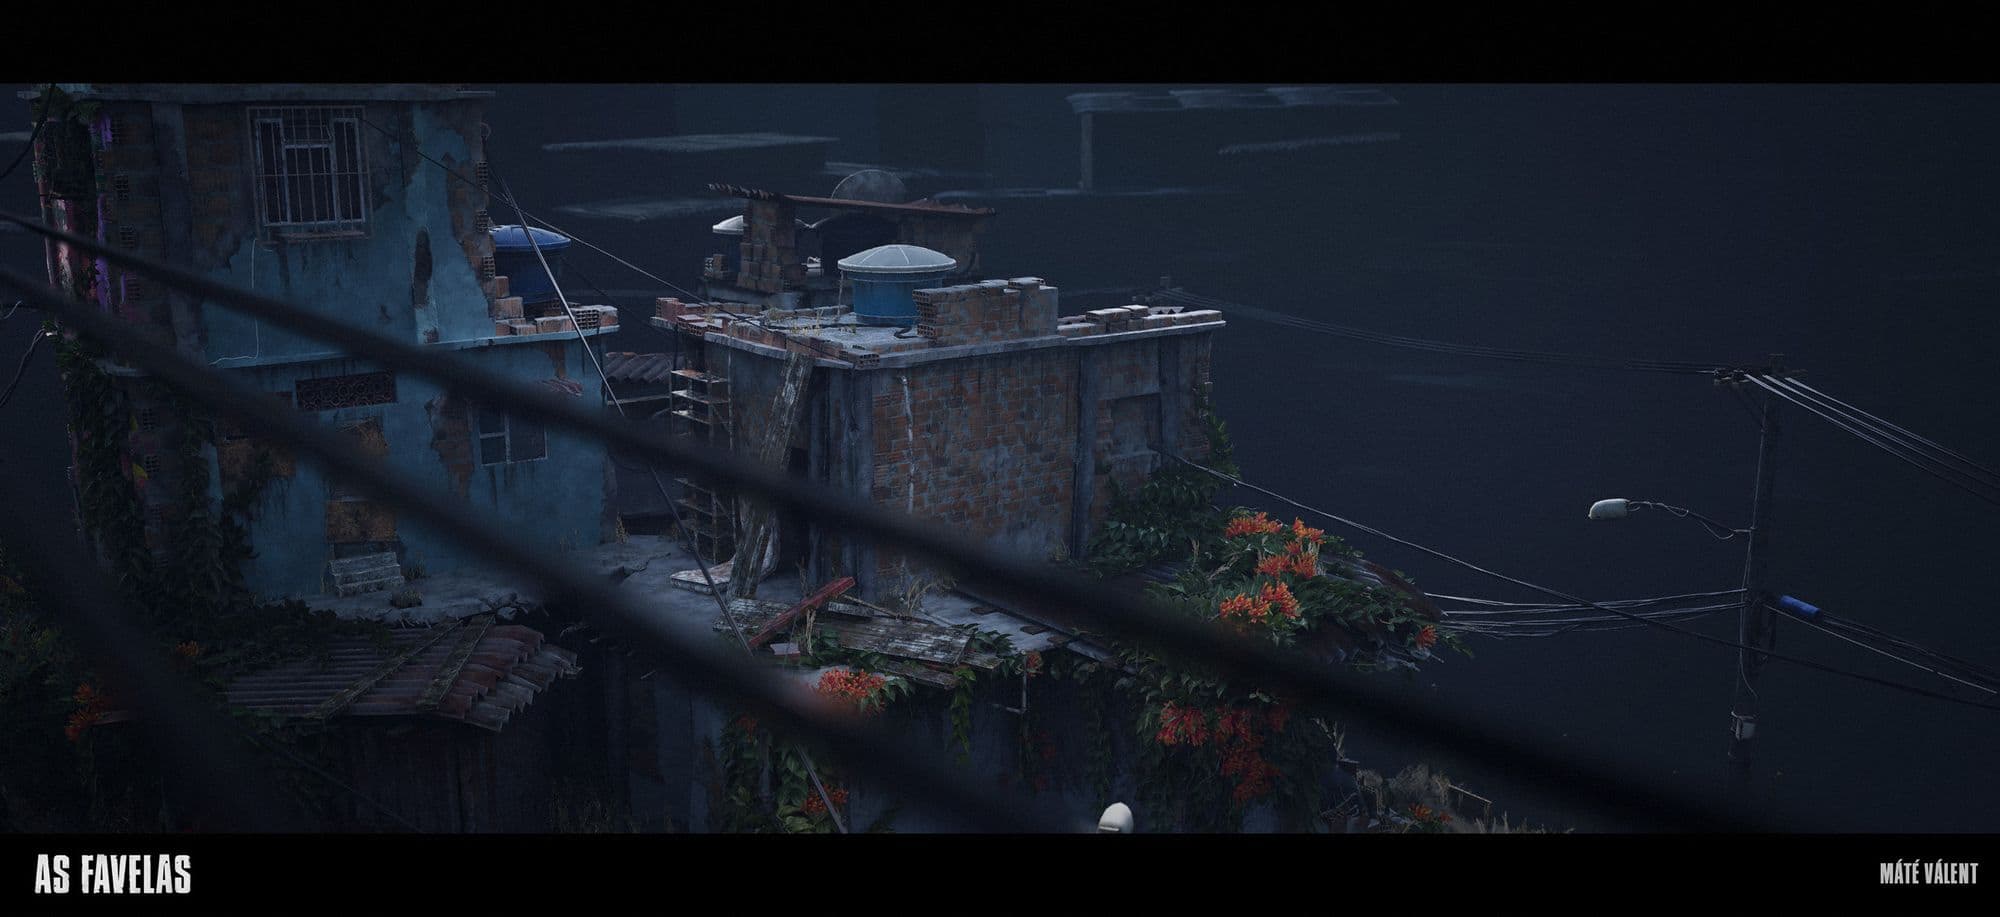
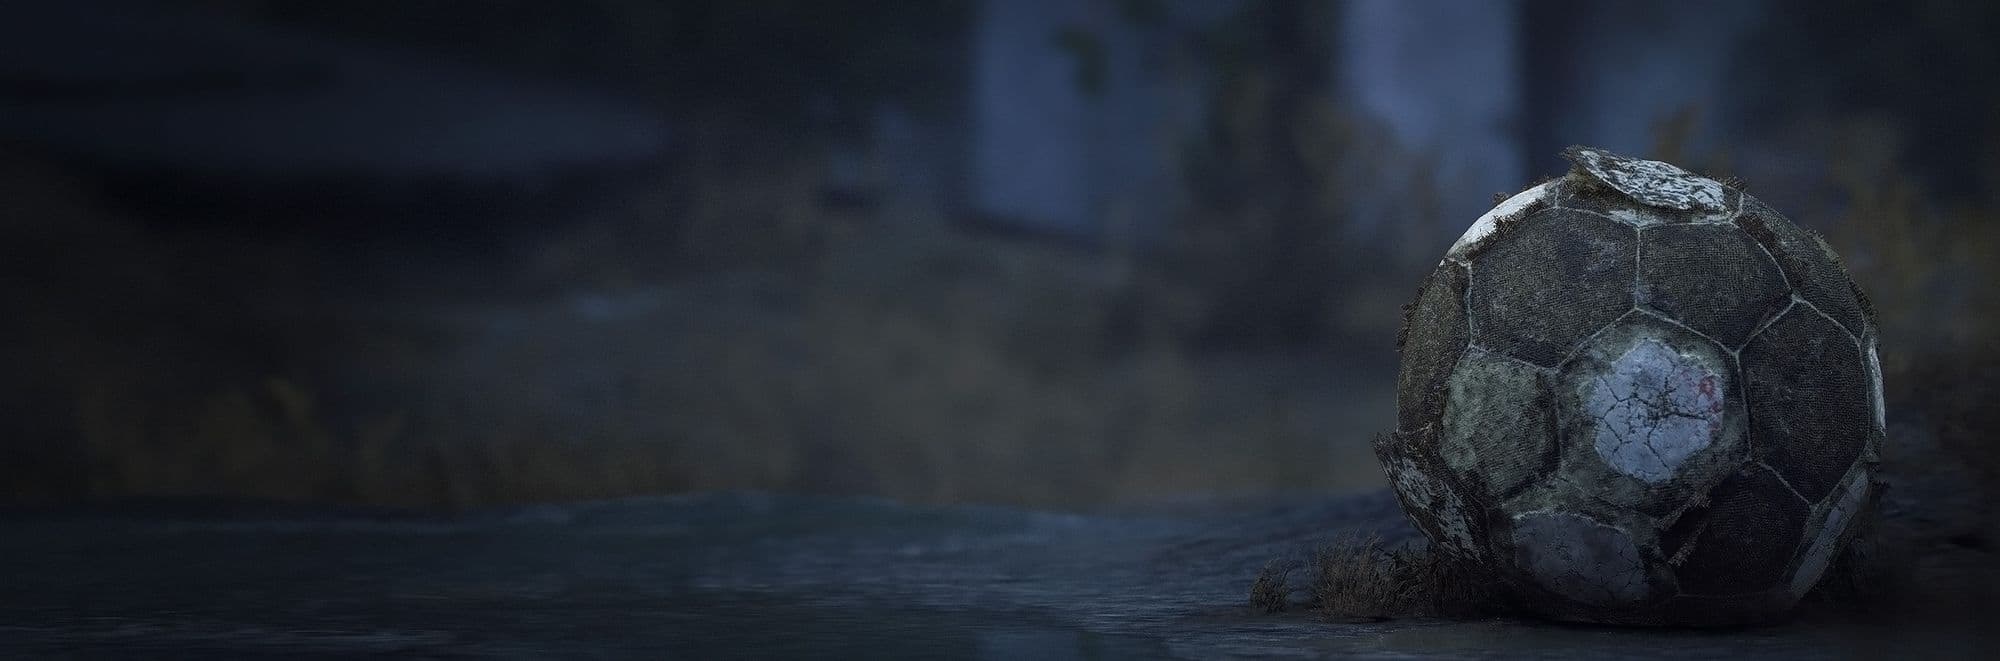
As Favelas
The rule of thirds and other compositional guidelines can give you a good base, but don’t rely on them when creating your shots; play around with framing, colour, and values and look for contrast with readability.
It's also a good idea to create a small cinematic if you have the time. Here you will find a really great talk on cinematography that is very applicable when taking your shots.
Another think to consider: details might work well in a frame with other elements, but most of the time will break the illusion and won't stand on their own if focused on. The detail will get lost.
Close-ups for As Favelas (left) and Honduras (Right)
When putting it up on your portfolio, also consider giving the graphic design a strong aesthetic.
I had it easy, since the inspiration was The Last of Us or the Horizon series, I had my visual style figured out by them. Using a little bit of graphic design in your presentation will put your work's quality on the next level.
Inspiration
Pursuing a creative pathway
If you are 16, at school, and somehow found this article because you got bored of learning Newton's 3rd law of motion for your test next Tuesday, just make sure to continue this as a joyful hobby, play around with Blender, while your peers play games. And make sure you don't take it seriously. Finally, when you escape that brain-meat grinder called high school, go for it!
There is just no denying that there will be a lot of nights where you stay up late to work on your project. But I have to admit, that I never felt mentally exhausted because of it (tired the next morning? very much so) – one time I put on my playlist, went into the zone, and realised it was 5 a.m. but I just had so much fun texturing that old leaking mattress...
In the end, this kind of career path in my opinion should be something you enjoy and like to do. If you ever find yourself having to force yourself, take a break, and come back to it later. You owe yourself not to burn out and continue making amazing art.
Future goals
My next big goal is to become an Environment Artist when I graduate. I have recently started on a new bigger project where I wish to show other skills that were missing from my previous big piece. In doing so probably putting myself closer to my goal.
I am also exploring the possibility to include some Houdini tools in that next project.
wow, you scrolled all the way! Thank you for the read!