
Little Hmong Harvester: An Expression of Feeling in 3D
Recent Think Tank Training Centre graduate and 3D Character Artist, Houra Eshad, shares with us how she evokes expression and realism in her digital 3D piece: The Little Hmong Harvester.
Recent Think Tank Training Centre graduate and 3D Character Artist, Houra Eshad, shares with us how she evokes expression and realism in her digital 3D piece: The Little Hmong Harvester.

Houra Ershad is a recent Think Tank Training Centre graduate and 3D Character Artist from Valencia, Spain. Houra has always been fascinated by the power of communication through realism in 3D artwork.
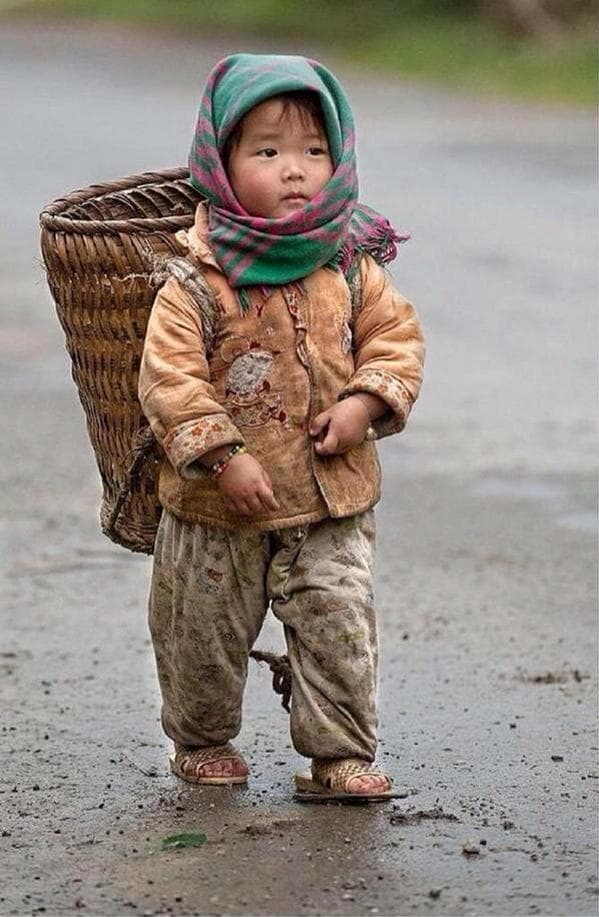
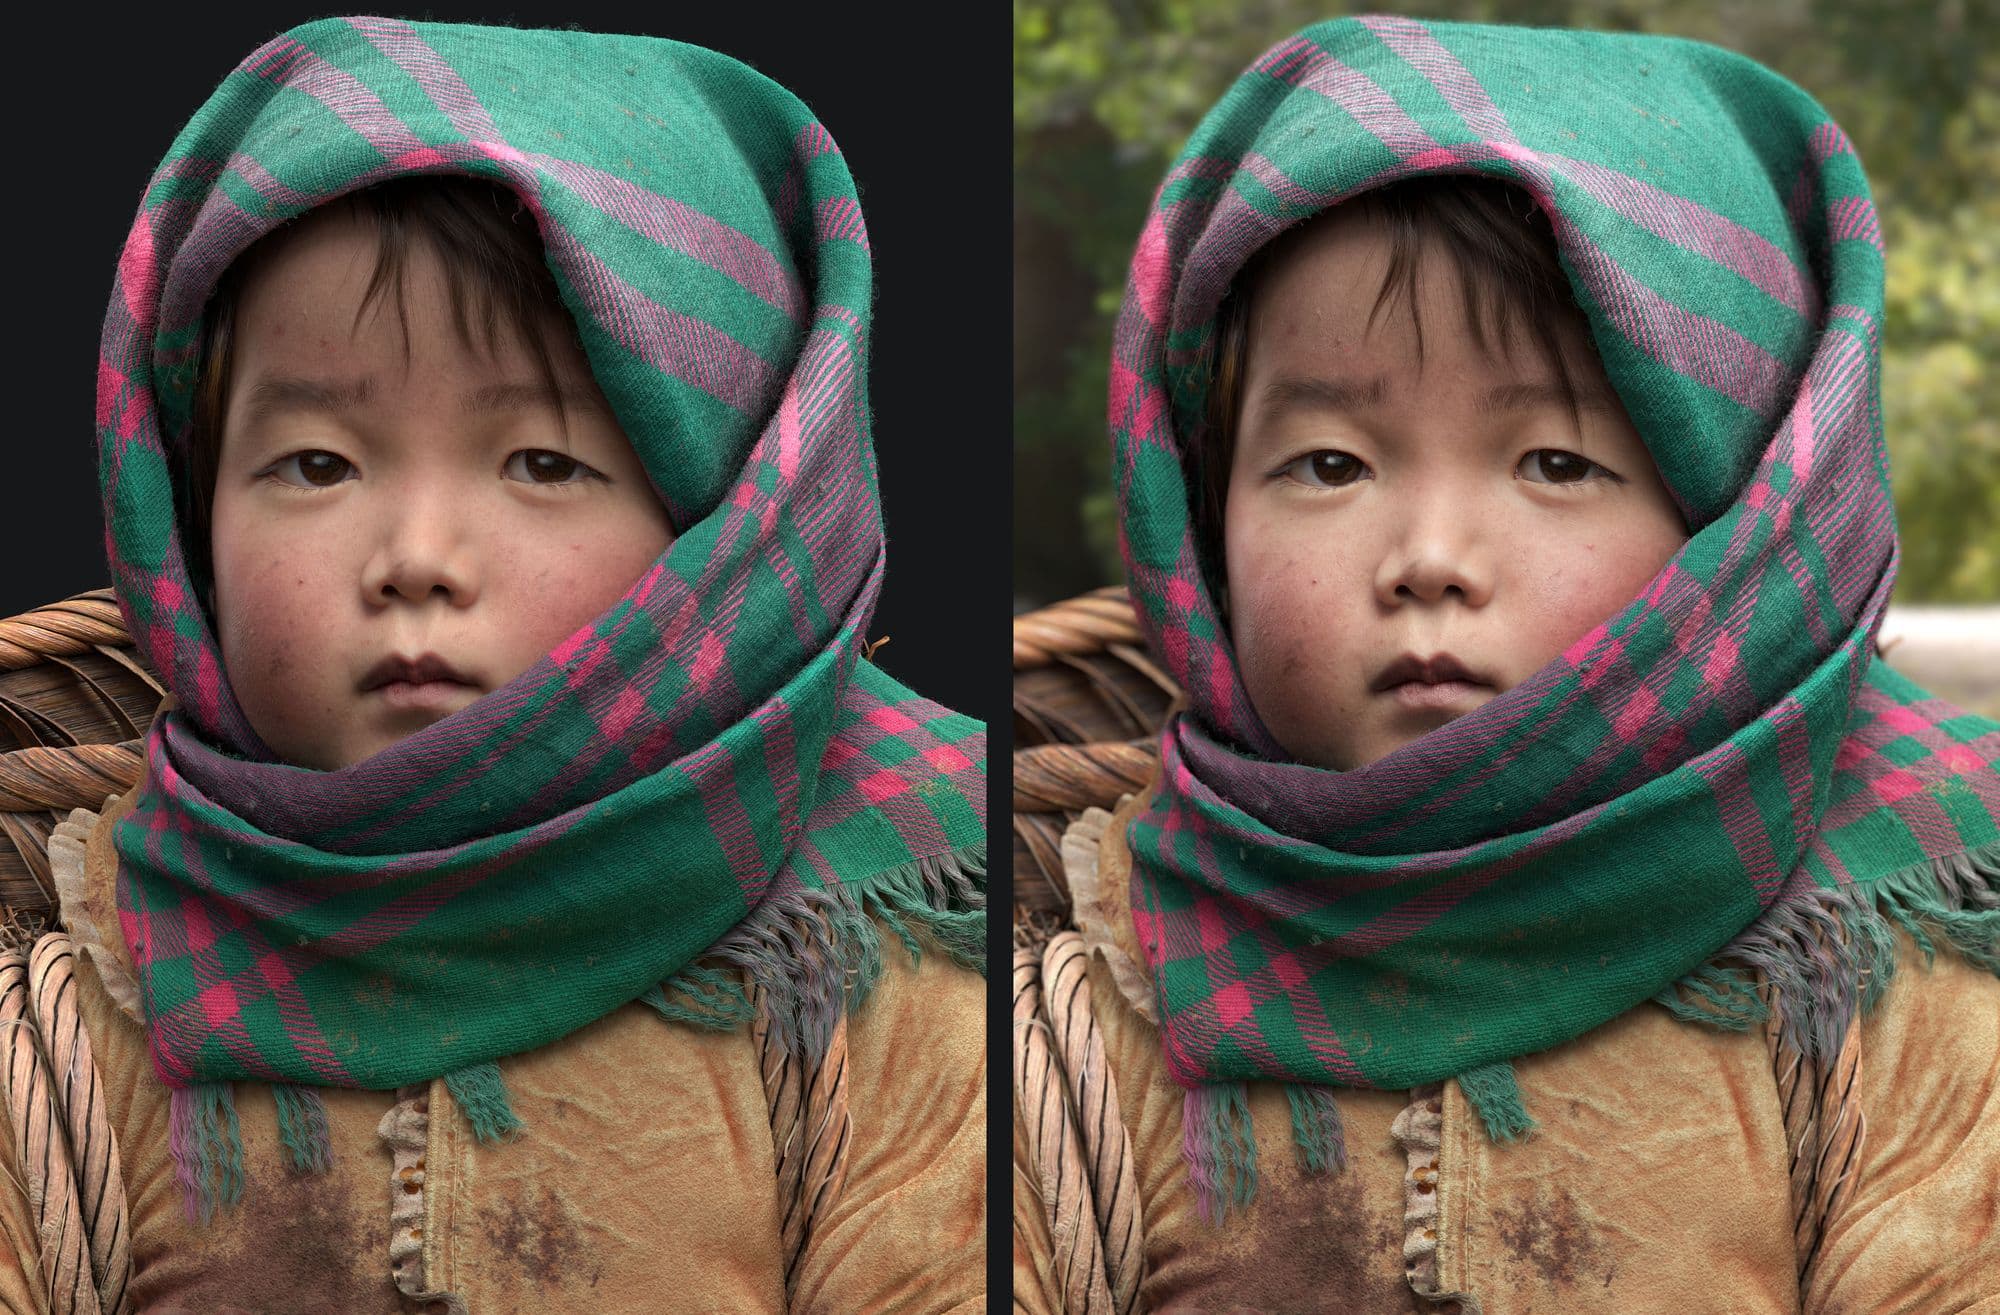
In her last project for her online course at Think Tank Training Centre, Houra endeavoured to evoke expression and realism in a digital 3D piece: The little Hmong harvester. This is how she did it.
The most important thing to me is to find a subject that I can connect with emotionally. It can even make me forget how tired I am after long periods of time when I'm working non-stop. This is why I always try to find this emotional connection in any concept I'm working on, since I believe a character can convey such a strong story that even words will not be able to describe it.
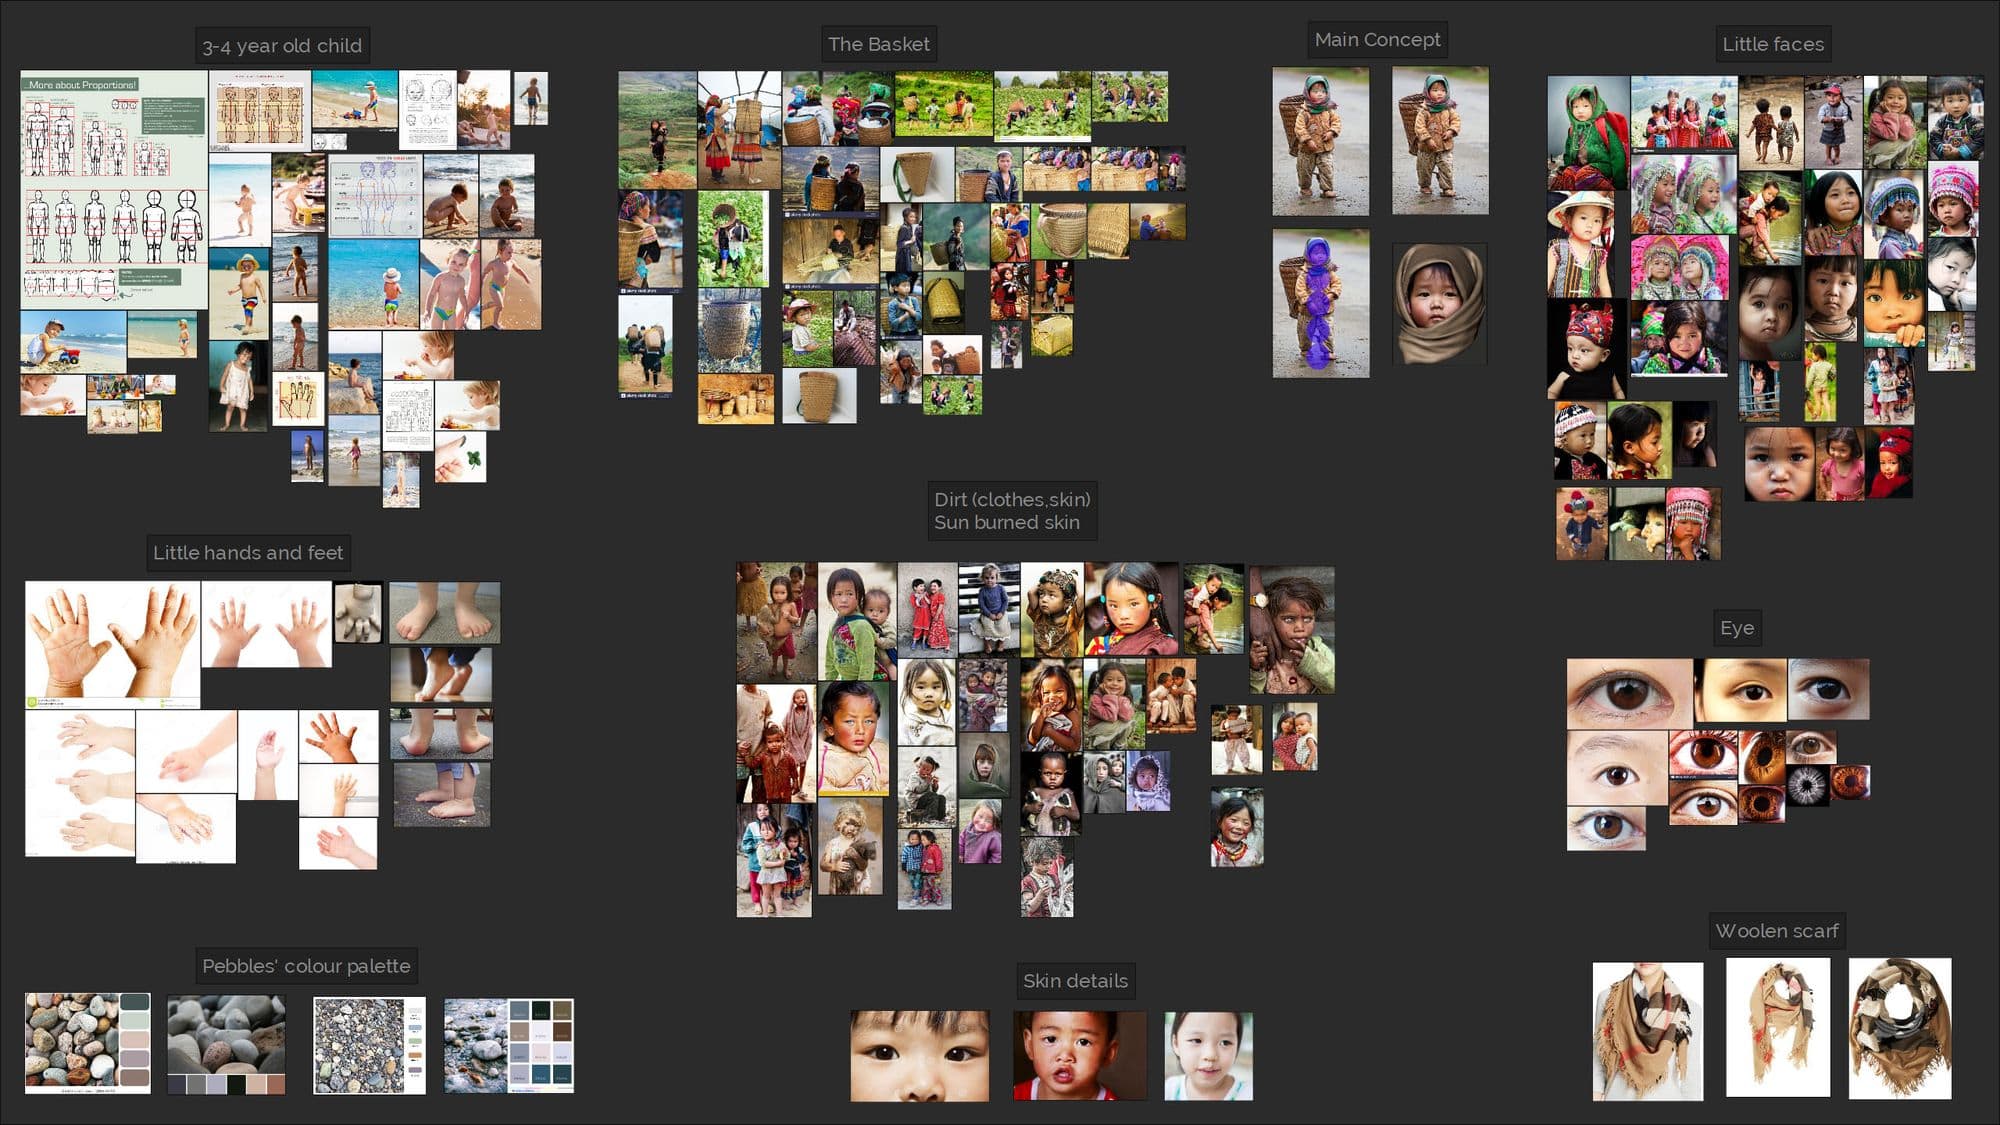
This is a very essential and also time consuming part of the process. You have to focus on all the details that may help create the materials on the objects look realistic and accurate. And you also have to think about the history of the character you're making. This helps with gathering more, and better reference photos.
I read some articles about an ethnic tribe in north Vietnam, where the child in my concept is from. I noticed the type of basket she's carrying is specific to this tribe. And I wasn't able to find photos of it when looking for example for "woven bamboo" baskets. I only found photos when I searched for "Hmong" baskets. This goes to show, knowing the characters history and background can help quite a lot when gathering references.
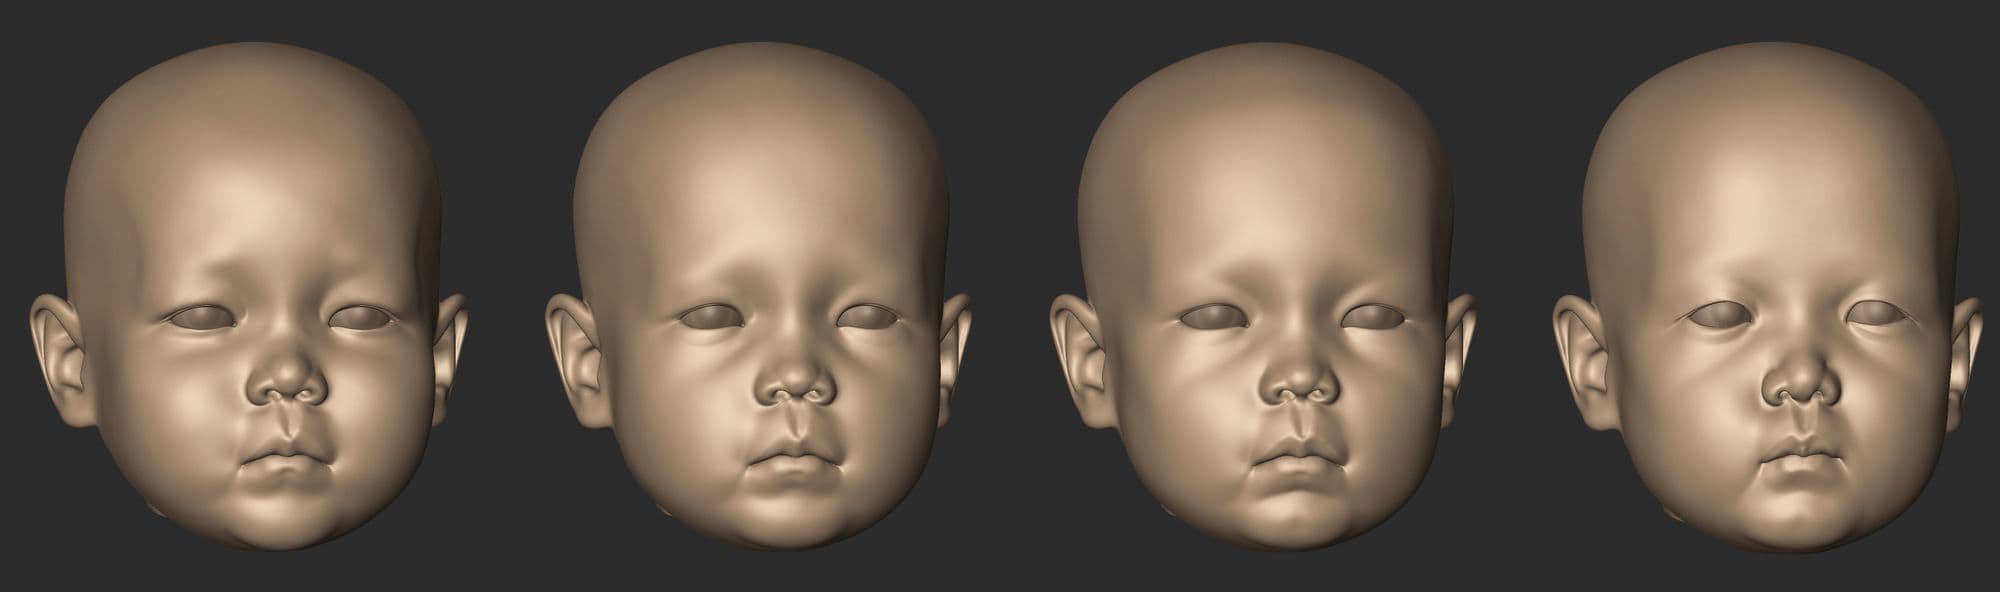
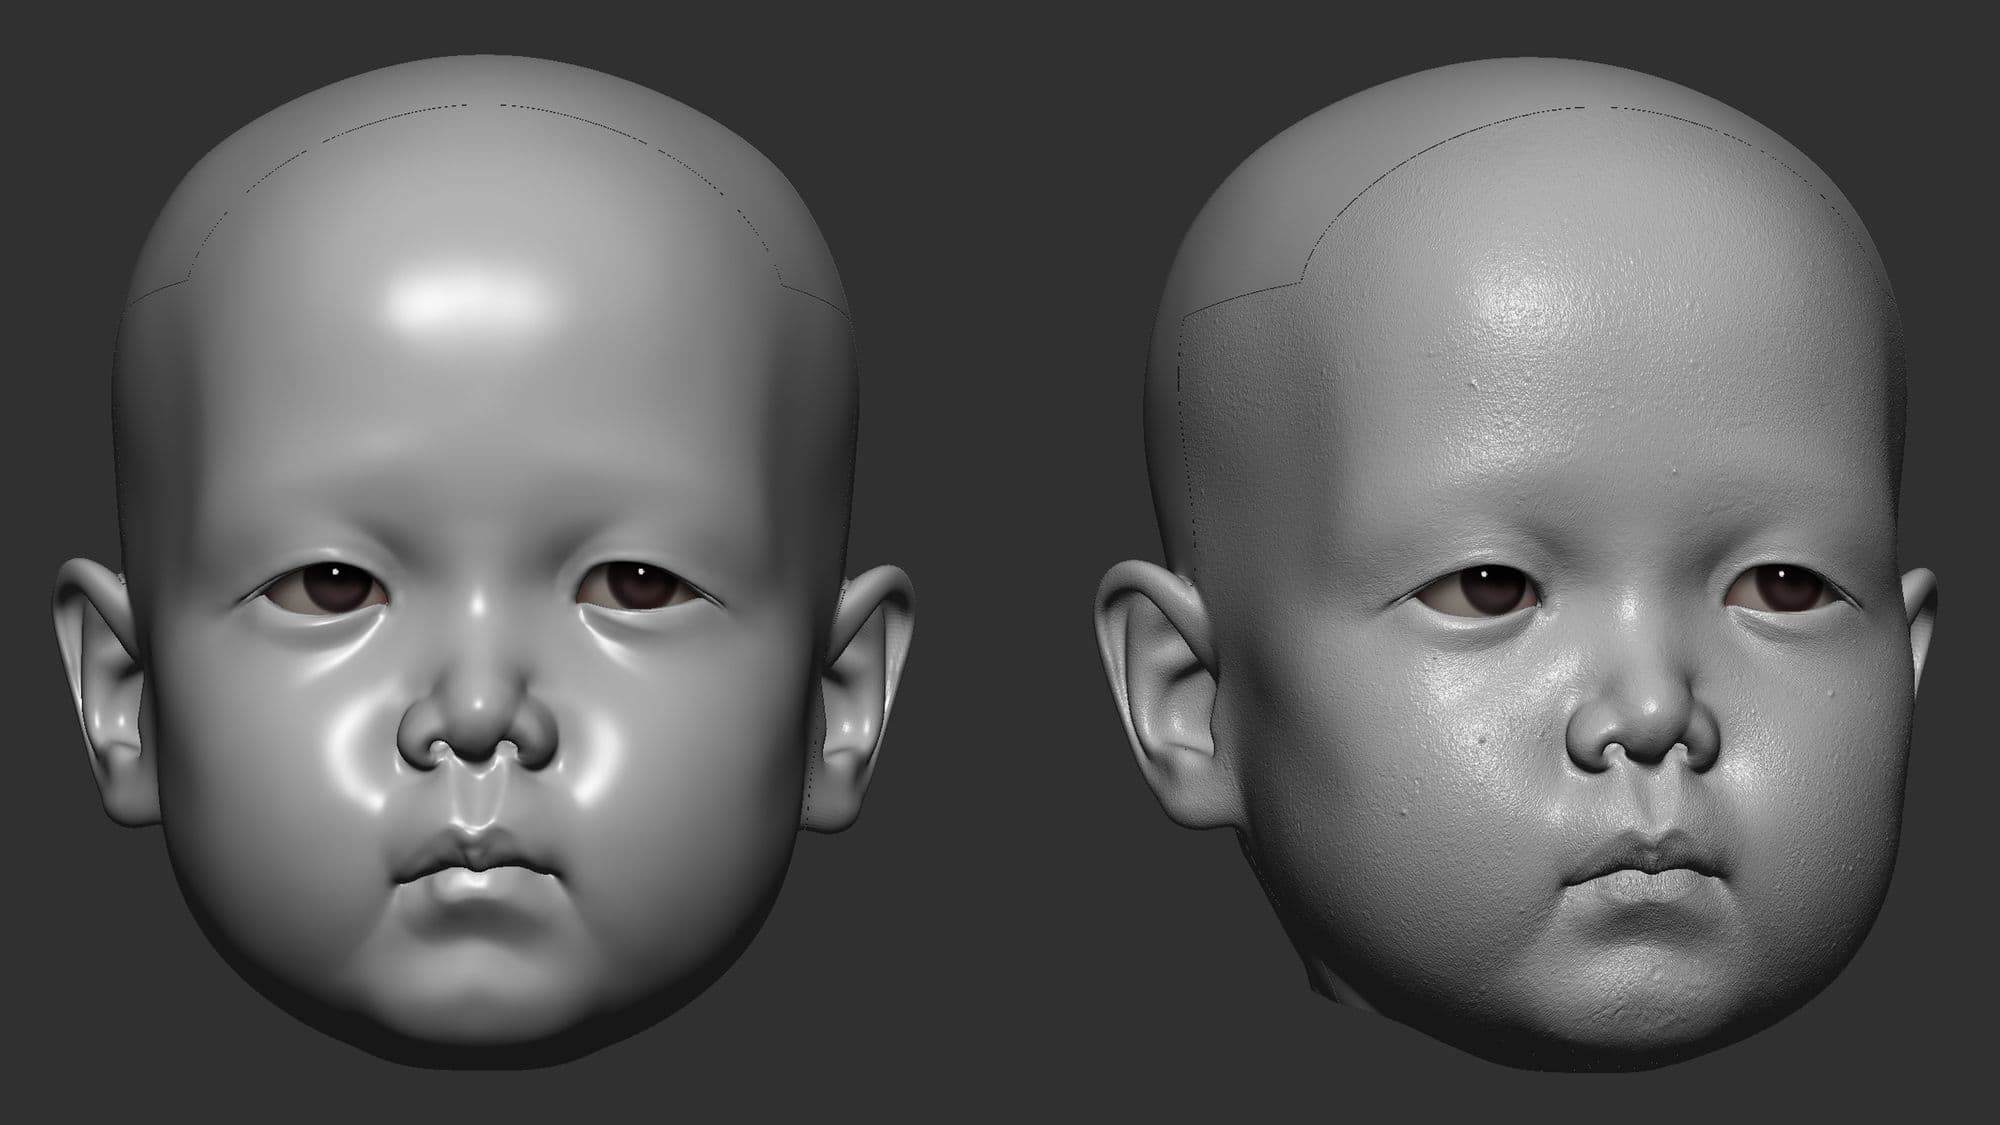
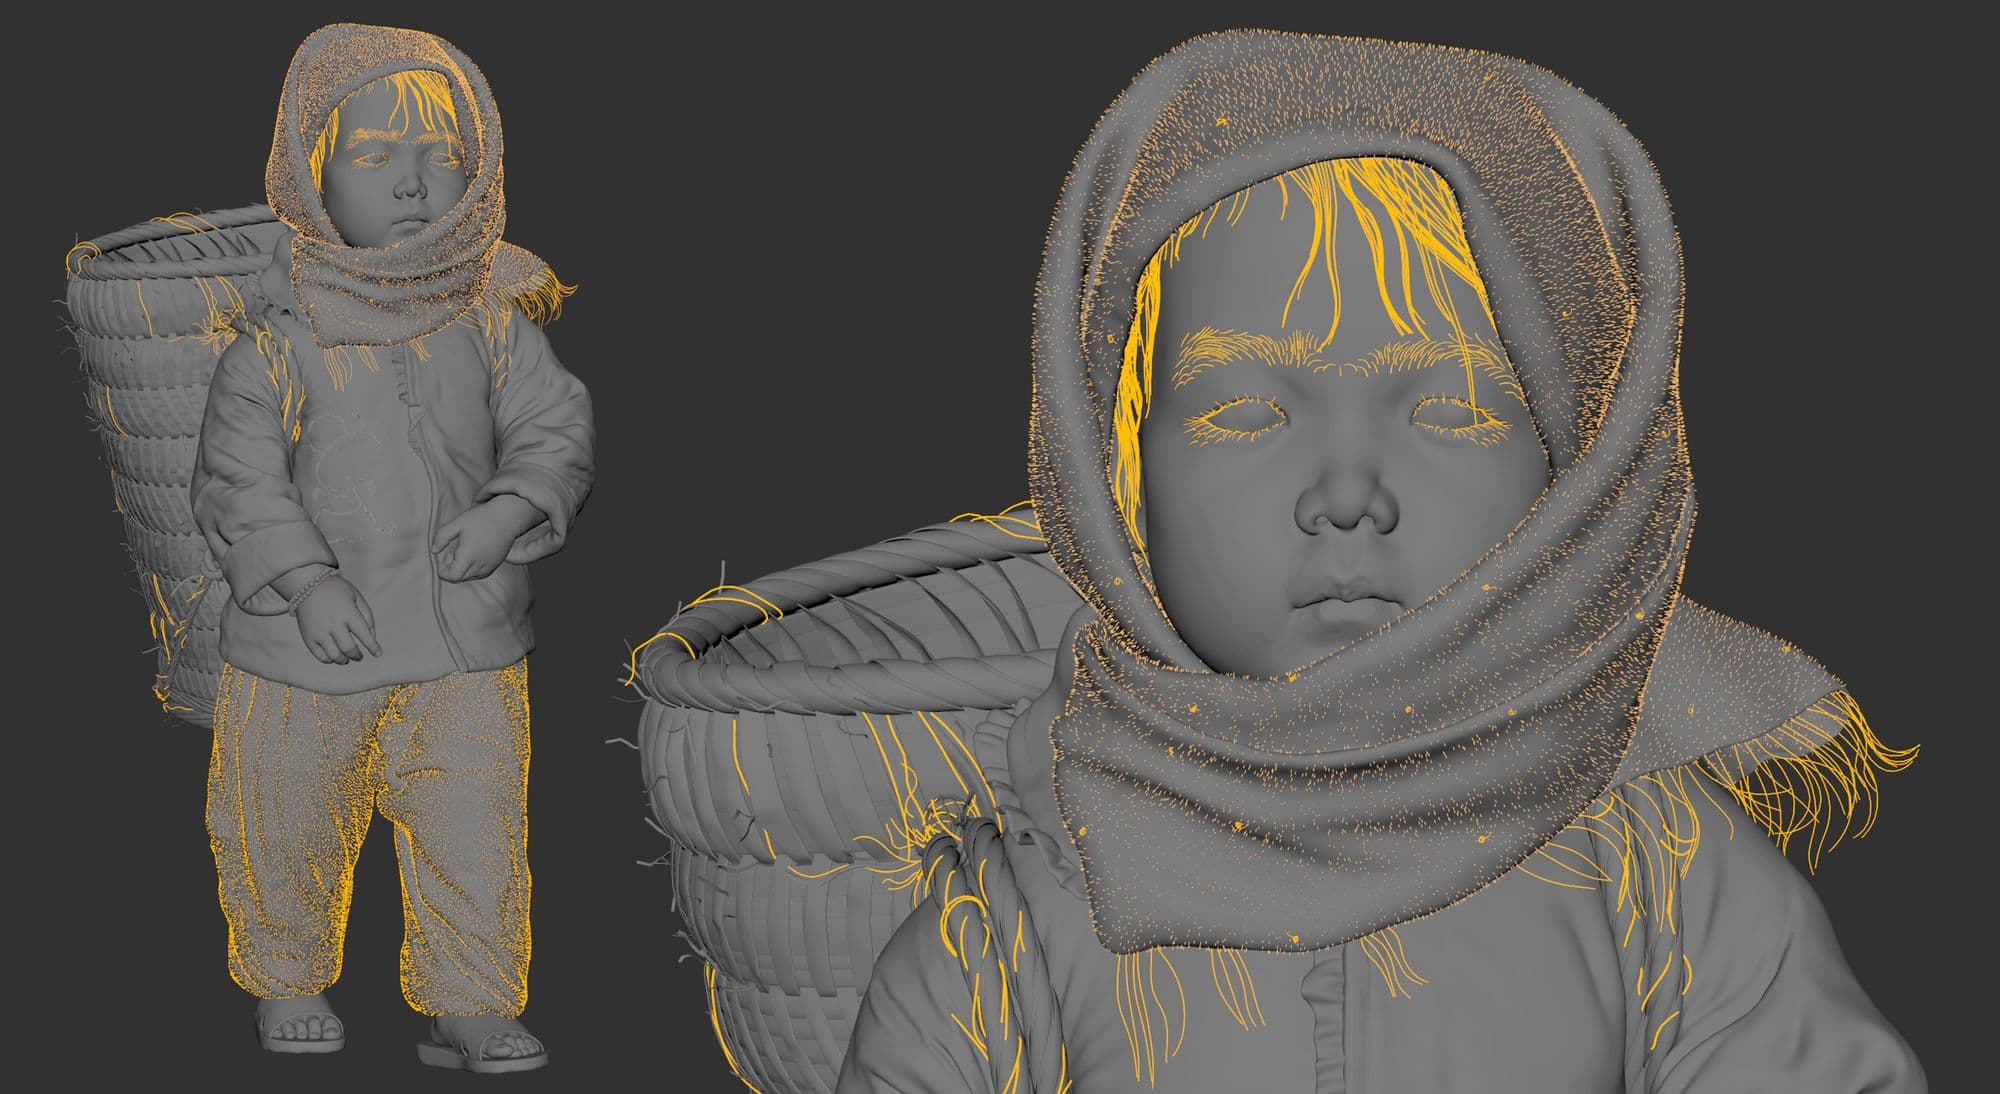
I sculpted the child's face in Zbrush (Dynameshed), just as a sculpting practice. I Scaled the base mesh I had, and tried to change its proportions to match the body of the child in my concept. I then wrapped the head of the base mesh onto the Dynameshed sculpt - this was used as a block-out later in Maya.
The most time consuming element of the scene from the aspect of modeling, was the basket. I started with a cylinder to block out the silhouette according to the concept. Then made a bent plane (180 degree) with the same size as the block-out cylinder, expanded the plane and distributed two single pieces (with the opposite direction of standing on the surface) of thinly extruded boxes (using Mash in Maya) on the surface of the plane to make the woven texture of the basket. By bending this whole thing (combined) and shaping it further with a Lattice deformer, I could get to the final result you see here.

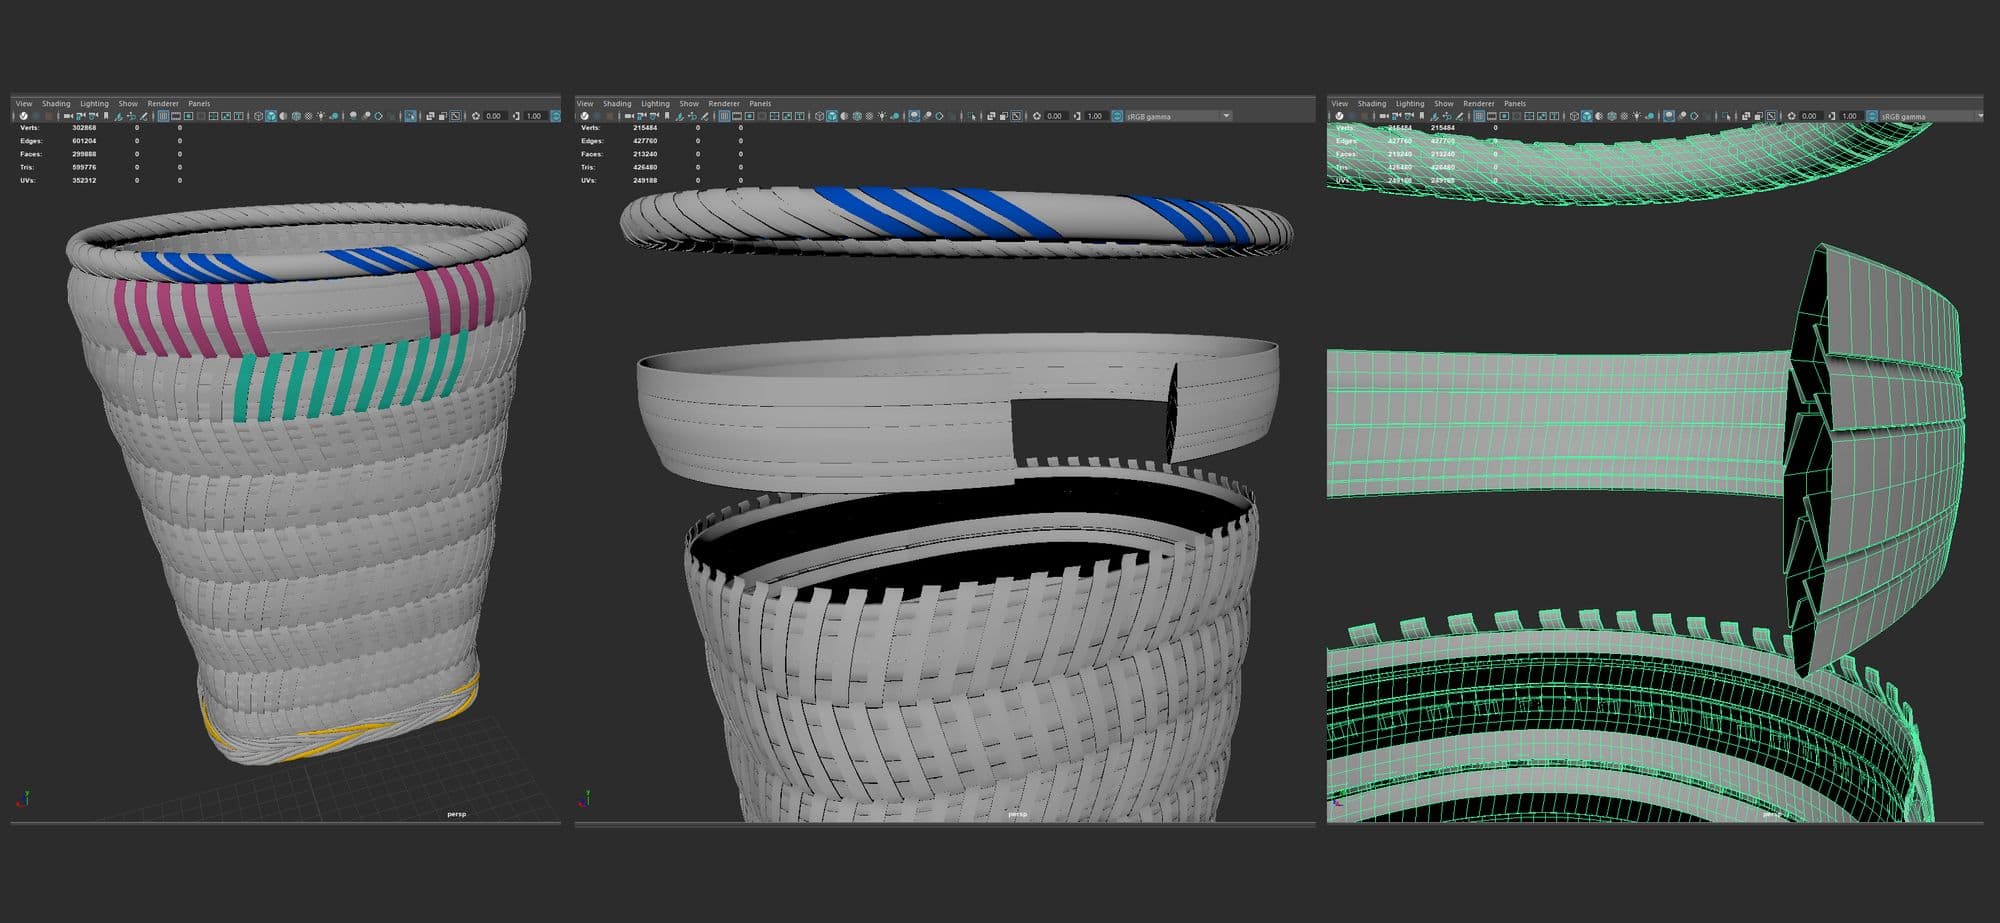
After giving variation to each little piece on the surface of the basket, one by one, by sculpting on them and shaping the body of the basket by Move brush in Zbrush, in accordance to how it might be affected by its own weight on the back of the character, I brought the model back into Maya and used Mash again to distribute some small strands on the outer surface of the basket. These strands were also shaped further in Zbrush to give them unevenness in form.

The little pebbles on the ground were placed by Mash distribution of 3 different base meshes (size and shape wise). I tried to give them variation later on, inside Zbrush, by adding surface noise and sculpting on some of them.
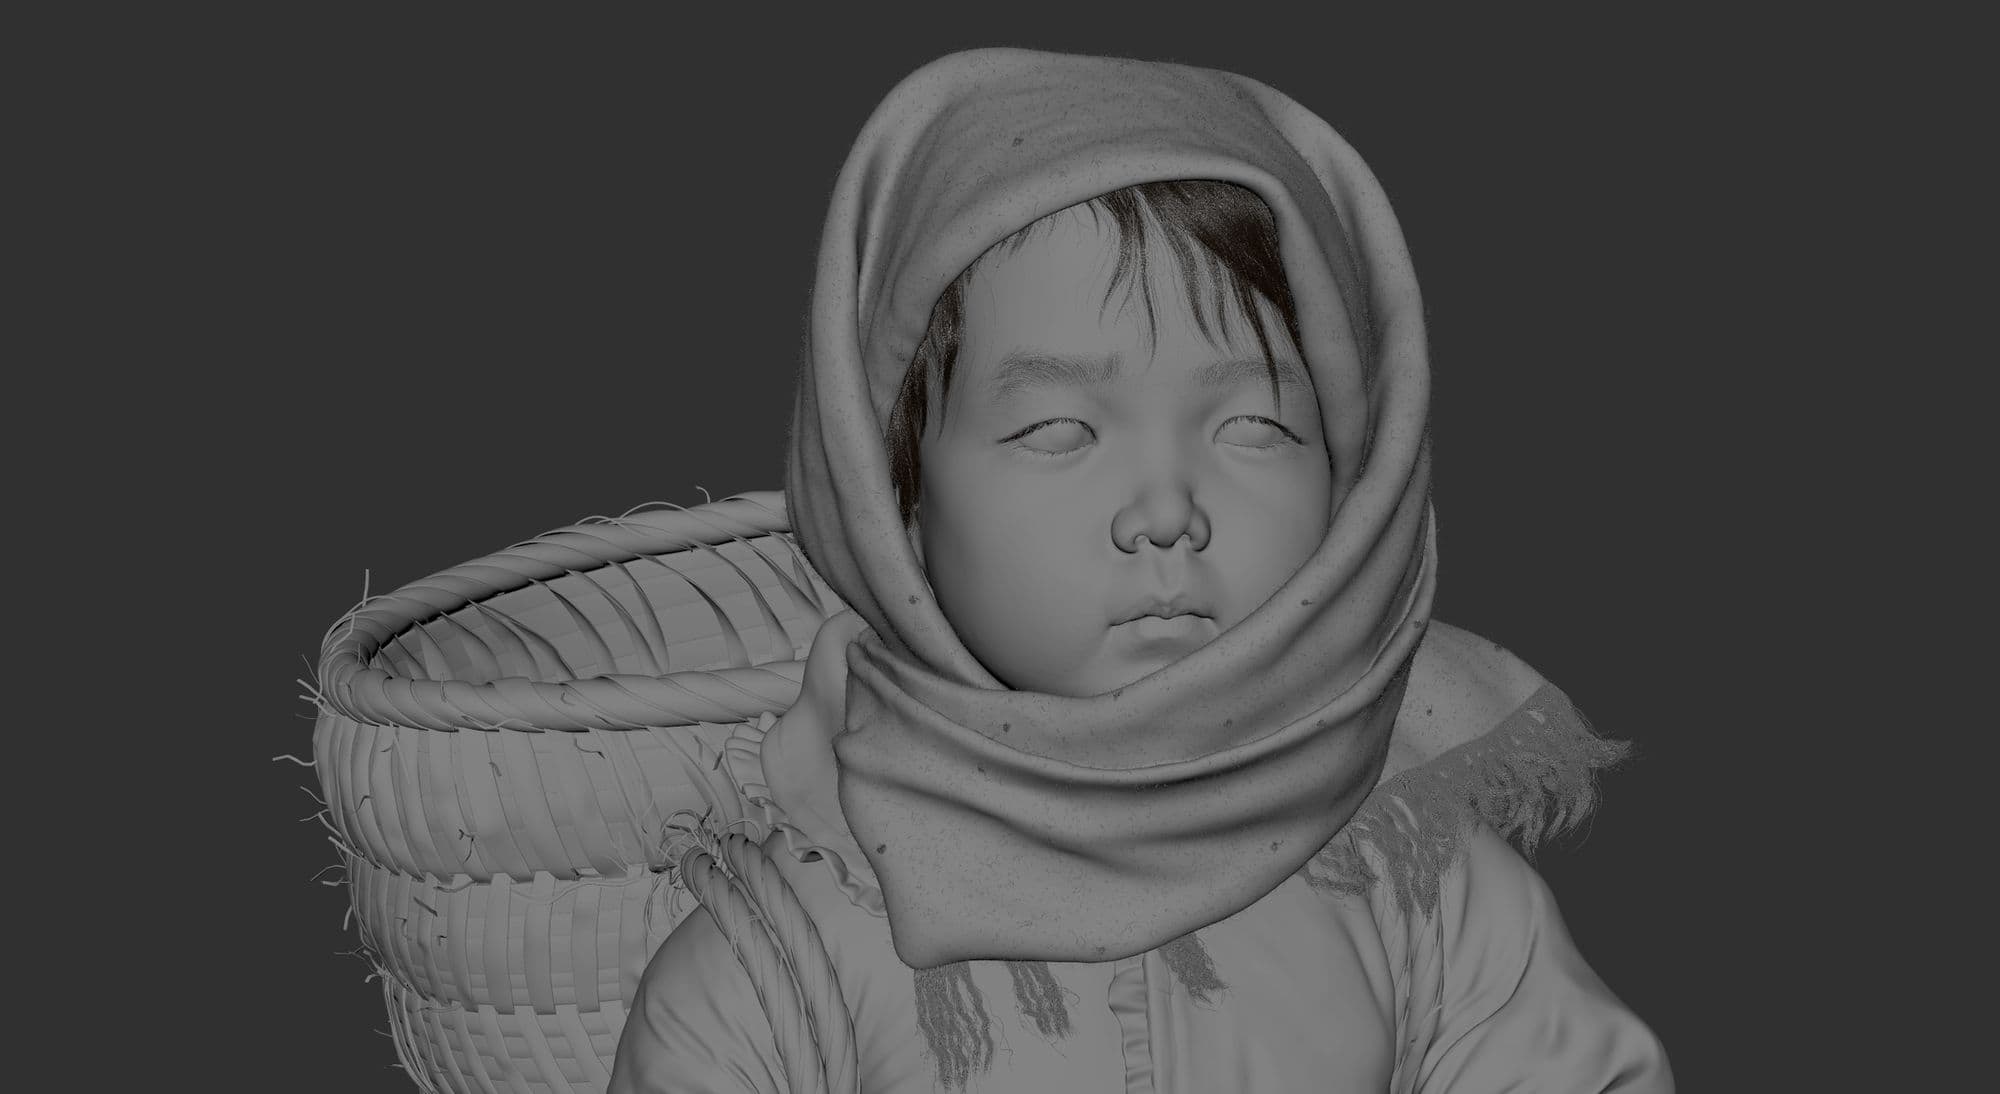
Sculpting was the longest part of the process that continued almost until the last modifications of the scene before going for the final renders. It contained developing the forms and volumes in the body of the character, before posing and after that. The same goes to the other objects like the basket, the clothes and the ground.
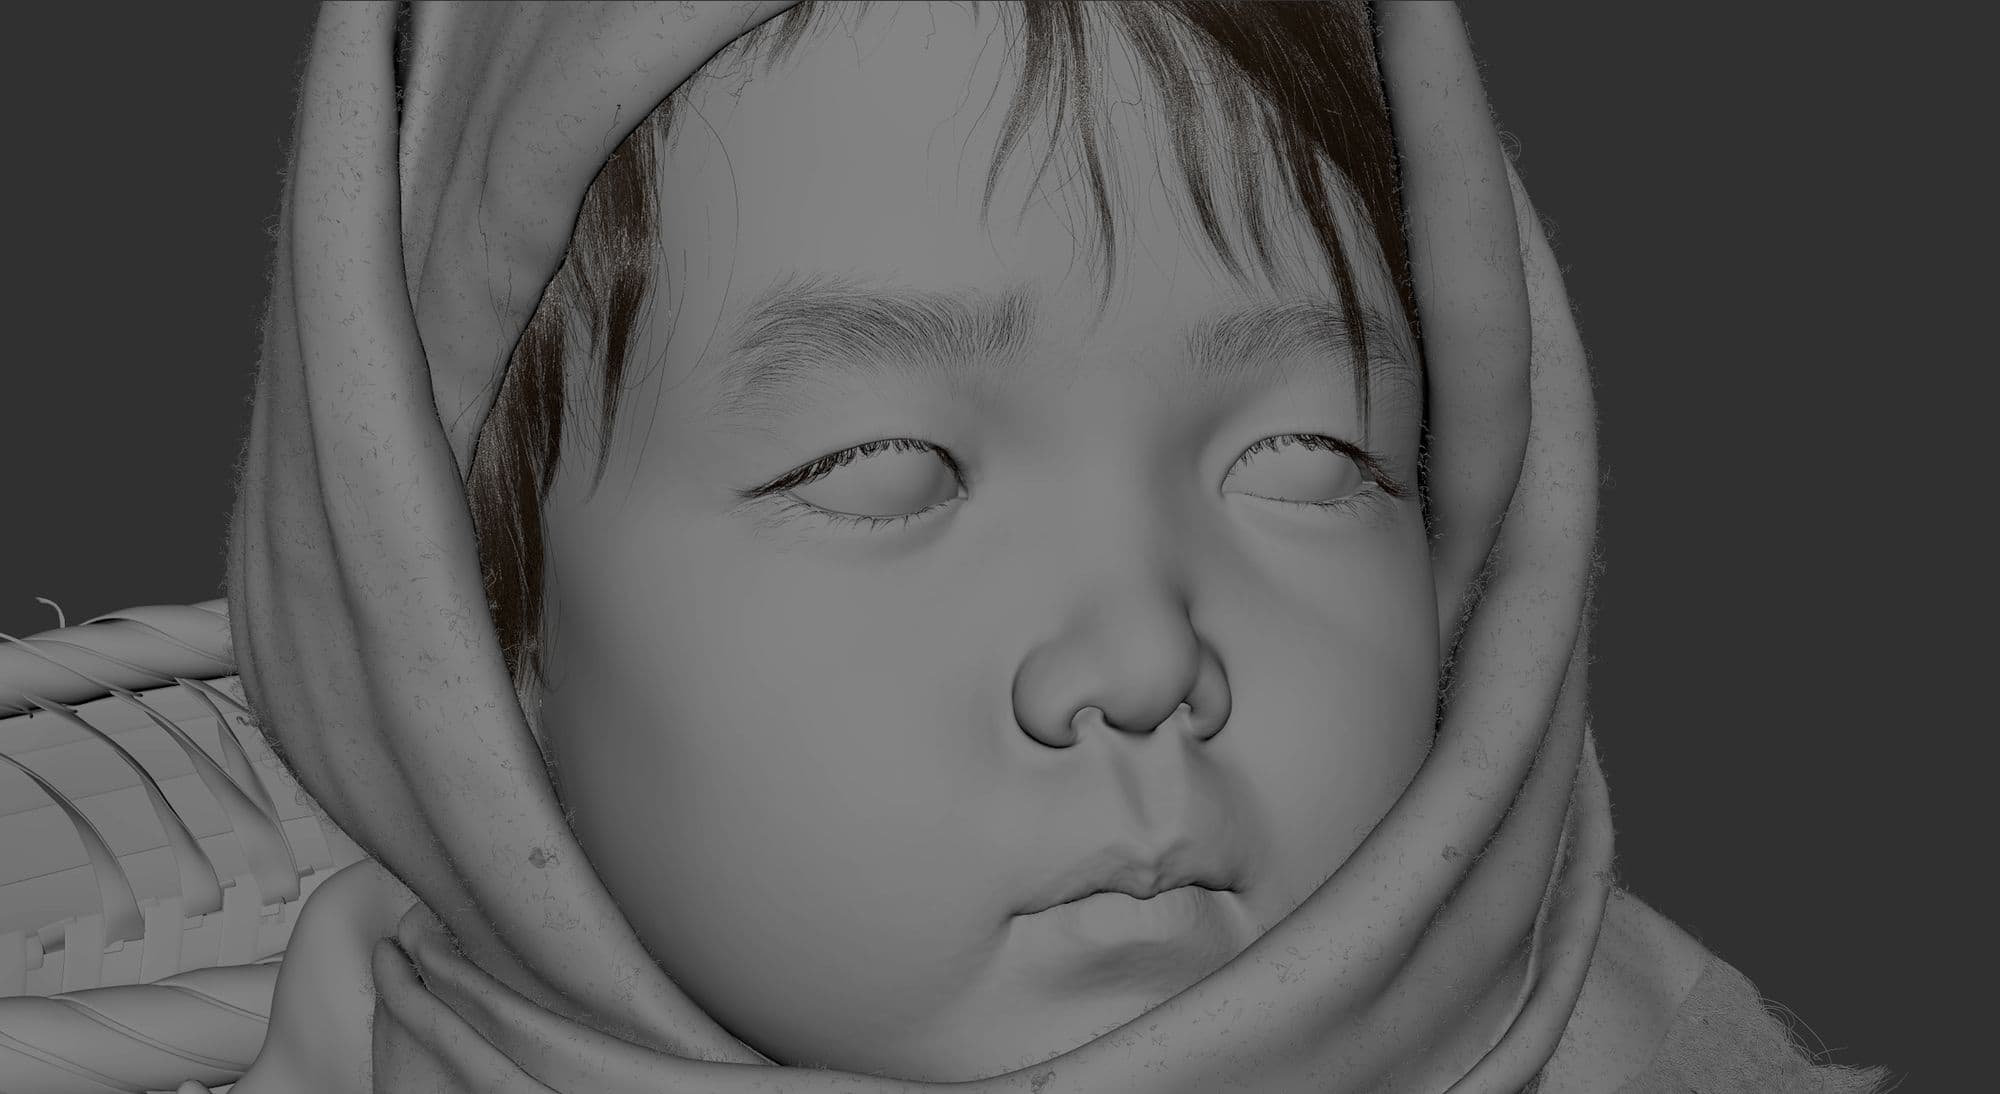
I used Texturing XYZ maps as the base for displacement and colour of the character's skin. For the displacement, since there's no texturing XYZ pack that works for my character's case, age wise (3-4 year old child), I chose a 20 year old female face pack and reduced the intensity of it later on in Zbrush. I also assigned other layers for adding some wrinkles and pimples.
The colour was done by adding multiple layers of painted splashed spots over the base XYZ and some HSV nodes or Vectors for tuning or applying specific colours to some areas.
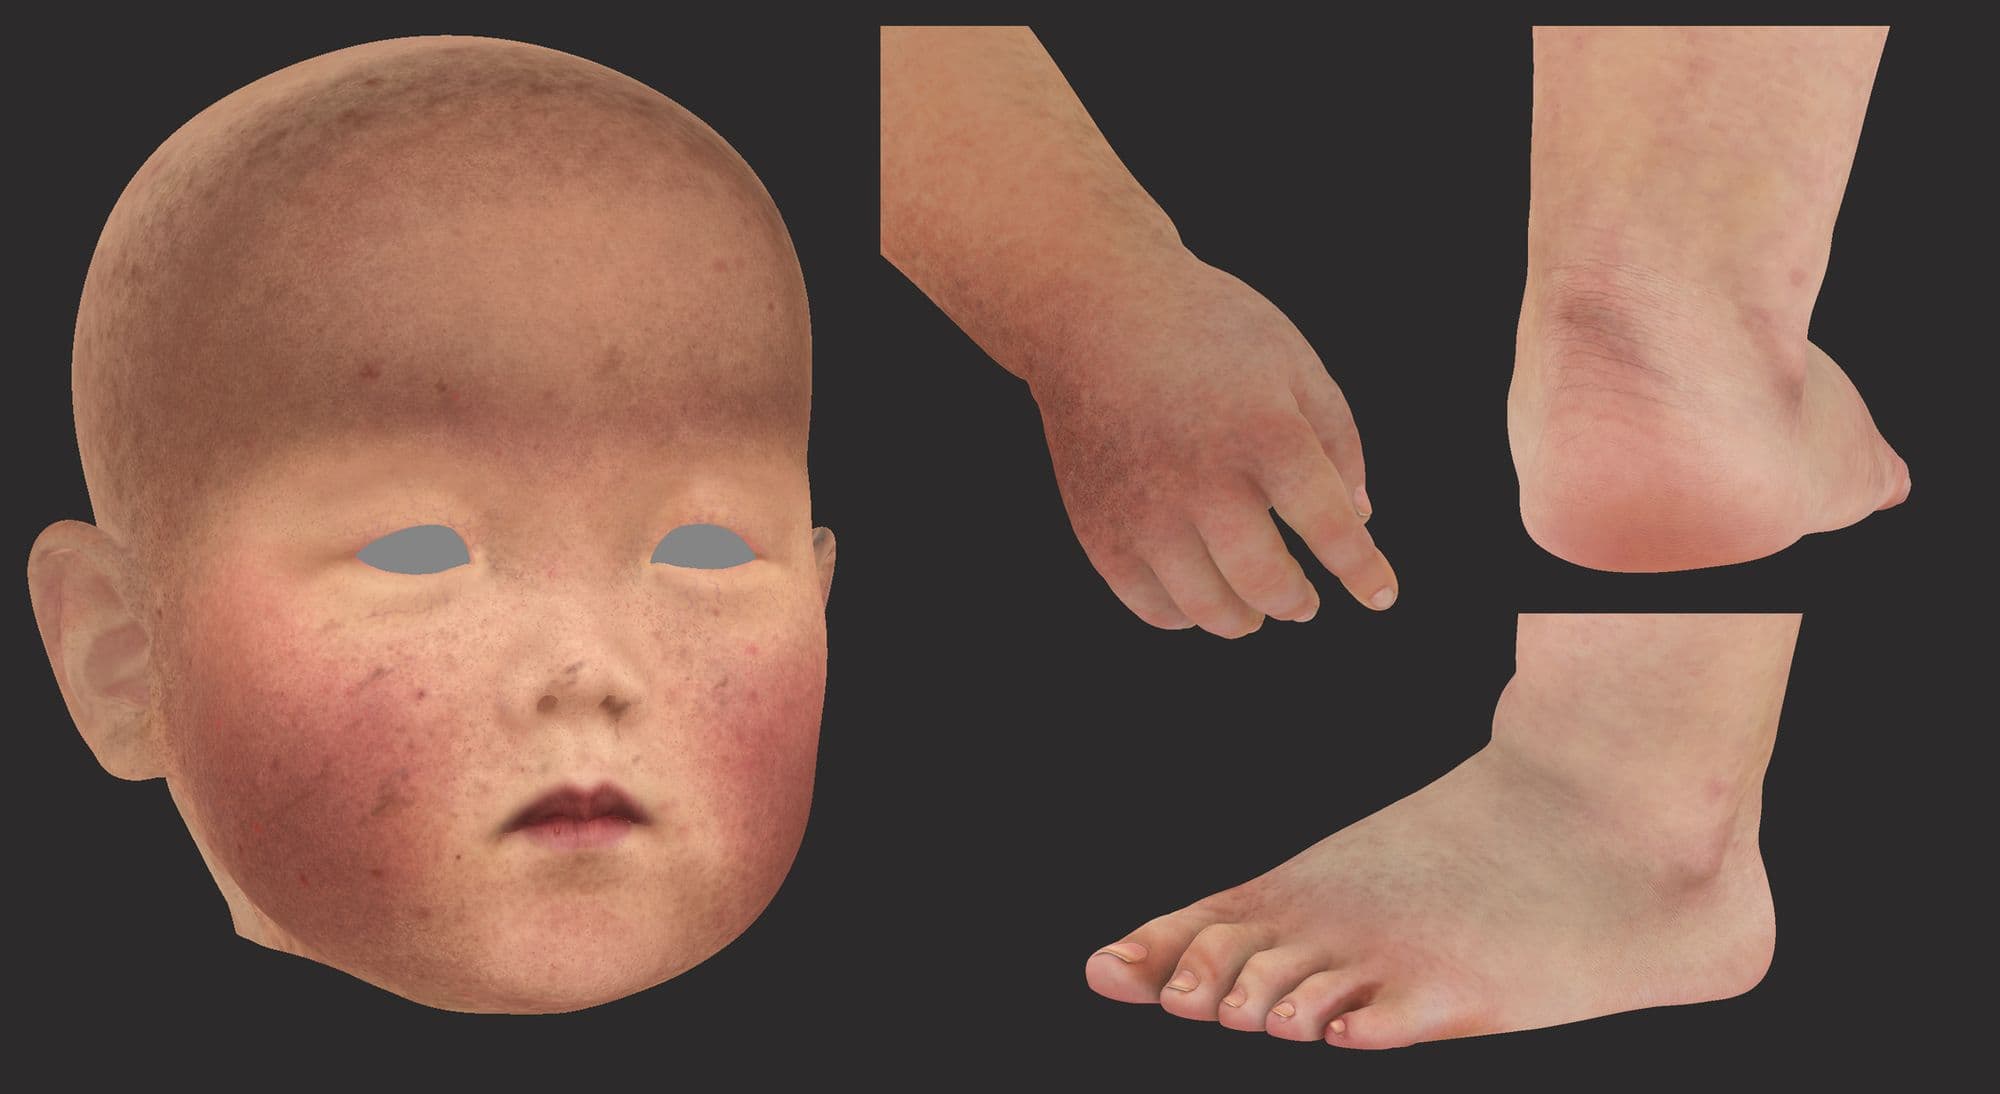
Check the progress view for the Face's colour texture here.
I think working more with colours and experiencing them practically with painting, will give you a good eye for extracting colours from an image, and this will definitely help to match colours better with the reference while texturing a 3D piece.
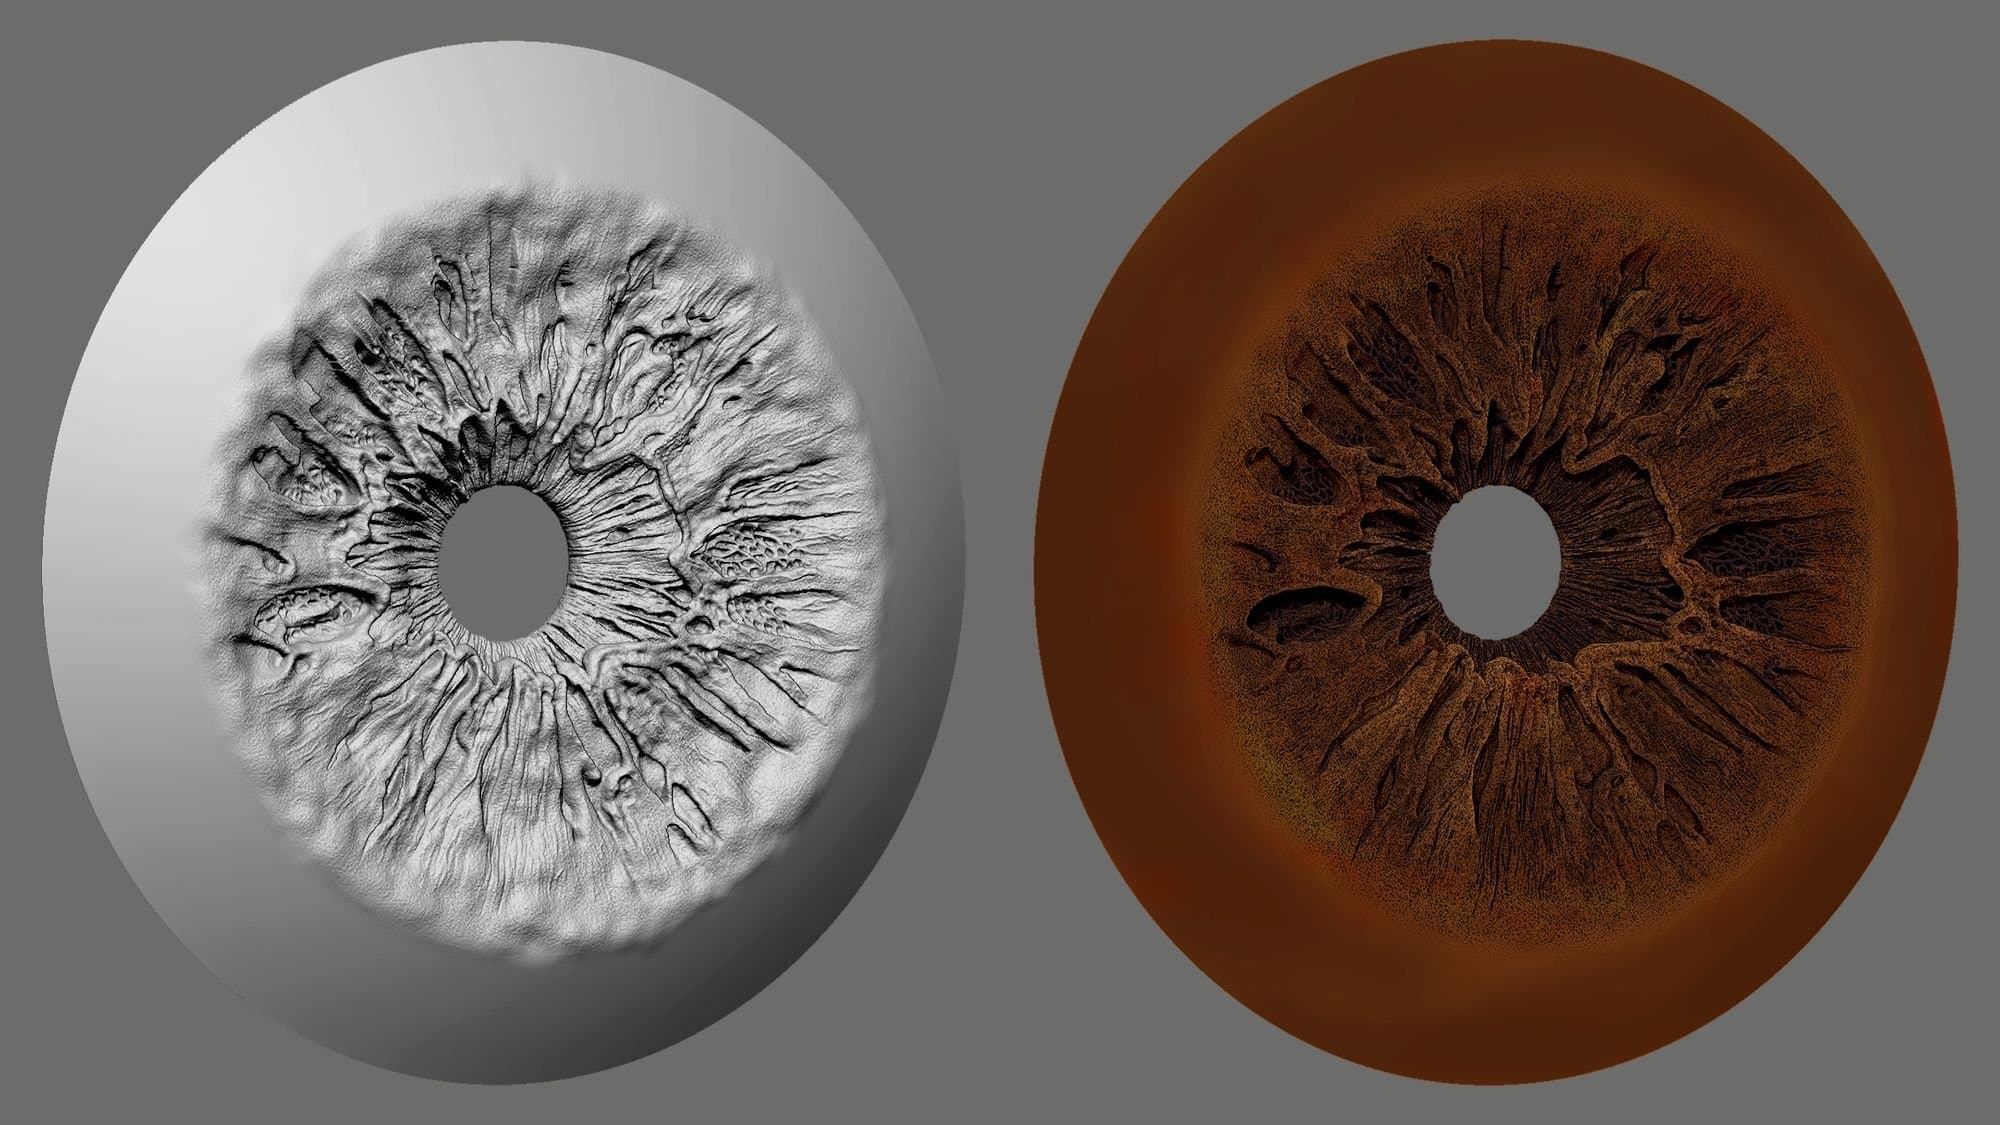
For the Eyes’ displacement and colour I chose to do everything completely manually. So, they are the only parts of the character with all the textures, sculpted and polypainted in Zbrush.
For the Basket I used a tile bamboo texture from www.textures.com as a base, and then again added layers and layers of colour variation.
To start painting the ground's texture, I projected the reference photo on the mesh in ZBrush, so I could get some information about the colours and the glossy or rough areas. I used this as a layer in Mari to make the process of colour matching faster and easier.
Stones' colours were picked from some reference photos. I looked for photos of rivers' pebbles, to use their colours, since those are the ones most similar to what I had in my concept photo.
I used baked curvature maps coming from Substance 3D Painter, for almost all the elements of the scene (except for the skin). It was a very good tool for enhancing the details, specially for the fabrics or to show the worn quality of a surface by changing the mode of the curvature layer on top of the other layers in Mari.
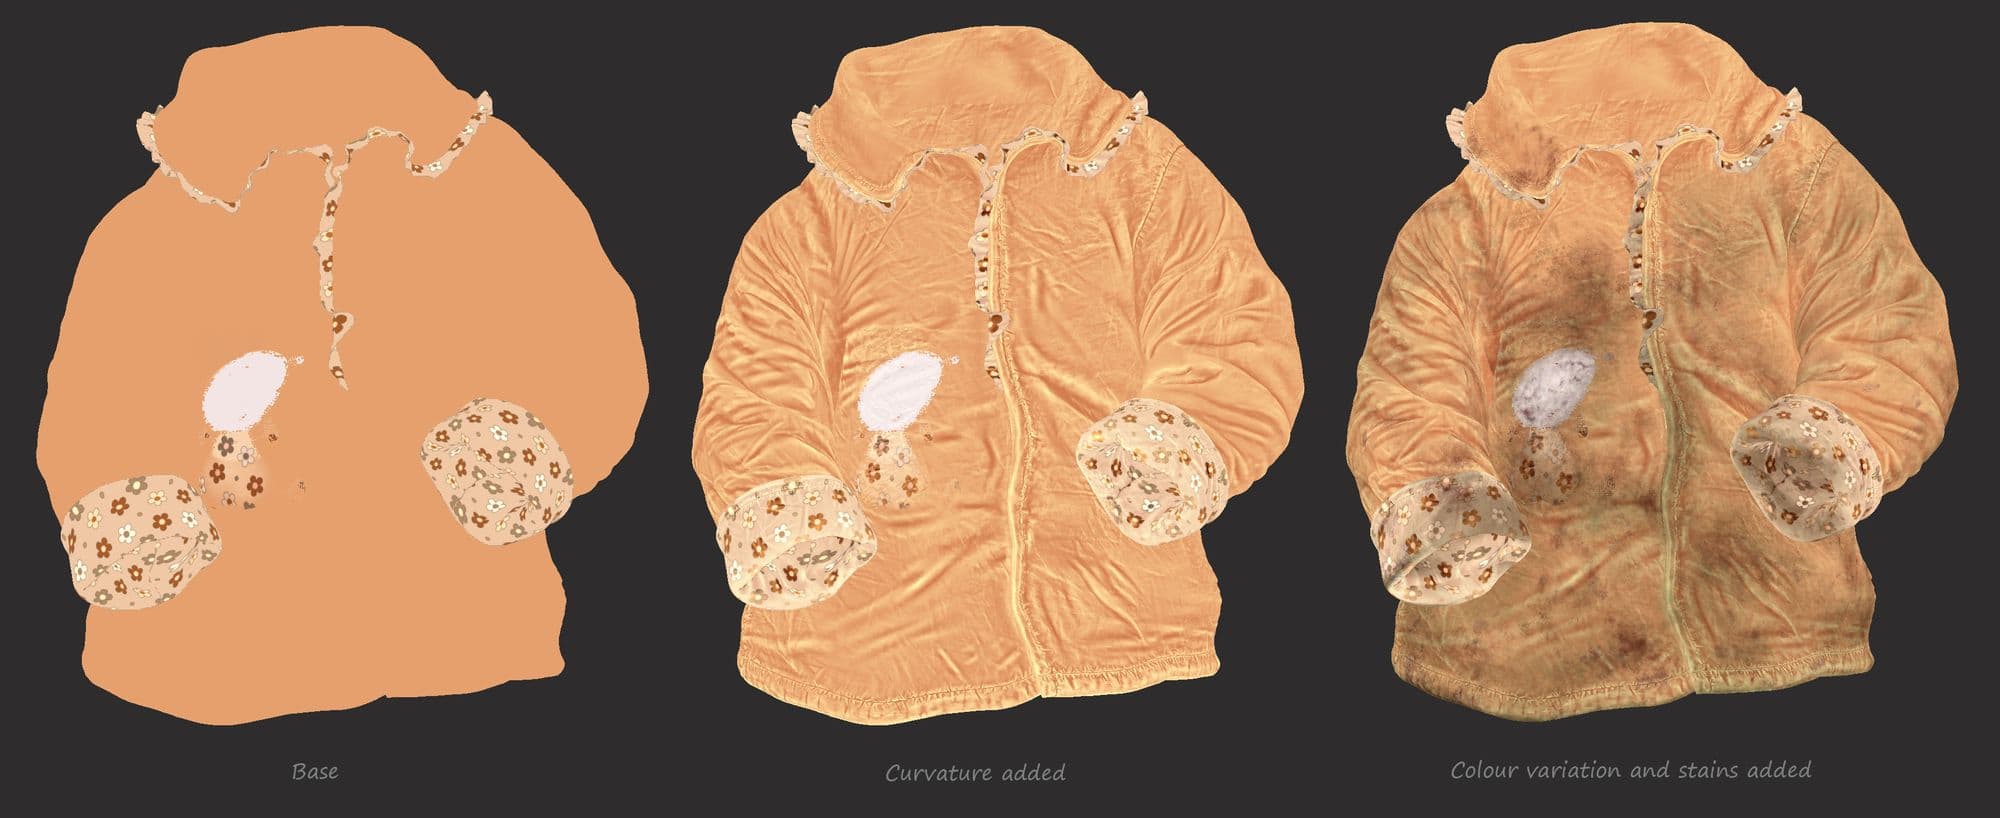
Check the progress view of the jacket's sheen colour here.
I used Xgen core to create the hair of the bangs' area, eyebrows, lashes and the face's peach-fuzz.
There was also some Xgen groomable spline (Specific to Xgen creatition for fur) added to the pants as the fabric fuzz and to the scarf.
For the basket I also ended up adding some Xgen strands (beside those that were modelled and distributed by Maya Mash Tool), manually in some areas where I wanted them.
I began the first step of lighting right after setting up the scene's block-out and started it with a single light on top of the character's head. Since the textures are so light dependent and also some sculpted details will get affected so much by the scene's lights, I had to adjust them many times during the look development process.
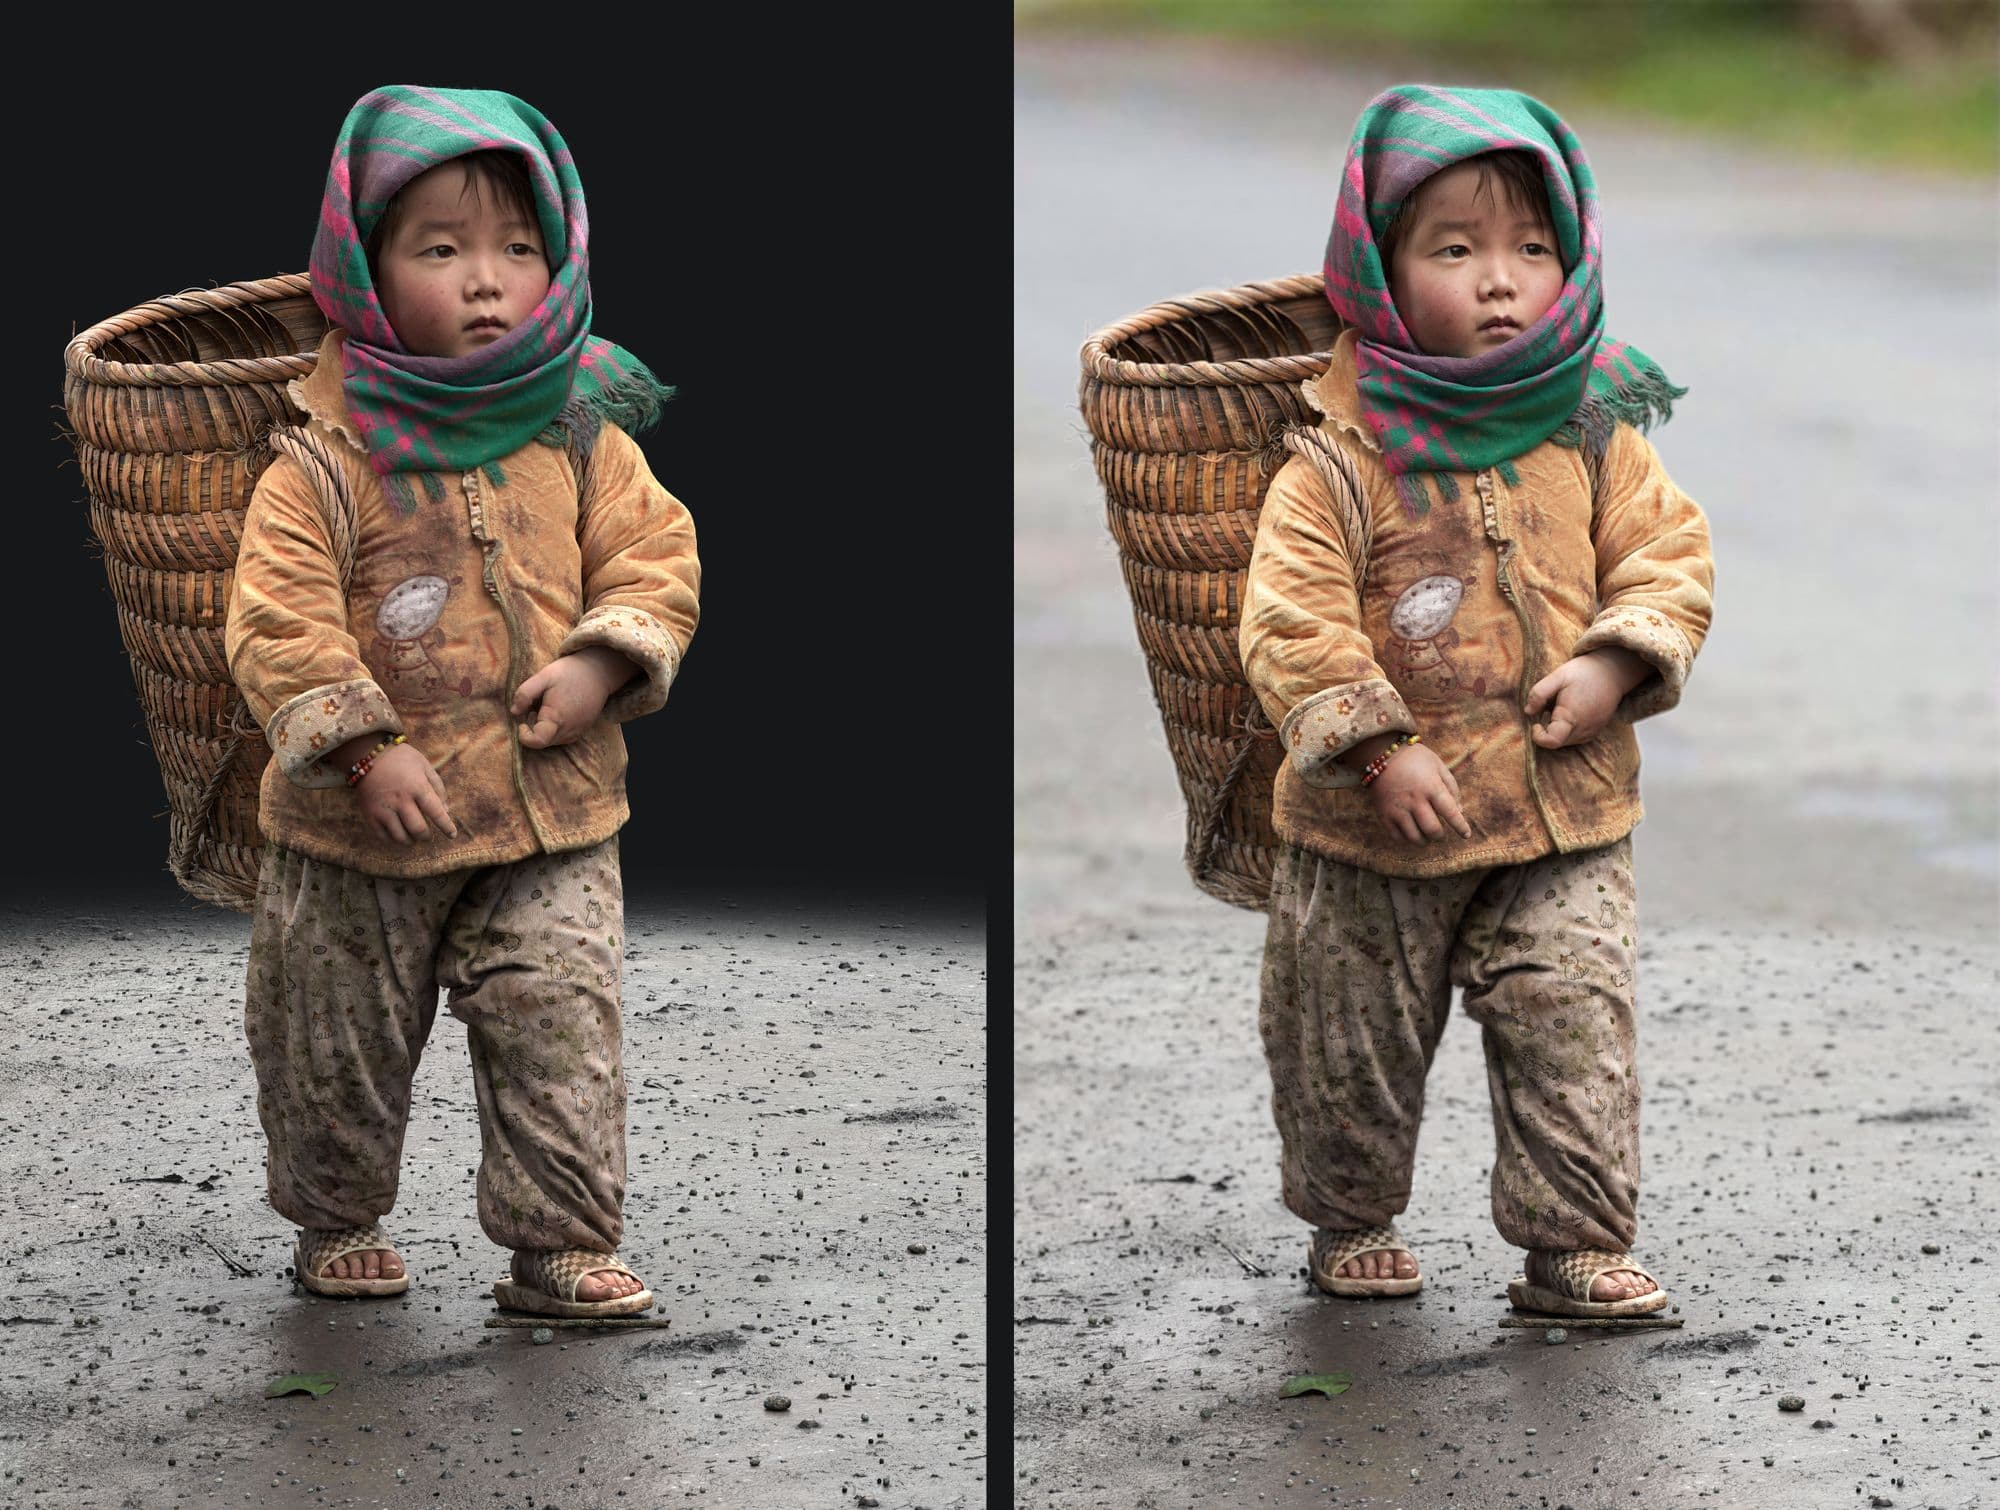
So here, I had already established all the textures according to the lights and it was time to call it done and go for the final renders.
At this stage I had the colours and brightness as close as I could get to the concept photo. Thus, there wasn't any major change done for compositing. I just added the Z-depth pass to the Final video in After Effects and to all the still images in Photoshop. The background was rendered separately and added in comp, to have more control.
I also added a bit of extra specularity to some areas of the face in still images, using Spec pass in Photoshop.
You can see more photos and videos of this project’s process on my Rookie Awards 2022 entry.
I’d like to thank my mentor Alex Huguet for his precise critiques, helpful guidance, and being the best teacher he is.
You can find more of Houra's work on The Rookies, Artstation, Instagram, Youtube and Facebook.